Nathan Towle
Participant
July 9, 2010
Answered

How to create a gradient transparency?

  • July 9, 2010
  • 4 replies
  • 48907 views

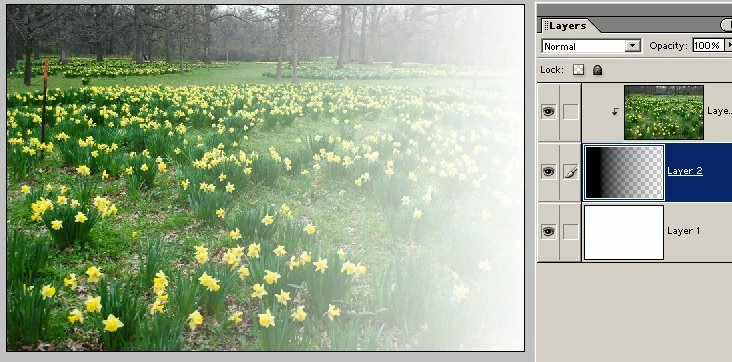
I am using Photoshop Elements 8.  This might have a really simple answer, but I can't figure it out.  I am trying to take a layer, and simply make it go from solid picture to a gradient transparency, so that it gradually disappears.  It is hard to explain, but I hope you understand.  Please let me know if you know how to do that.  Thanks a bunch.

-TitanVex

It would look kind of like this:

IIIIIIIIII IIII  II  I  I    I       I

IIIIIIIIII IIII  II  I  I    I       I

IIIIIIIIII IIII  II  I  I    I       I

^                                      ^

Solid                             Picture

Part of                         Gradually

Picture                        Disappears

If that makes sense.

    This topic has been closed for replies.
    Correct answer Mark_Sand

    Is this what you are looking for?  I used the clipping group method Terri mentioned.

    1. Added a blank layer below the picture layer and grouped the 2 layers.

    2. Set the Gradient options: Linear, Foreground-to-Transparent

    3. Drew the gradient from about 1/4 from the left edge all the way to the right edge.

    You can keep drawing the gradient with different staart and end points until you get the result you want. Just a matter of trial and error.

    I added the white layer so that you can see the results.

    4 replies

    Greg_S.
    Community Expert
    Community Expert
    October 16, 2024

    @Heather32220545ejoh said:  How did you "draw the gradient"?


    Using the gradient tool, simply click-drag-click in a straight line from the beginning to the end of where you want the gradient to be.

    Mark_SandCorrect answer
    Inspiring
    July 9, 2010

    Is this what you are looking for?  I used the clipping group method Terri mentioned.

    1. Added a blank layer below the picture layer and grouped the 2 layers.

    2. Set the Gradient options: Linear, Foreground-to-Transparent

    3. Drew the gradient from about 1/4 from the left edge all the way to the right edge.

    You can keep drawing the gradient with different staart and end points until you get the result you want. Just a matter of trial and error.

    I added the white layer so that you can see the results.

    Participant
    October 16, 2024

    How did you "draw the gradient"?


    July 9, 2010

    One way is to use a clipping group (also known as clipping mask) with the desired gradient being the base of the group. See step #4 "Use a Pattern or Gradient" in the link below.

    http://www.photokaboom.com/photography/learn/Photoshop_Elements/layers/layer_groups_clipping_masks/1_layer_groups_clipping_masks.htm

    Tip: Hold in the shift key as you pull the gradient iIf you want a straight even edge side to side, top to bottom, or at a diagonal angle.

    If you want to edit the gradient itself, have a look at the tutorial I have linked below.

    http://www.photokaboom.com/photography/learn/Photoshop_Elements/gradients/4_gradients_edit_a_gradient.htm

    hatstead
    Inspiring
    July 9, 2010

    TitanVex,

    http://www.pixentral.com/show.php?picture=1F0EKmMs2abEs4PGS3Oe1wyCxJ1rsh

    1. Open picture
    2. Duplicate background layer, work on background copy layer
    3. Access the gradient tool (G), and in the tool's option bar select the foreground-to-transparent, linear gradient. Be sure that the color chips (lower left) are set to black for foreground and white for background. See my screen shot above. Note transparency is checked.
    4. I drew the gradient from right to left, about 3/4 way.
    5. If the gradient is too profound, you can reduce the opacity of the background copy layer.
    6. If you need to start over again during practice, delete the background copy layer and go back to step #2.