- Home
- Photoshop Elements
- Discussions
- Re: The Background Eraser Tool lives "dirty" erase...
- Re: The Background Eraser Tool lives "dirty" erase...
Copy link to clipboard
Copied
Hello everyone,
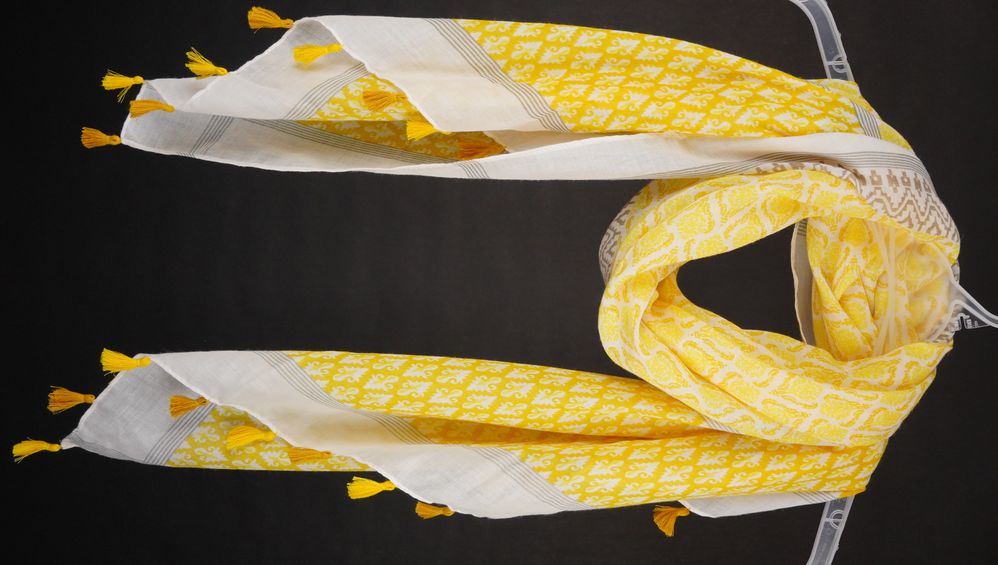
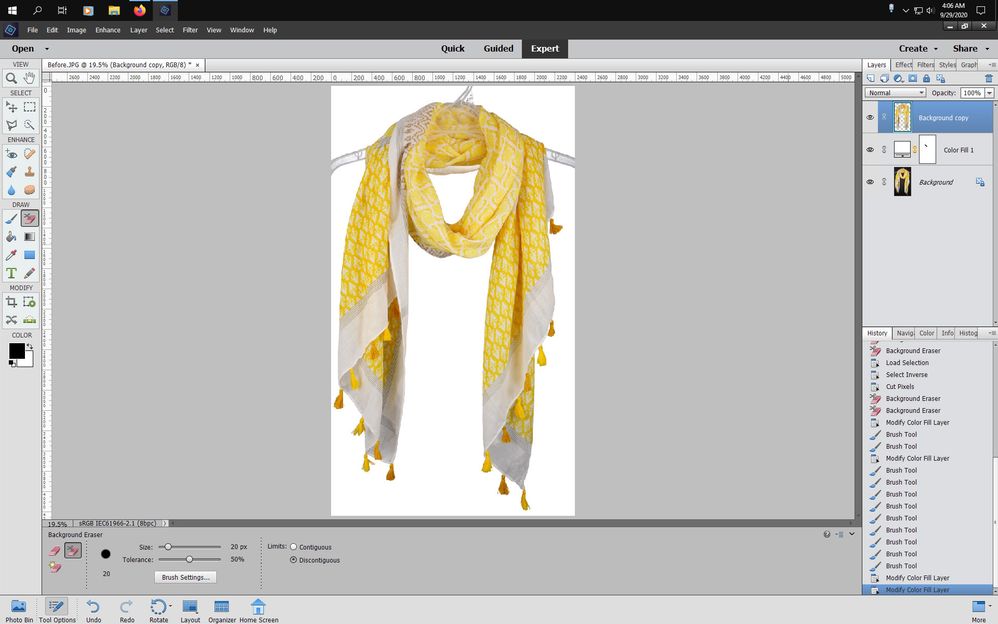
I am on a product photography project, and I need quickly and accurately turn the background in an absolutely clear white area. I tried using the Background Eraser Tool and got in the result: (1) a "dirty" erased background, and (2) dark spots along the edges. (see attached pictures: "before" and "after").
I tried several times on background curtains of different colours (at first white, then black), and always got the above-mentioned problems.
What is that happening?!
Any input will be greatly appreciated.
I am ready to discuss remuneration for the consultation which would help me resolve these problems.
IMAGE BEFORE THE "BACKGROUND ERASER TOOL":
IMAGE AFTER APPLYING THE "BACKGROUND ERASER TOOL":
 2 Correct answers
Here is one way to do it.
- Press D then X to make sure that white is the foreground color.
- Use the Magic Wand tool and set the tolerance to about 40 and selection mode to contiguous.
- Select the black background on the image by clicking in the bottom, and then using the Add to selection mode to click in the top left and right black background and finally in the middle of the scarf.
- Press Delete and the scarf should appear on a transparent background. The transparent area should remain selected.
On my equipment the "before" image looks fine. Try this:
1. Open the image
2. Duplicate the background layer, shut off the visibility of the background layer, and work on the background copy layer.
3. Activate the Magic wand tool. On the tool's option bar, set tolerance=32. Uncheck "contiguous."
4. Left click (single click) on the an area of the black background, and hit d
elete on the keyboard
5. Press CTRL+D to get rid of the selection outline
6. Set your foreground color chip to white
7
...Copy link to clipboard
Copied
Here is one way to do it.
- Press D then X to make sure that white is the foreground color.
- Use the Magic Wand tool and set the tolerance to about 40 and selection mode to contiguous.
- Select the black background on the image by clicking in the bottom, and then using the Add to selection mode to click in the top left and right black background and finally in the middle of the scarf.
- Press Delete and the scarf should appear on a transparent background. The transparent area should remain selected.
- Go to Layer>New Fill Layer>Solid Color.
- A dialog should open with White selected as the fill color.
- Click OK.
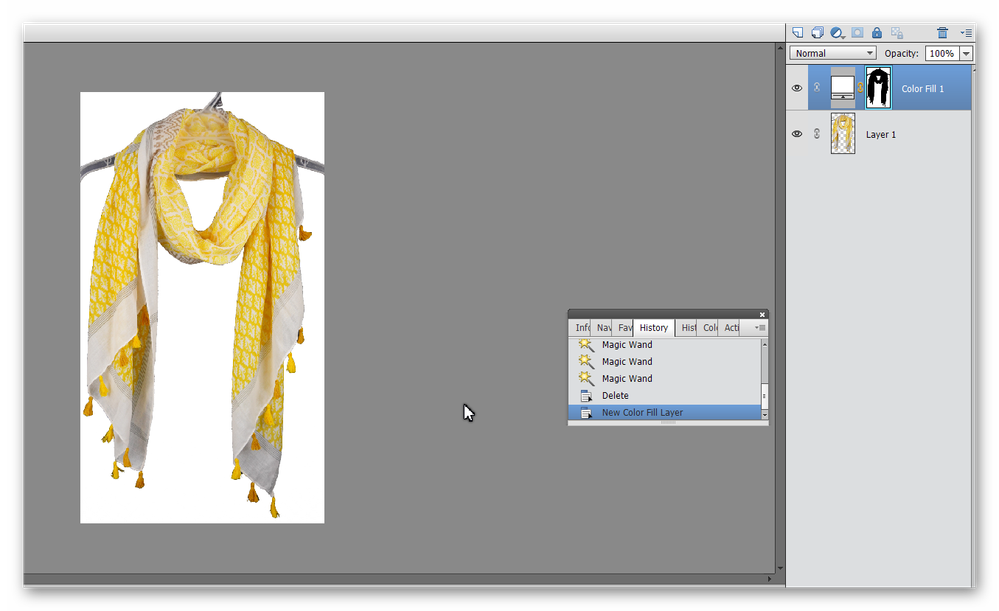
You should end up with something like this:
Copy link to clipboard
Copied
Hi Greg,
Your step-by-step suggestions helped me to "clear" background from "dirt" on it (See my point 1 in the original post), and
Unfortunately, your suggestions have not helped me to resolve the issue with dark spots along the edges of the scarf (See my point 1 in the original post).
See my results after following your step-by-step instructions below.
Your further guidance will be greatly appreciated!!!
Copy link to clipboard
Copied
When you use the Background Eraser Tool set it to Discontiguous and in the Brush Settings set the Spacing to 1%.
Also Duplicate the layer and put a Color Fill Adjustment Layer (Layer>New Fill Layer>Solid Color) between the two layers. That way you can change colors easily to see how things look and use the mask to touch up spots that the Background Eraser Tool removed or missed
Then after you get most of the background removed, Ctrl click on the Layer thumbnail to load a selection, then go to Select>Inverse, then Edit>Cut, which remove any stray streaks that the brush left. Then use the Brush Tool to paint black on the color fill mask to bring back details and paint white if you need to remove any details you put back.
Copy link to clipboard
Copied
Hi Jeff,
Thanks a lot for your input. Due to your reply, I have learnt a lot!
Unfortunately, your step-by-step instructions have not resolved the "dark spots along the edges" problem which I had described in the body of the post.
After spending hours working on this image, I am tempted to think, that this issue is related to the poor-thought algorithm of the Background Eraser Tool on Adobe side which erroneously leaves some small black dots and areas on the image though it is supposed to remove all black areas from the image.
I hope, sooner or later Adobe will notice this problem and fix it.
Copy link to clipboard
Copied
With the Background Eraser Tool you can try a higher Tolerance setting.
Even though your image looks like it would be easy to remove the background, such is not the case because it appears that it has heavy jpeg compression which causes a lot of multicolor artifacts.
Copy link to clipboard
Copied
Yes, Jeff, that's true. JPG compression causes a lot of noise. I have already switched to ARW (Sony RAW), and the "noise" was diminished significantly.
Copy link to clipboard
Copied
On my equipment the "before" image looks fine. Try this:
1. Open the image
2. Duplicate the background layer, shut off the visibility of the background layer, and work on the background copy layer.
3. Activate the Magic wand tool. On the tool's option bar, set tolerance=32. Uncheck "contiguous."
4. Left click (single click) on the an area of the black background, and hit d
elete on the keyboard
5. Press CTRL+D to get rid of the selection outline
6. Set your foreground color chip to white
7. Open a blank layer between the background and background copy layers. This will be Layer 1
8. Activate the Paintbucket tool and left click on Layer 1 to fill the layer with white
