Copy link to clipboard
Copied
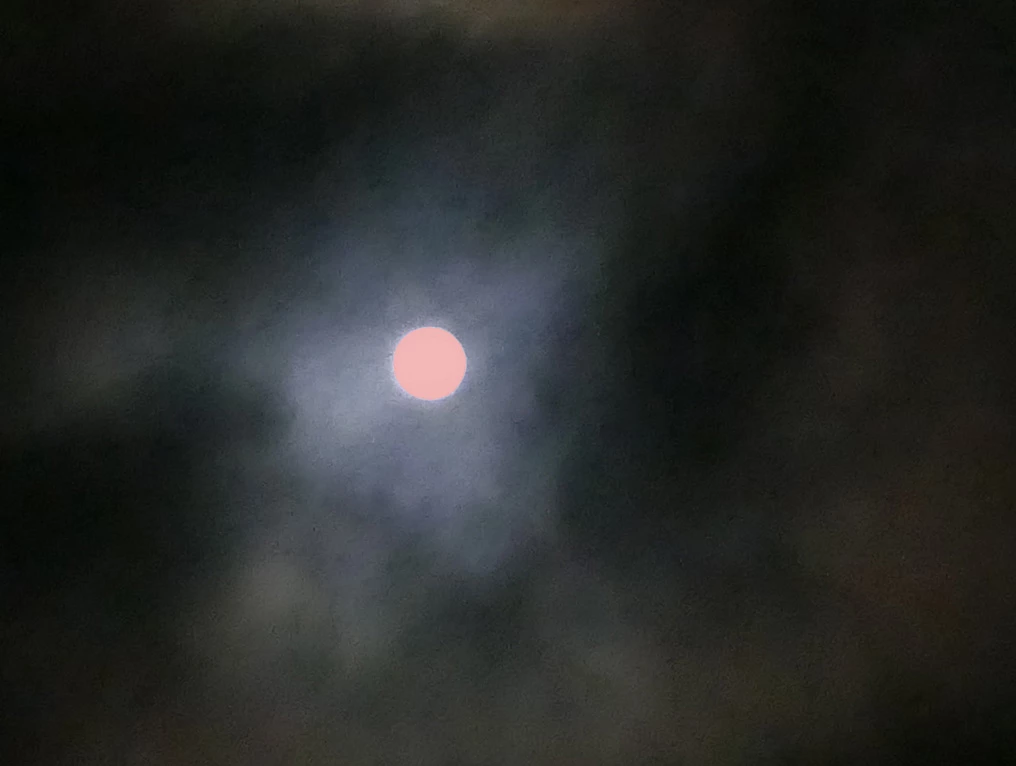
I'm trying to change the color of a round object. Eventually I want to learn how to copy the color from another photo, but to begin with, I just want to manually adjust the color. I used the Quick Selection tool to select the object. I'm using PSE 18, but used the following instructions from the "The Photoshop Elements 15 Book for Digital Photographers"; it seems simple:
Now let’s make an adjustment and you’ll see that your adjustment will only affect your selected area. Click on the Create New Adjustment Layer icon at the top of the Layers palette, and choose Hue/Saturation from the pop-up menu. In the Hue/Saturation adjustments palette, drag the Hue slider to the left to change the color of the tiles to a green color. Notice how just the color of the tiles is changing and nothing else in the image? This is why selections are so important—they are how you tell Elements you only want to adjust a specific area.
But when I do that, the color of the object doesn't change. I can see that an extremely tiny area on or outside the edge of the selection is changing color, but nothing else. As an experiment, I used the rectangular selection tool to select the object and surrounding pixels. In that case, the area outside the object change color when I moved the Hue slider. So has something changed from PSE 15 to PSE 18, or did the author omit a step?
Try this:
Copy link to clipboard
Copied
What is the original color of the object?
Can you post an example photo?
Copy link to clipboard
Copied
It is the moon. It is white in the photo, but a shade of orange to the eye.
Copy link to clipboard
Copied
Try this:
Copy link to clipboard
Copied
The above really looks fake, but I hope that this will get you started.
With a little additional work, you can get to something like this:
Copy link to clipboard
Copied
I followed your instructions the best that I could, but in the end, the hue adjustment affected everything except the selected object. I tried it three times, varying the order of layers and what I selected before pressing Ctrl+J. I would need to understand layer usage better in order to figure out where I'm going wrong.
Copy link to clipboard
Copied
After you have left clicked on the white moon in step #2, you should see "marching ants" surrounding the circular moon, a sort of moving outline, indicating that you have made a selection.
CTRL+J, or Layer>New>Layer via copy puts the moon on its own layer (see Layer 1 below)
The Hue/saturation adj. layer is at the top. With this layer active, press CTRL+G. This clips the adjustment layer to Layer 1, and the adjustment remains confined to the selection, i.e. the moon. This step is critical.
Note, the colorize box is checked in the dialog.
Copy link to clipboard
Copied
Still no go. My screen looks similar to yours (other than the version difference), so I don't know where I'm going wrong. Now, when I move the Hue slider, nothing at all changes.
I was hoping to graduate from this task to actually copying the color of the moon from another photo which captured it. But if this is so hard, I can't imagine getting as far as that!
Copy link to clipboard
Copied
hatstead,
I followed your instructions and and got the same result as gfbugaboo: no change to the moon color.
From my experience, a Hue/Saturation adjustment does not work on a white (or black) object.
I'm wondering how you got it to work.
Anyway, here is another method:
Ctrl-click the moon layer to select the moon.
Add a Solid Color adjustment layer and choose orange in the Color Picker.
If you later want to tweak the orange (make darker or lighter), double-click the adjustment layer to bring up the Color Picker again.
Copy link to clipboard
Copied
Mark,
That's another way to do it.
The way I did it was to check the Colorize option, and work the 3 sliders, esp. lightness - to left of center.
Copy link to clipboard
Copied
hatstead,
Well, I learned something new today!
With the Colorize option and the object pure white (RGB 255,255,255), the Hue & Saturation sliders work only if the Lightness slider is left of center. Thanks for pointing this out.
Also, with the Colorize option and the object pure black (RGB 0,0,0), the Hue & Saturation sliders work only if the Lightness slider is right of center.
Copy link to clipboard
Copied
You’re welcome. Glad to help.
Sent from my iPad
Copy link to clipboard
Copied
gdbugaboo,
If the periphery of the entire moon is not selected the end result might be a tiny glow remaining from the glow around the moon, as in mine and hatstead's examples:
If this happens, you can apply a Free Transform to the moon layer and enlarge the moon a bit.
Here I increased the size to 105% on the Free Transform options bar:
Copy link to clipboard
Copied
You can always cheat and download an orange moon from the internet (Google Image search yields hundreds).
Put it on a new layer, and resize/reposition to cover the old moon.
You can also download a grayscale moon and color it as you wish while still revealing the craters.
In this example I downloaded the grayscale moon, added a Solid Color fill layer of orange, and lowered the layer's Opacity to reveal the craters.
Copy link to clipboard
Copied
I'm already cheating! I appreciate all the help. With Mark's method, I was able to just color the moon, as I set out to do. (And yes, it looks very fake.) With Hatstead's method, this time adjusting the Lightness slider, the entire photo was affected by the change in Hue, not just the moon. Although that wasn't what I was trying to do, I love the result:
My next project will be to learn how to adjust the moon by grafting on the color from another photo I took of the moon, in which the camera captured the orange color. But first I have three sets of photos to process. Thanks again.
Copy link to clipboard
Copied
gfbugaboo wrote
With Hatstead's method, this time adjusting the Lightness slider, the entire photo was affected by the change in Hue, not just the moon.
That would happen if the Hue/Saturation layer is not grouped with the moon layer. Is that the case?
Copy link to clipboard
Copied
I tried one last time, and it still does not work for me. I followed Hatstead's instructions to the letter. As far as I can tell, the Hue/Saturation layer is grouped with the moon layer. My settings look the same as those shown on his screenshot. I'm moving on to the next project.