

- Home
- Photoshop Elements
- Discussions
- Re: How do I brighten (not whiten) a portion of a ...
- Re: How do I brighten (not whiten) a portion of a ...

Copy link to clipboard
Copied
How do I brighten or lighten (not whiten) a portion of a photo using gradients?
I have used "levels" and "brightness/contrast" to lighten or brighten the entire photo.
But I want to lighten only certain areas of a photo.
When I use the gradient tool it can whiten a photo.
However, I do not want to add white. I only want to lighten certain areas of the photo.
E.g., I am trying to lighten some plantings in a night photo and leave the rest of the photo unchanged.
How do I do this?
Thanks.


 1 Correct answer

toasted wrote
How do I brighten or lighten (not whiten) a portion of a photo using gradients?
I have used "levels" and "brightness/contrast" to lighten or brighten the entire photo.
But I want to lighten only certain areas of a photo.
When I use the gradient tool it can whiten a photo.
However, I do not want to add white. I only want to lighten certain areas of the photo.
E.g., I am trying to lighten some plantings in a night photo and leave the rest of the photo unchanged.
How do I do this?
Thanks.
- Us
 27
Replies
27
27
Replies
27
Copy link to clipboard
Copied
toasted wrote
How do I brighten or lighten (not whiten) a portion of a photo using gradients?
I have used "levels" and "brightness/contrast" to lighten or brighten the entire photo.
But I want to lighten only certain areas of a photo.
When I use the gradient tool it can whiten a photo.
However, I do not want to add white. I only want to lighten certain areas of the photo.
E.g., I am trying to lighten some plantings in a night photo and leave the rest of the photo unchanged.
How do I do this?
Thanks.
- Use one of the selection tools, e.g. selection brush or lasso tool, to select the plantings.
- Then, place the selection on a separate layer (CTRL+J)
- Open a levels or brightness/contrast or gradient adjustment layer at the top, and clip the adjustment layer to the layer with the selection from step #2 (CTRL+G). The adjustment which you make will be confined to the selection
Another way to go about this is:
Duplicate the background layer
Brighten the Background Copy layer the way you have been doing it with a brightness/contrast adjustment layer
The adjustment layer has a built in mask. Left click on the white rectangle. Then, using a black brush, paint where you don't wish to have the area brightened. If you go too far, correct with a white brush.
This technique allows you to be precise, esp. along branches, leaves, etc. The selection tools are cumbersome in this type of work.
Copy link to clipboard
Copied
Thank you hatstead. I thiink I understand your solutions. I will try out the 2 options you mentioned.
Copy link to clipboard
Copied
You're welcome. Let us know if you encounter a problem.
I should add, when using the mask, black hides, white reveals, hence you can "hide" by painting over an area with a black brush, and make corrections (reveal) with a white brush.
Copy link to clipboard
Copied
Thanks again. I will check things out and hopefully work it out and let you know how it goes.
Thanks!

Copy link to clipboard
Copied
Hi,
I am reading your posts and they are very helpful. However, I still have problem with removing this shadow in the left top corner on the below picture. I am really a beginner with Photoshop (2017 version) and just can't get a result I want...What would be the best tool to use here?
Any suggestions? 

Copy link to clipboard
Copied
Follow-up to the selection method in msg#1:
You might want to feather the selection before applying the adjustment.
Here is with the selection unfeathered:
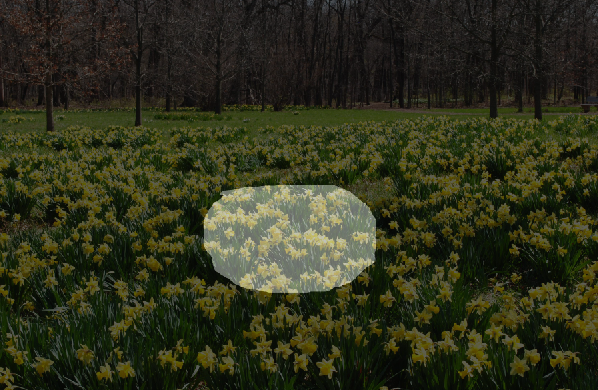
Here I feathered the selection 70px.
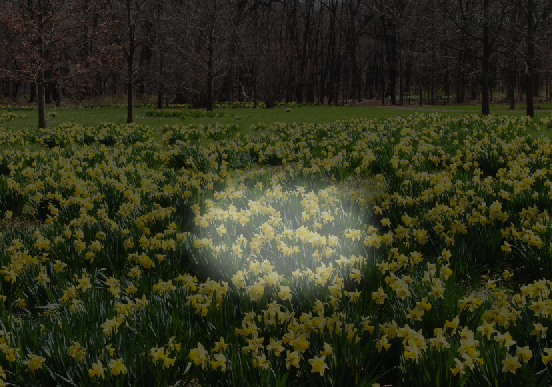
Of course the amount of the feather depends on the picture's resolution. A matter of trial and error.
Copy link to clipboard
Copied
Thank you hatstead and Mark Sand.
I got the effect I was after. I wanted to brighten up a couple areas in a night photo as if I was
using a directional (background) flash at the time of taking the photo.
I used hatstead's first option and then the feathering Mark mentioned to get the effect I wanted.
Probably sounds pretty basic but it was the first time I used either effect.
Thanks again to you both!
Copy link to clipboard
Copied
You're welcome. Glad to help.
Copy link to clipboard
Copied
You can do this even easier:
Select and feather the area to be lightened.
Add the adjustment layer.
You can later increase or decrease the size of the light area by painting (using a soft brush) white or black respectively.

Copy link to clipboard
Copied
Great
Thanks again for the help!
Copy link to clipboard
Copied
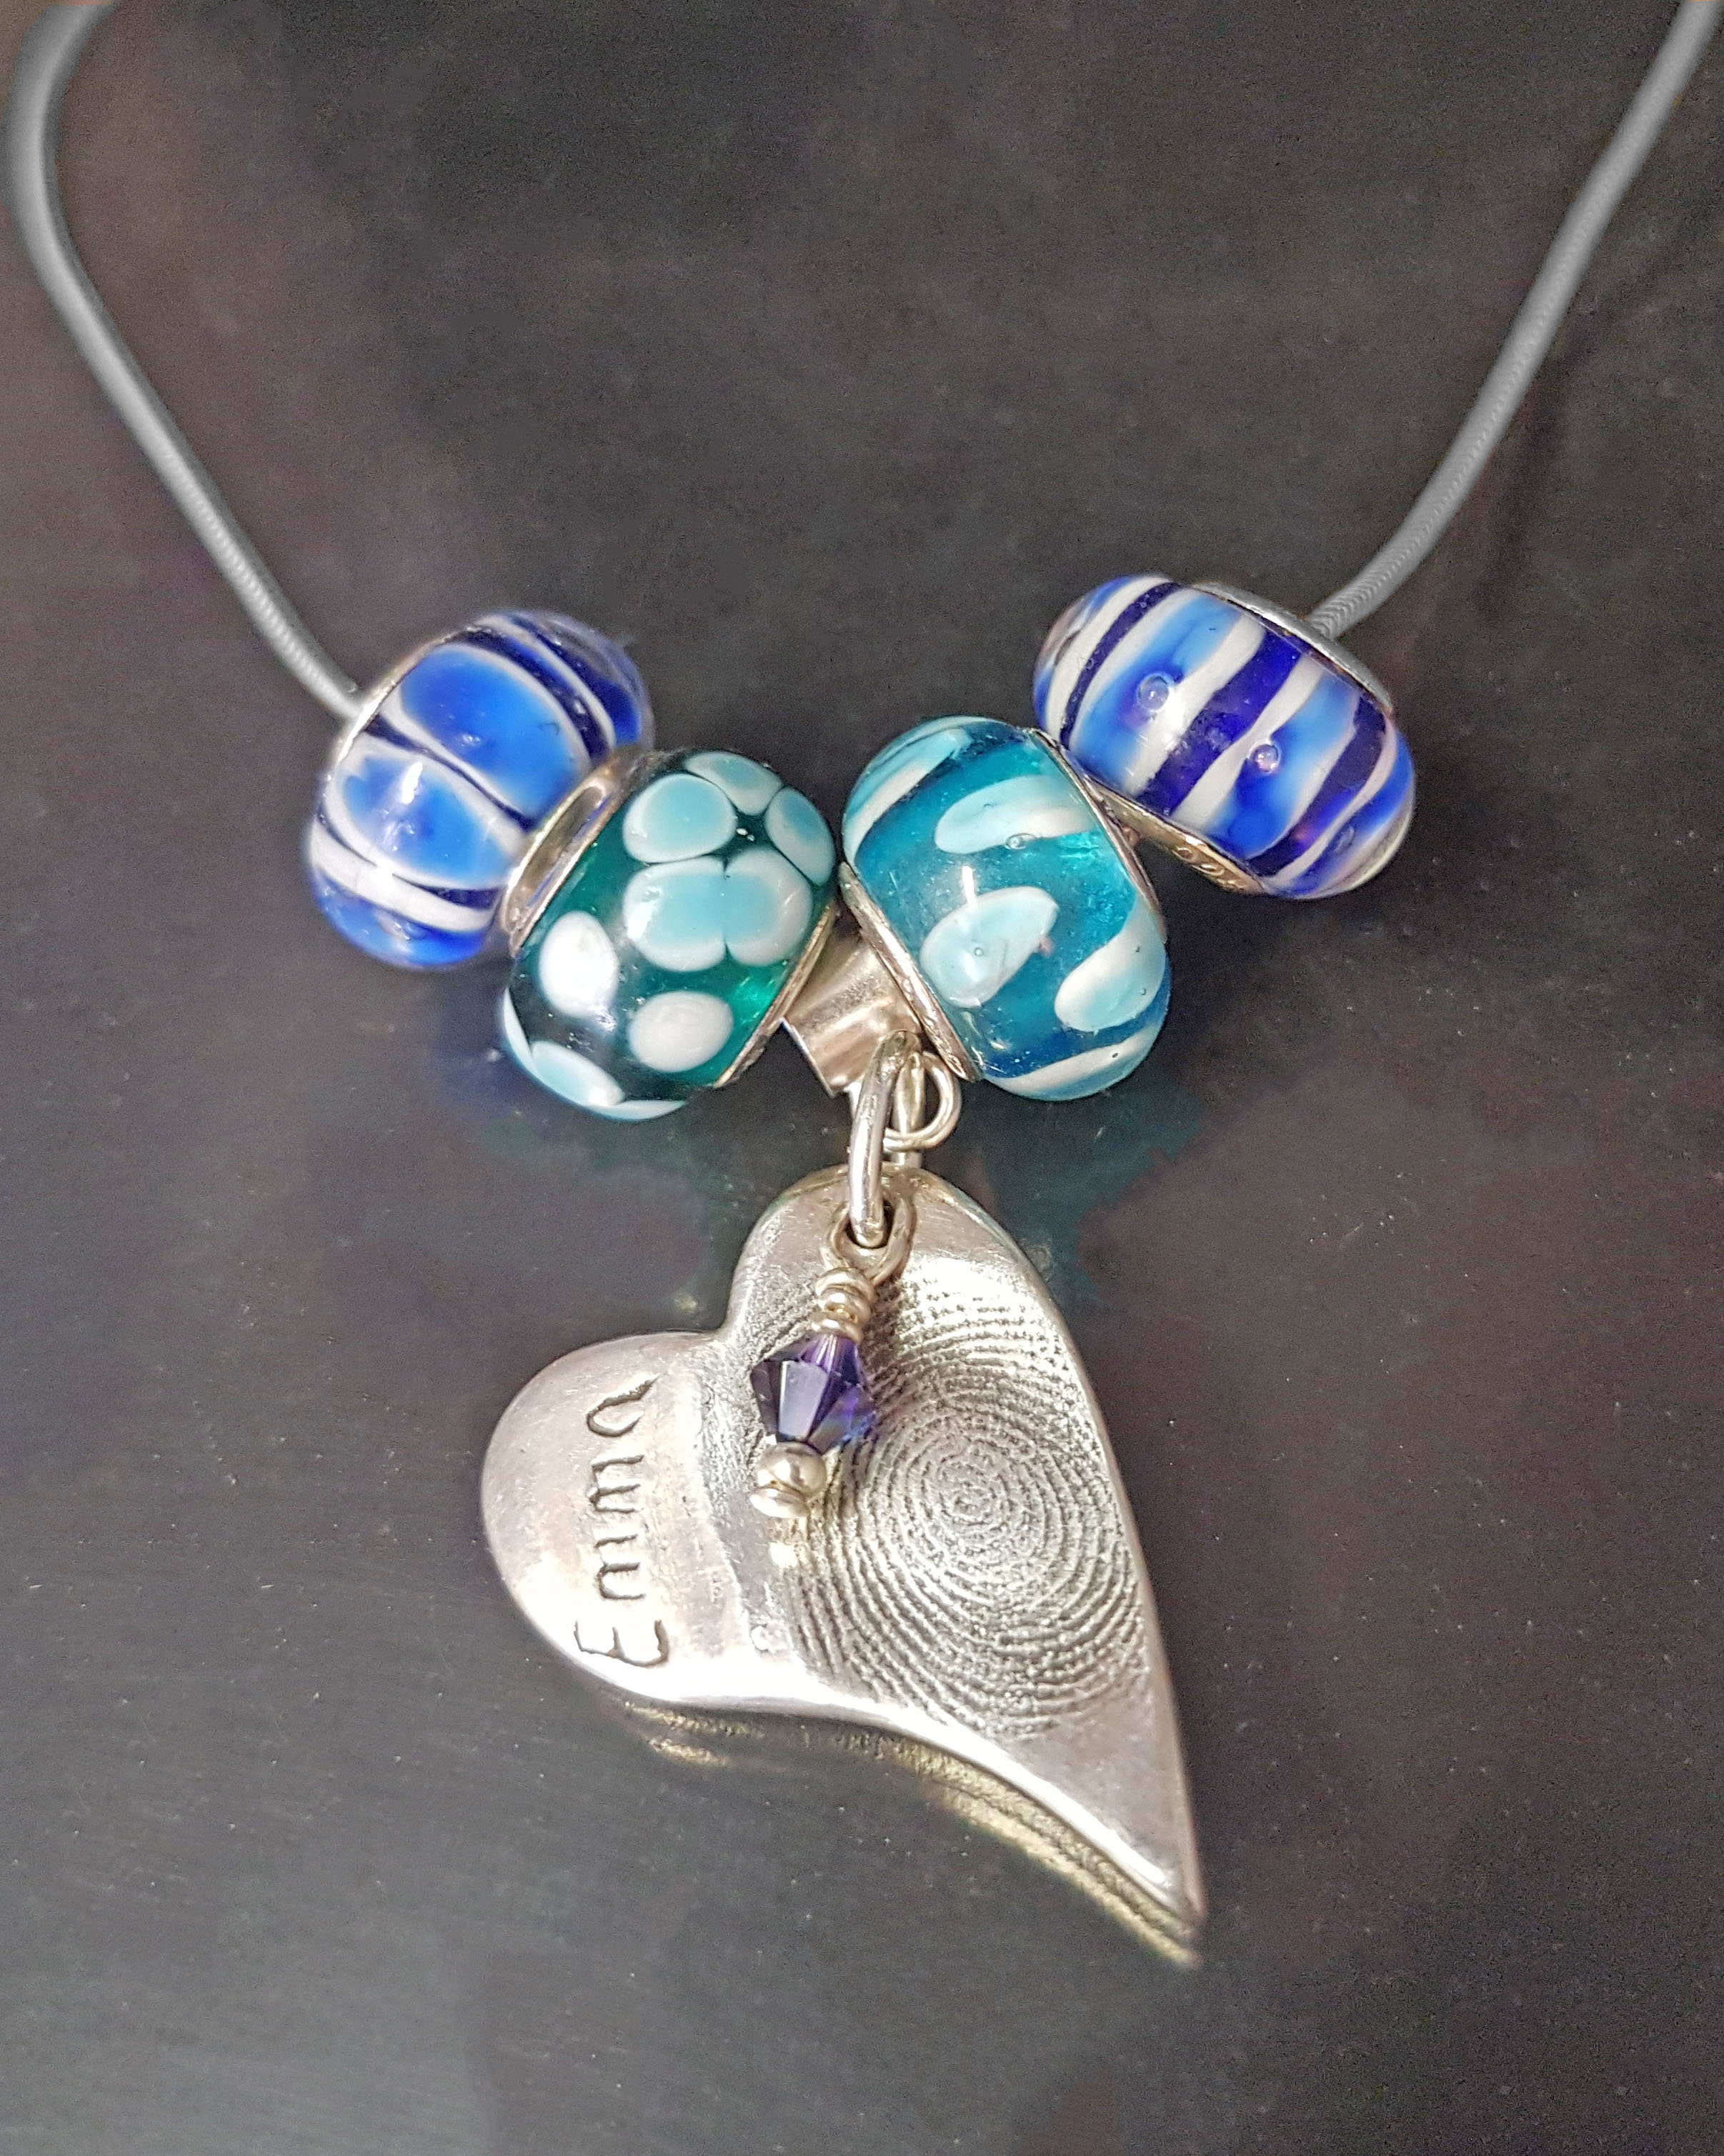
Hi
I have an image of a necklace, where the chain is slightly discoloured in places. How do I brighten the chain only?
Many thanks in advance
Natasha
Copy link to clipboard
Copied
natashap64021260 wrote
Hi
I have an image of a necklace, where the chain is slightly discoloured in places. How do I brighten the chain only?
Many thanks in advance
Natasha
natashap64021260 wrote
Hi
I have an image of a necklace, where the chain is slightly discoloured in places. How do I brighten the chain only?
Many thanks in advance
Natasha
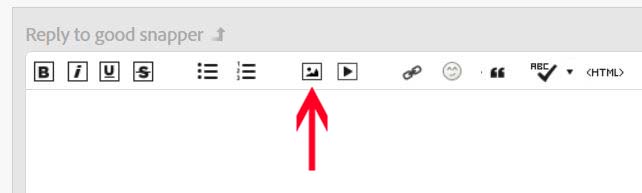
Suggest that you post the picture involving the necklace so that we may have a look at it for specific guidance.
To do that, click on the "Insert Image" icon at the top of the reply box here on the forum. You can not do it via an e-mail reply, however.
Copy link to clipboard
Copied
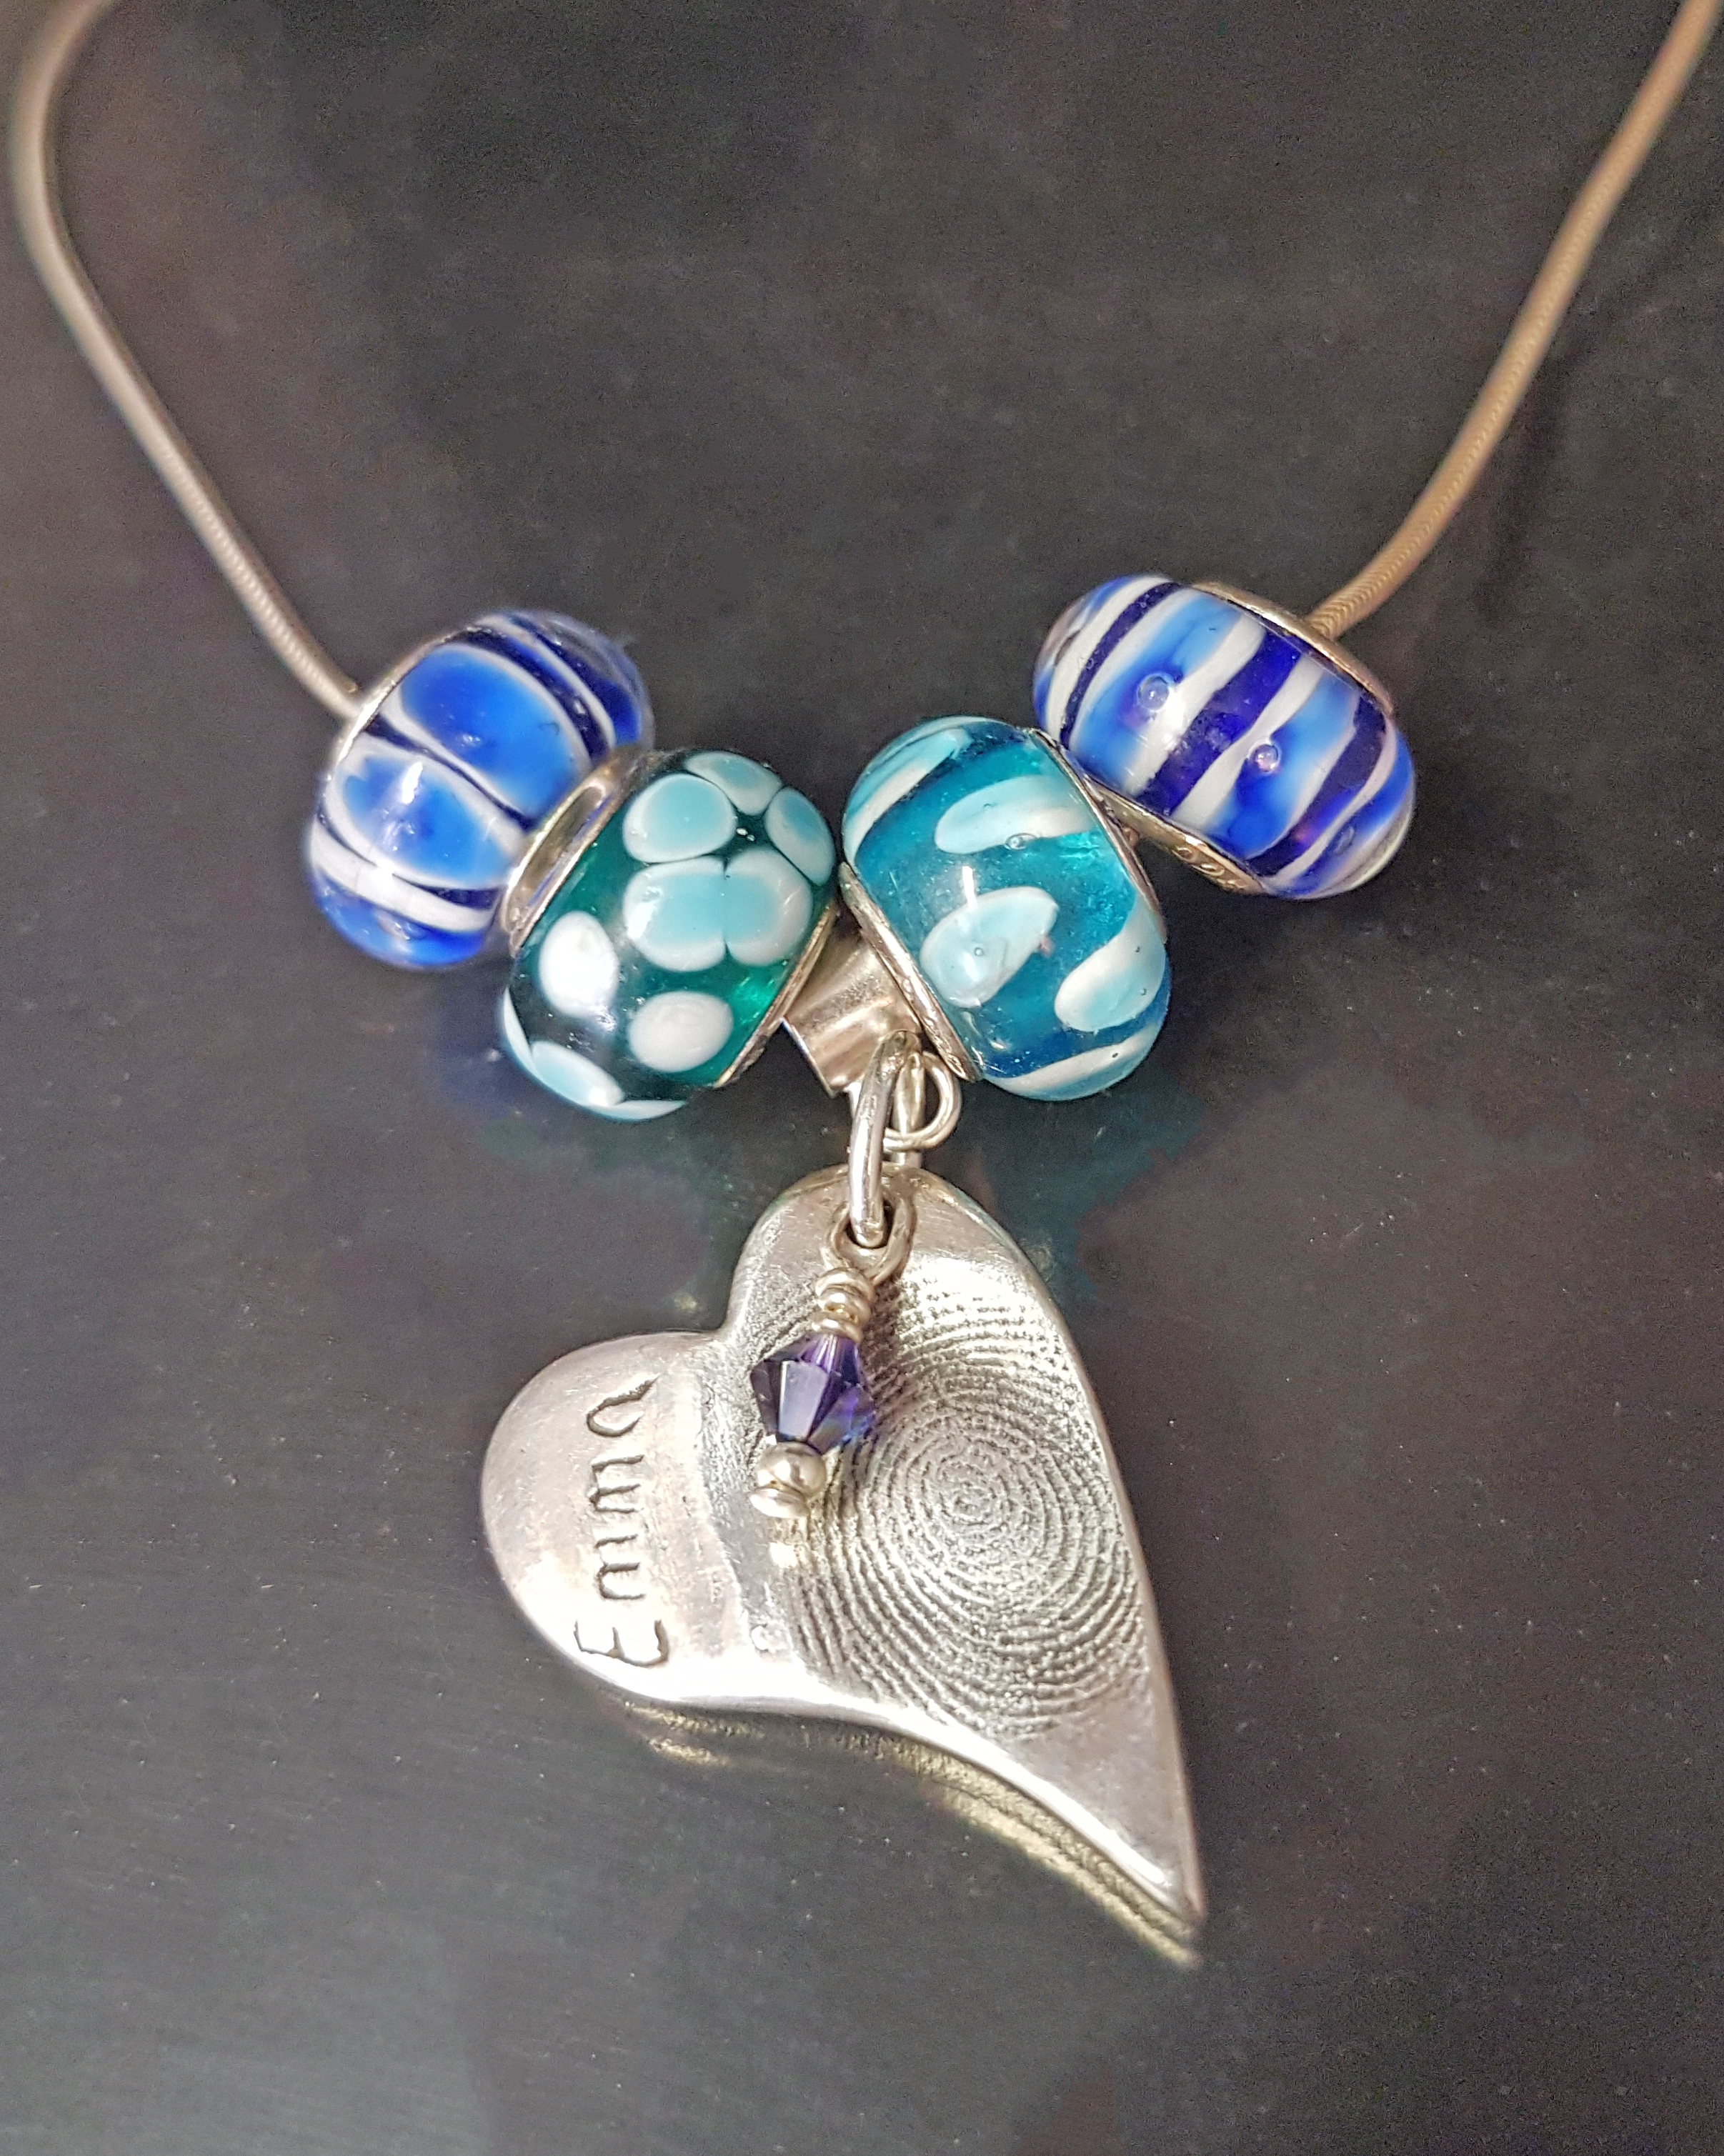
Here is the image. Thanks in advance Natasha
Copy link to clipboard
Copied
From the look of the bottom portion of the chain on the left side, I'm guessing it is a silver chain.
If that is the case:
Here I used the Magnetic Lasso to select the right portion, then smoothed the selection 5 pixels.
Then applied a Hue/Saturation adjustment where I moved the Saturation slider all the way to the left.
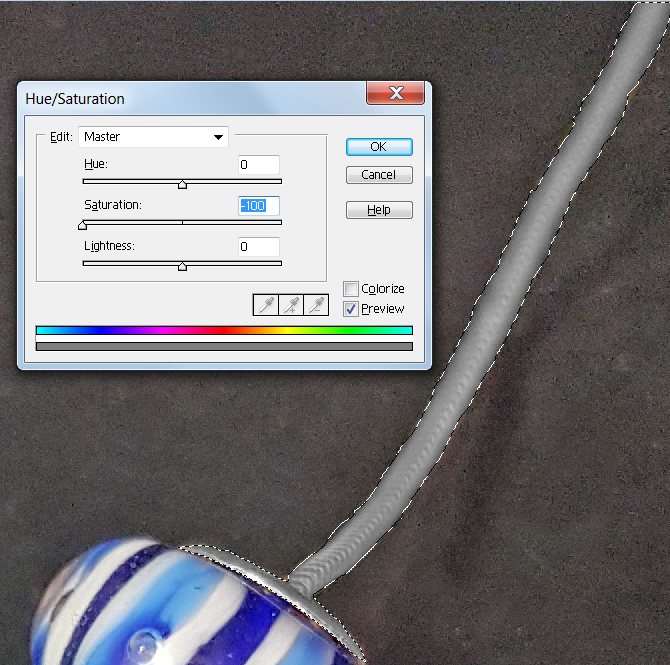
Did the same on the left side. Final result:
Copy link to clipboard
Copied
Thank you Mark. That is great. I am trying to replicate but I can only find quick selection not the magnetic lasso tool?
I have Elements 15
Natasha
Copy link to clipboard
Copied
Natasha,
I don't have PSE15, but I'm guessing you have to be in Expert Mode to access it.
If you want, you can right-click my result to save it to your PC.
Copy link to clipboard
Copied
Hi Steve
What is expert mode? I have lots of images to edit?
Natasha
The English Charm Co.Handmade Keepsakes07792 503411www.theenglishcharmco.co.ukWww.facebook.com/theenglishcharmcompanywww.twitter.com/@englishcharmcowww.instagram.com/keepsakes_englishcharmco
Copy link to clipboard
Copied
Natasha,
This should help get you to Expert Mode:
Photoshop Elements workspace basics
also this tutorial of the magnetic lasso in PSE15
Photoshop Elements 15 Tutorial The Magnetic Lasso Tool Adobe Training - YouTube
Bear in mind that there are lots of ways to select an area for editing. In this case this magnetic lasso worked well.
Copy link to clipboard
Copied
Hi
I don’t have a magnetic lasso tool on the Photoshop elements 15. I only have Quick Selection, Brush selection tool and refine brush selection tool? Is there a different version in the UK?
Natasha
Copy link to clipboard
Copied
Hi Mark
Here is my screen.
Natasha
Copy link to clipboard
Copied
natashap64021260 wrote
Hi Mark
Here is my screen.
But the screen shot is missing.
To upload it into a reply, click the Insert Image icon just above the message box.
Did you check the PSE Help (if there is one)?
Since I cannot address PSE15, you might want to start a new thread in this forum titled "where is magnetic lasso in UK PSE15 version".
Copy link to clipboard
Copied
Hi Mark
I have found this now. How do I smooth the selection 5 pixels? Also the magnetic lasso isn’t picking up the shape very well and says that’s no pixels are more than 50% selected and the selection edges will not be visible.
Natasha
Copy link to clipboard
Copied
In my version it is Select > Modify > Smooth. However there are several ways to smooth a choppy selection, depending on how you made the selection (with the magnetic lasso or other).
I suggest you do a Google or YouTube search on "photoshop elements smooth selection". This yields many tutorials.
Google and YouTube can be used to find help on just about every aspect of PSE.
If you want, you can upload your latest picture and I, or other users, can see if there are ways besides the polygonal lasso in this case.
Copy link to clipboard
Copied
thank you for your help
-
- 1
- 2

Find more inspiration, events, and resources on the new Adobe Community
Explore Now
 AdChoices