Discuss: Change Multi-Cam thumbnails and a shortcut to change poster frames now in Beta
Now available in the latest Premiere Pro (Beta) build are new features to help manage clip thumbnails in the Project panel:
- Multi-Cam thumbnails now show camera angle 1 by default
- Use existing Multi-Cam keyboard shortcuts to choose the camera angle used for the thumbnail
- Keyboard shortcuts now let you adjust and clear the poster frame for one or more clips at once
Multi-Cam thumbnails now show camera angle 1 by default
Previously, the thumbnail of a Multi-Cam clip was the last camera angle (or track) of the Multi-Cam sequence. Have two cameras? Your thumbnail would be camera 2. Have eight cameras? The thumbnail would be camera 8. Because editors often want to see the first camera, the default thumbnail for Multi-Cam clips is now camera angle 1.
Use existing Multi-Cam keyboard shortcuts to choose the camera angle used for the thumbnail
Use the “Select Camera #” keyboard shortcuts to switch your Multi-Cam thumbnail in the Project panel. In the keyboard shortcuts window, search for “Select Camera” to find and assign the shortcut to a key. Select Next and Previous Camera shortcuts will also affect the Multi-Cam thumbnails in the project panel. These shortcuts can be used on one or a selection of Multi-Cam clips. The existing “Select Camera #” shortcut functionality continues to work as before when you are working in the source monitor, program monitor or timeline.
Keyboard shortcuts now let you adjust and clear the poster frame for one or more clips at once
In Icon or Freeform View in the Project panel, a clip’s thumbnail (also known as poster frame) defaults to the first frame. When you want to change the poster frame, you can now select one or more clips and use new keyboard shortcuts to move the poster frame 10 frames forward or backward.
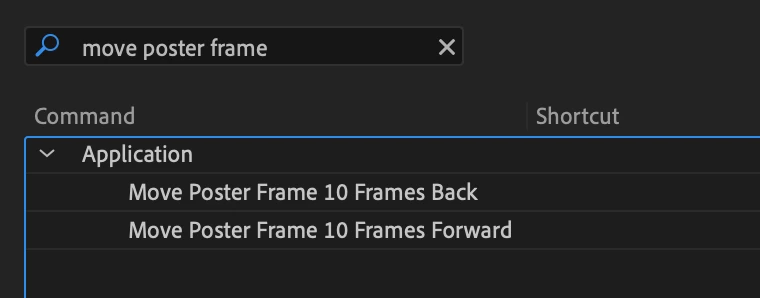
Open the keyboard shortcut panel (Premiere Pro menu on Mac, Edit menu on Windows) and search for “Move Poster Frame 10 Frames Back” and “Move Poster Frame 10 Frames Forward”. Assign your desired keyboard shortcuts and click OK (default shortcuts are not yet assigned).

Things to know:
- If a clip already has a poster frame set, it will be moved forward/backward 10 frames from where the poster frame was previously set.
- When a clip has an IN point marked and you use this command, the poster frame will move 10 frames from the start of the clip.
- When you’re too close to the beginning or end of the clip and there are less than 10 frames, the poster frame is set at the first or last frame of the clip.
- When clips have different durations, some clips may stop moving the poster frame forward while others in the multiple selection continue moving their poster frames.
- The keyboard shortcut “Clear Poster Frame” now works on single and multiple clip selections.

