- Home
- Premiere Pro (Beta)
- Discussions
- ProRes RAW Premiere Pro Workflow & avoiding overex...
- ProRes RAW Premiere Pro Workflow & avoiding overex...
ProRes RAW Premiere Pro Workflow & avoiding overexposure?
Copy link to clipboard
Copied
Hi everyone,
Is there any recommended workflow for processing and grading ProResRAW in Premiere Pro (beta)?
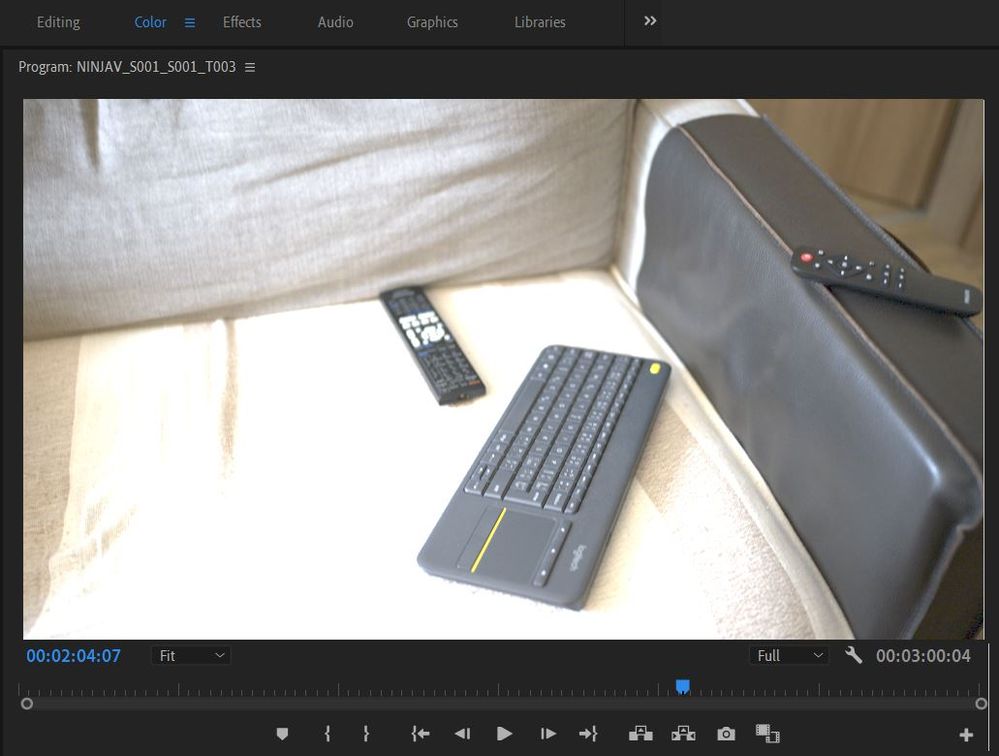
I'm shooting Z6 and record ProResRAW(HQ) to Atomos Ninja. All seems great apart from the fact that the normally exposed footage appears to be 2-3stops overexposed while loaded into Premiere.
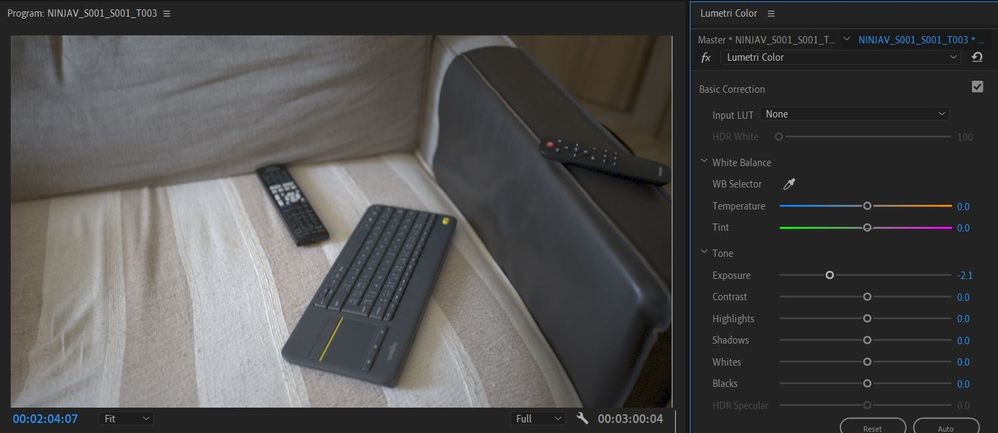
The RAW has plenty of dynamic range and there is no detail lost in the highlights (after decreasing the exposure at least 2 stops in Lumetri color basic correction). But I'm wondering if the import has to be done differently or if the exposure of the camera needs to be explicitly adjusted while shooting ProResRAW to avoid the need to heavily correct the exposure for each clip.
This is how ProResRaw footage normally exposed by camera looks after importing into Premiere.
here it is corrected:
There is no problem with exposure with any other format with this combo (and Premiere), so this is specific to ProResRAW.
Then I'm interested in color grading. I love the detail of this footage, but so far, I wasn't able to achieve the colors that would stand out, and I wonder if there is something specific to ProResRAW for grading as well.
Copy link to clipboard
Copied
Hi AlexSkyrider,
We're sorry to hear about this issue. Could you please confirm if the Waveform shown in Premiere Pro is also registering an increment in the exposure or is it just the preview that seems to be overexposed. Is there any difference between the Waveform shown in Premiere Pro and in Atomos Ninja. Also, if it's happening with all the ProRes RAW files, please share a download link for a sample media to test the issue at our end.
Thanks,
Sumeet

