This problem got on my mind and another method occured to me.
This alternative might help depending on the panel layout and rivet spacing required. Again it's not perfect, in this case it missed a very small panel, but for me it worked slightly better than the last method if fewer rivets with larger spacing is required.
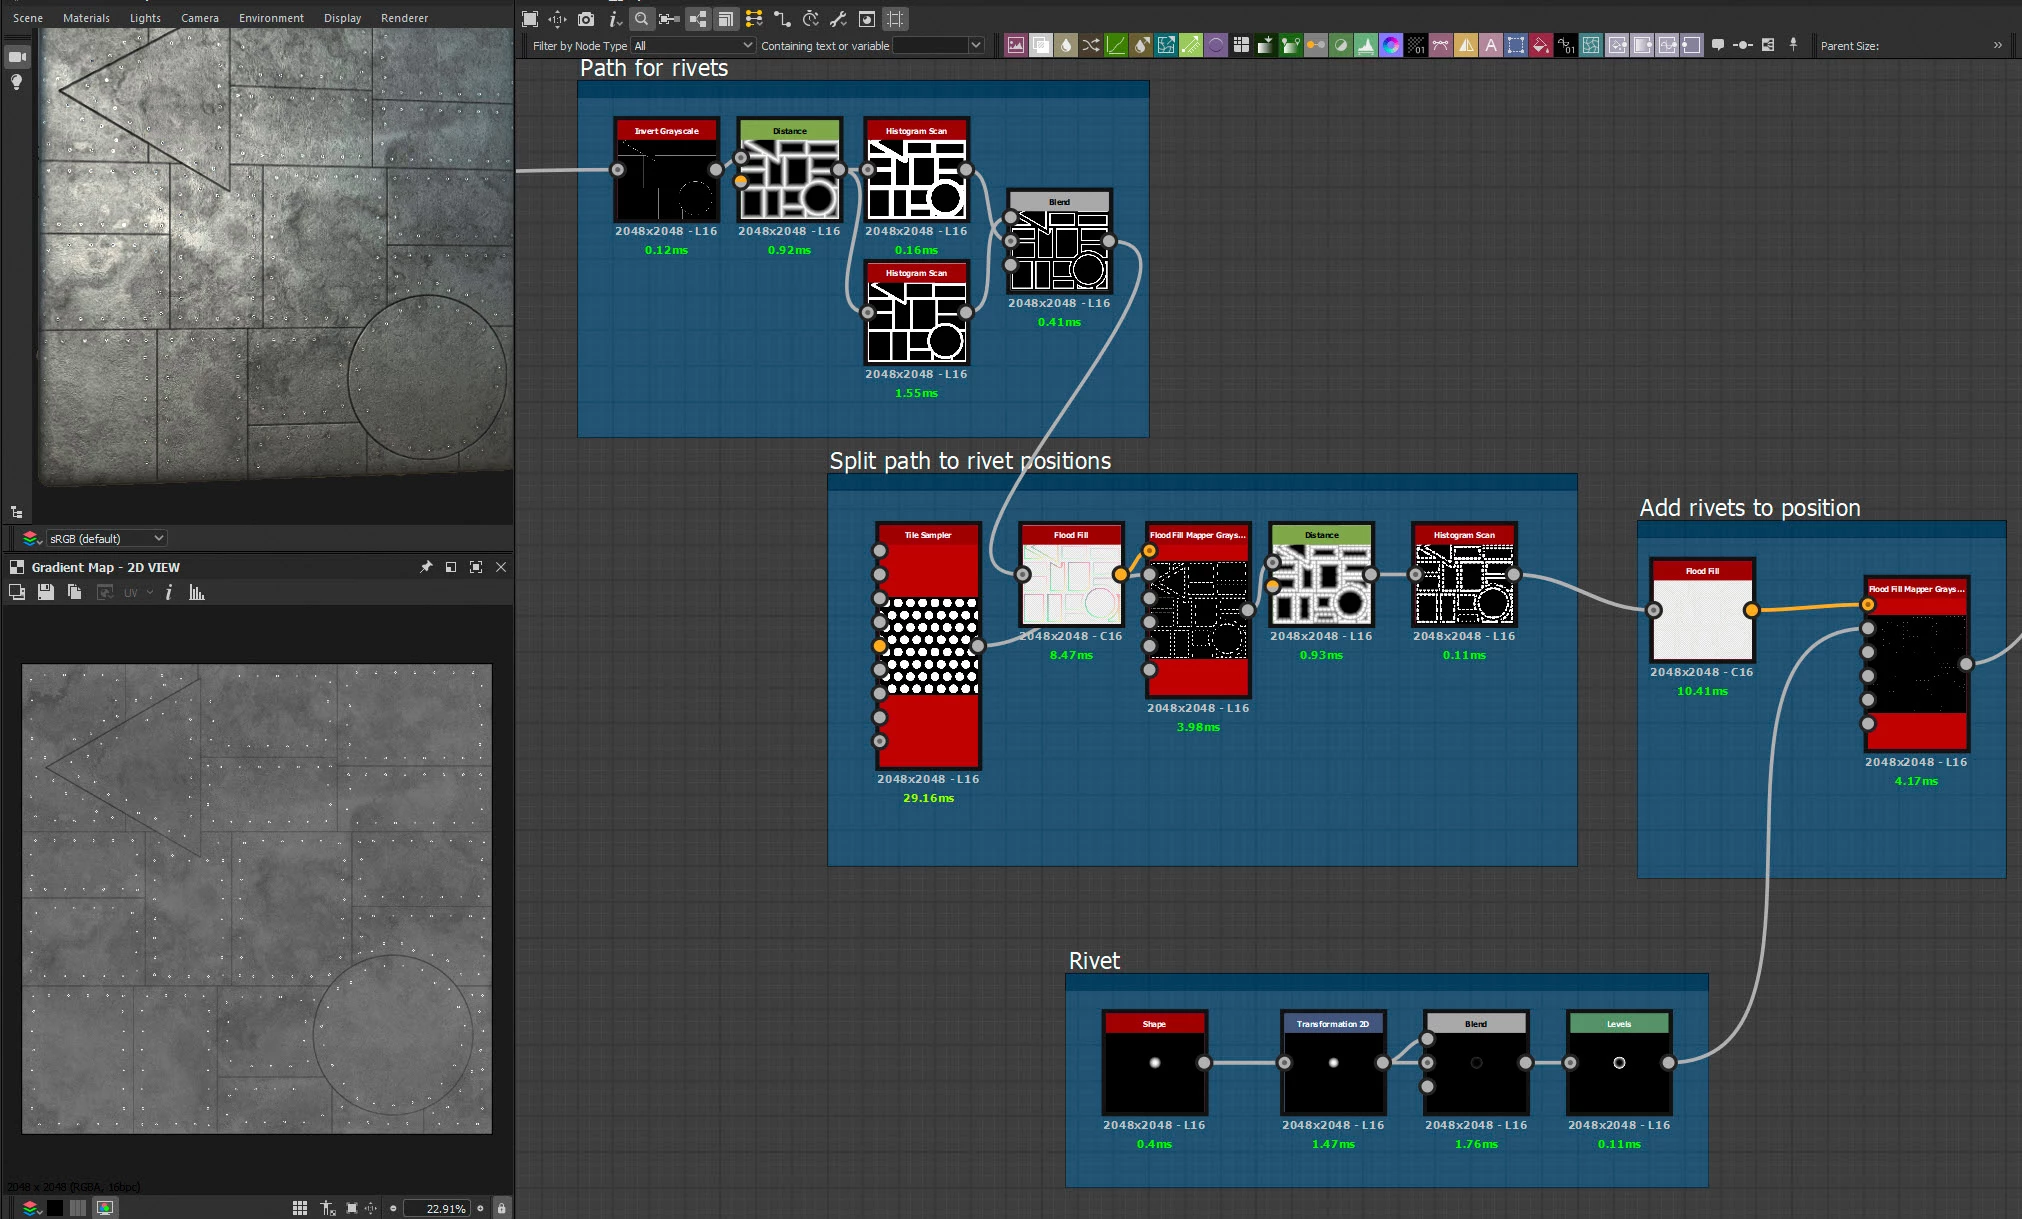
It starts with creating a path for each set of rivets (make it is wide enought to capture positions at the next step).
Next a flood fill creates a flood fill on each individual rivet path shape and a flood fill mapper is used with a tile sampler making circles (8 x8 and 0.5 offset). Then a distance note to expand the positions and histogram scan. Balance the distance node and histogram position to ensure individual rivet positions are large enough to hold a rivet but do not overlap.
Then a flood fill mapper to put a rivet in each position.
Cheers
Dave