• Global community
    • Language:
      • Deutsch
      • English
      • Español
      • Français
      • Português
  • 日本語コミュニティ
    Dedicated community for Japanese speakers
  • 한국 커뮤니티
    Dedicated community for Korean speakers
Exit
0

Displacement maps, height maps, and Normal maps in Stager

Explorer ,
Jul 29, 2021 Jul 29, 2021

Copy link to clipboard

Copied

Can someone explain the differences between these?


Can you demonstrate in Stager how to use a displacement map, or height map, or normal with a black and white checkerboard pattern to have the texture emboss and de-boss? ty

Views

4.2K

Translate

Translate

Report

Report
Community guidelines
Be kind and respectful, give credit to the original source of content, and search for duplicates before posting. Learn more
community guidelines

correct answers 1 Correct answer

Adobe Employee , Jul 29, 2021 Jul 29, 2021

Normal maps and height maps are very different, but both of them have the goal of adding detail to your object.


A normal map is usually in this 'blue' format colored image because it stores directional data - so not just up/down (black/white) but the curve along the bump which is stored in RGB channels for XYZ data.  They are usually created by 'baking' methods - where you first model a high polygon model then bake a normal map down to store all the detail and reproject it to a low polygon mod

...

Votes

Translate

Translate
Adobe Employee ,
Jul 29, 2021 Jul 29, 2021

Copy link to clipboard

Copied

Normal maps and height maps are very different, but both of them have the goal of adding detail to your object.


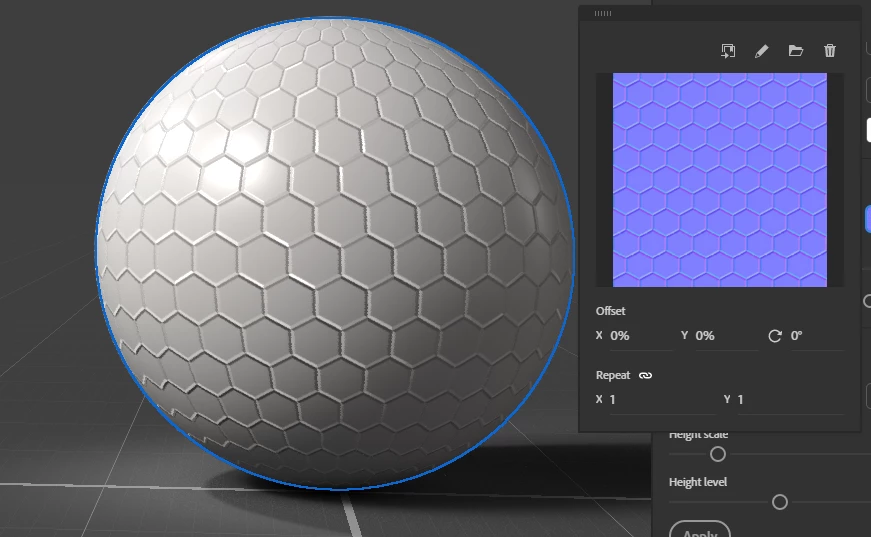
A normal map is usually in this 'blue' format colored image because it stores directional data - so not just up/down (black/white) but the curve along the bump which is stored in RGB channels for XYZ data.  They are usually created by 'baking' methods - where you first model a high polygon model then bake a normal map down to store all the detail and reproject it to a low polygon model.  You can also convert black/white patterns to normal maps in Photoshop under the Filter > 3D > normal map filter.


The result of a normal map is an 'illusion'.  No geometry is added, you can see the outer edge of this sphere is perfectly smooth, but the rendering software uses the map to fake bumps and valleys and curves to give it the illusion of an emboss/deboss or general shape change.
 

JMathews_0-1627575799916.png


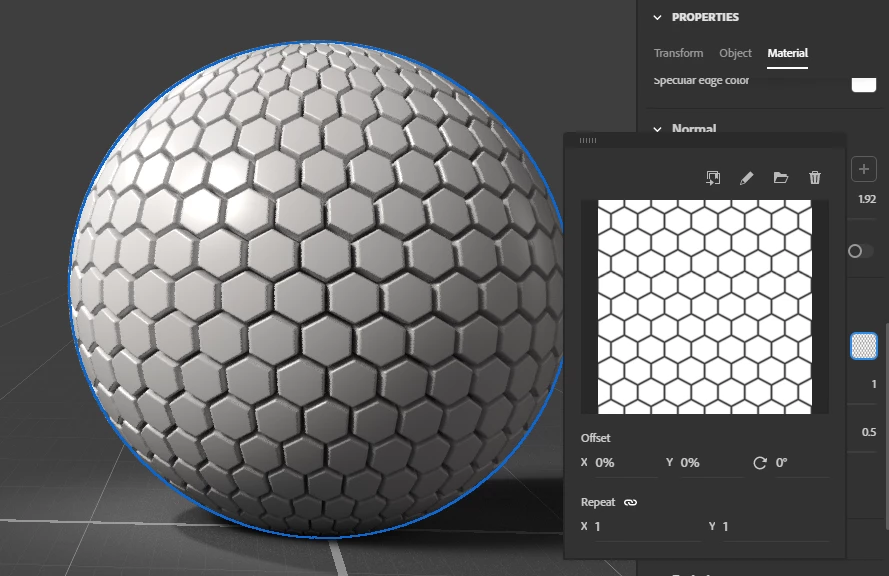
Displacement maps on the other hand are generally black/white (for basic displacement - there's also vector displacement but Stager doesn't support that as it's not very common yet).  Height maps are just black (for lowered) and white (for raised) - usually with mid-gray being 'flat'.  So they are easier to make in general.  However, they can't represent curves very well.  Displacement does best for large geometry offsets.
JMathews_1-1627576105610.png


The result of a displacement is not an illusion - the application actually offsets the polygons of the mesh so you have real 'cuts' and 'valleys' or other types of surface offsets.  Displacement usually requires a VERY high polygon count, so you combine the height map with tessellation settings (tessellating a mesh is taking each polygon and breaking it down into MORE polygons).


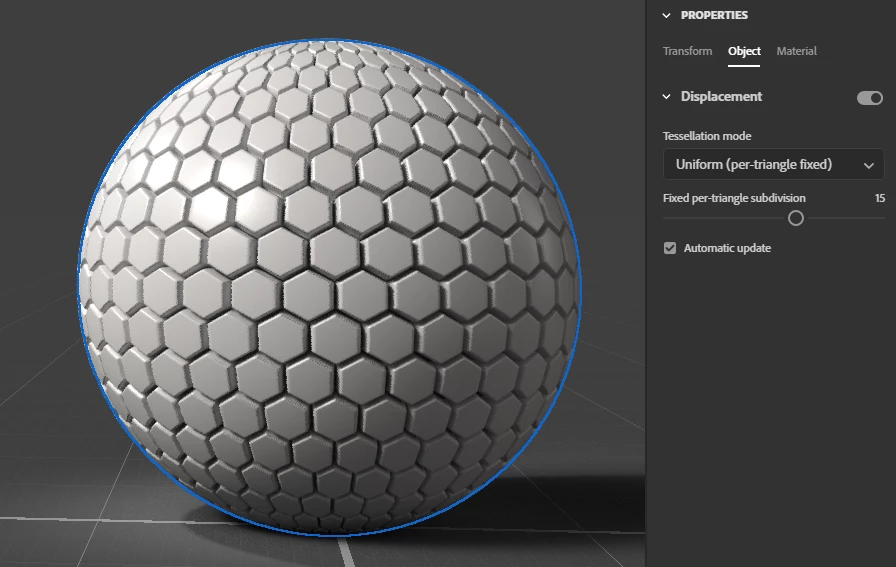
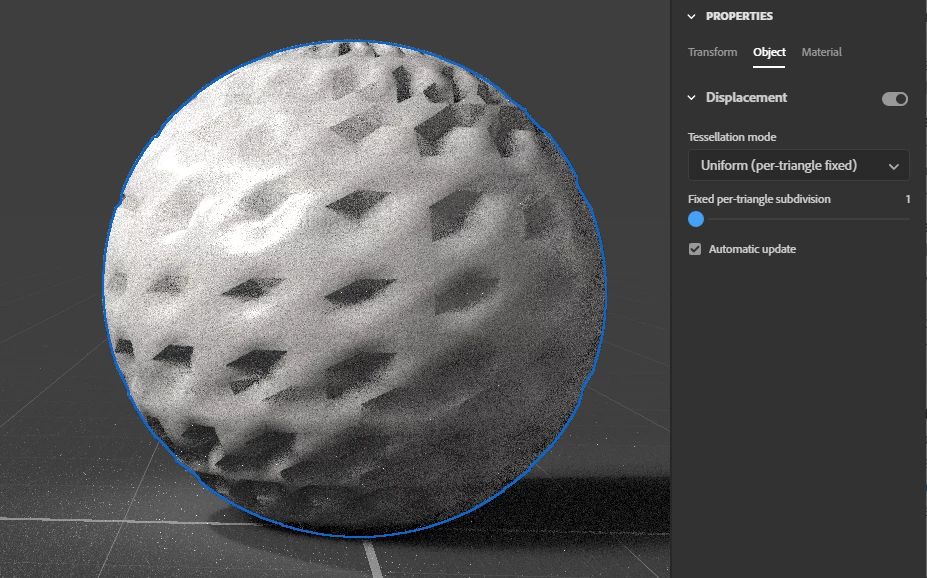
Here's an example of the exact same sphere and height map but without any tessellation - it only had about 4.5K polygons, which isn't enough for the engine to add all that detail.
 

JMathews_2-1627576256419.png


Here's 100K polygons

JMathews_3-1627576289949.png


And 1 million polygons:

JMathews_4-1627576339186.png


Computers these days are pretty good at handling polygons, so 1M is fine for a single asset but if you're building up a full scene it would be crazy to add displaement to everything.  So normal maps and height maps can both be useful - and it's a matter of choice of where to spend more polygon budget for details up close versus when you can get away with a normal map which is cheaper and faster for the app.


Senior Product Manager, 3D & Immersive

Votes

Translate

Translate

Report

Report
Community guidelines
Be kind and respectful, give credit to the original source of content, and search for duplicates before posting. Learn more
community guidelines
Explorer ,
Jul 29, 2021 Jul 29, 2021

Copy link to clipboard

Copied

Awesome...Can you show in a screen shot where your loading the displacement map file? Also, is the Displacement map option available in all materials or just "Adobe Standard Materials"? ty

Votes

Translate

Translate

Report

Report
Community guidelines
Be kind and respectful, give credit to the original source of content, and search for duplicates before posting. Learn more
community guidelines
Explorer ,
Jul 29, 2021 Jul 29, 2021

Copy link to clipboard

Copied

Ok I have it working, how to add polygons to a million? Mine looks like the one with 4.5k polygons.


thanks
Mark

Votes

Translate

Translate

Report

Report
Community guidelines
Be kind and respectful, give credit to the original source of content, and search for duplicates before posting. Learn more
community guidelines
Adobe Employee ,
Jul 29, 2021 Jul 29, 2021

Copy link to clipboard

Copied

LATEST

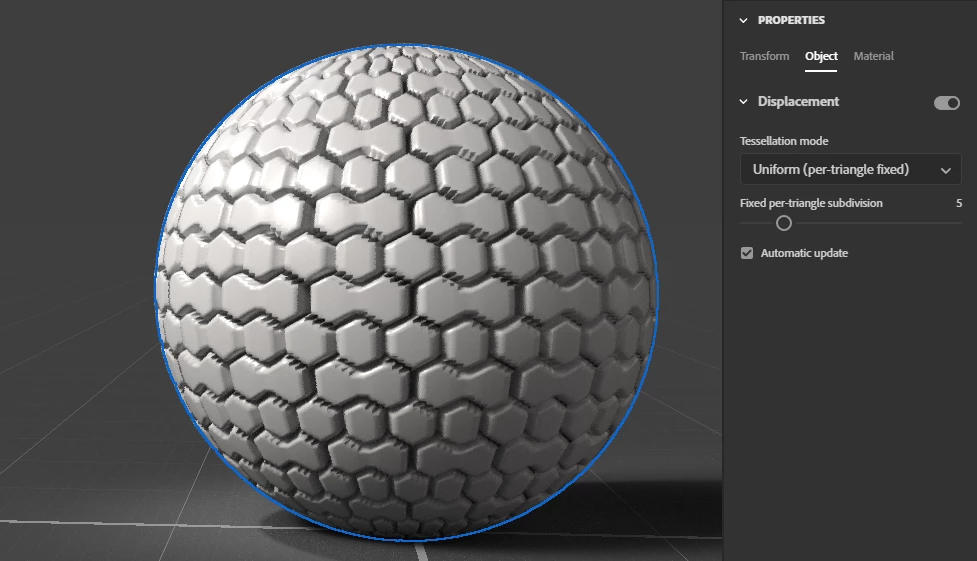
Select the object

Switch to the "object" tab in the properties panel

Turn on displacement switch + increase tessellation settings


JeanetteMathews_0-1627579517700.png


Votes

Translate

Translate

Report

Report
Community guidelines
Be kind and respectful, give credit to the original source of content, and search for duplicates before posting. Learn more
community guidelines
Explorer ,
Jul 29, 2021 Jul 29, 2021

Copy link to clipboard

Copied

You never cease to amaze me! Amongst a million 'things' on your overflowing 'plate' you have time to answer questions? Wow, does Adobe realize how valuable you are both personally and professionally? I doubt they do...


Ok enough praise for now...

All this info you have supplied, which I very much appreciate, is this from a Substance documentation that I can access and learn from, instead taking up your time? shalom

Votes

Translate

Translate

Report

Report
Community guidelines
Be kind and respectful, give credit to the original source of content, and search for duplicates before posting. Learn more
community guidelines
Adobe Employee ,
Jul 29, 2021 Jul 29, 2021

Copy link to clipboard

Copied

Hhaa, all good.  This is my morning routine - helps me stay connected to the community and user issues to be involved on forums and social posts - listening is what helps us build great products!


In general Substance 3D Documentation is here:

 https://substance3d.adobe.com/documentation/sg/substance-3d-stager-213060480.html


There is a general page that covers all material properties:

https://substance3d.adobe.com/documentation/sg/materials-213060354.html


Unfortunately there isn't detailed workflow documentation for displacement, which I can work on adding!


In the mean time, you add normal maps to the 'normal' material property and height maps to the 'height' material property.  They are both in the same location:


JMathews_0-1627577509662.png


One note is that Substance materials dont' always show the raw Adobe Standard Material properties.  Instead they have custom properties that control these for you behind the scenes. 


Senior Product Manager, 3D & Immersive

Votes

Translate

Translate

Report

Report
Community guidelines
Be kind and respectful, give credit to the original source of content, and search for duplicates before posting. Learn more
community guidelines
Explorer ,
Jul 29, 2021 Jul 29, 2021

Copy link to clipboard

Copied

Awesome again, I will work on a tutorial for displacement maps also! and keep an eye for yours too!

TY

Mark

Votes

Translate

Translate

Report

Report
Community guidelines
Be kind and respectful, give credit to the original source of content, and search for duplicates before posting. Learn more
community guidelines
Resources