Answered
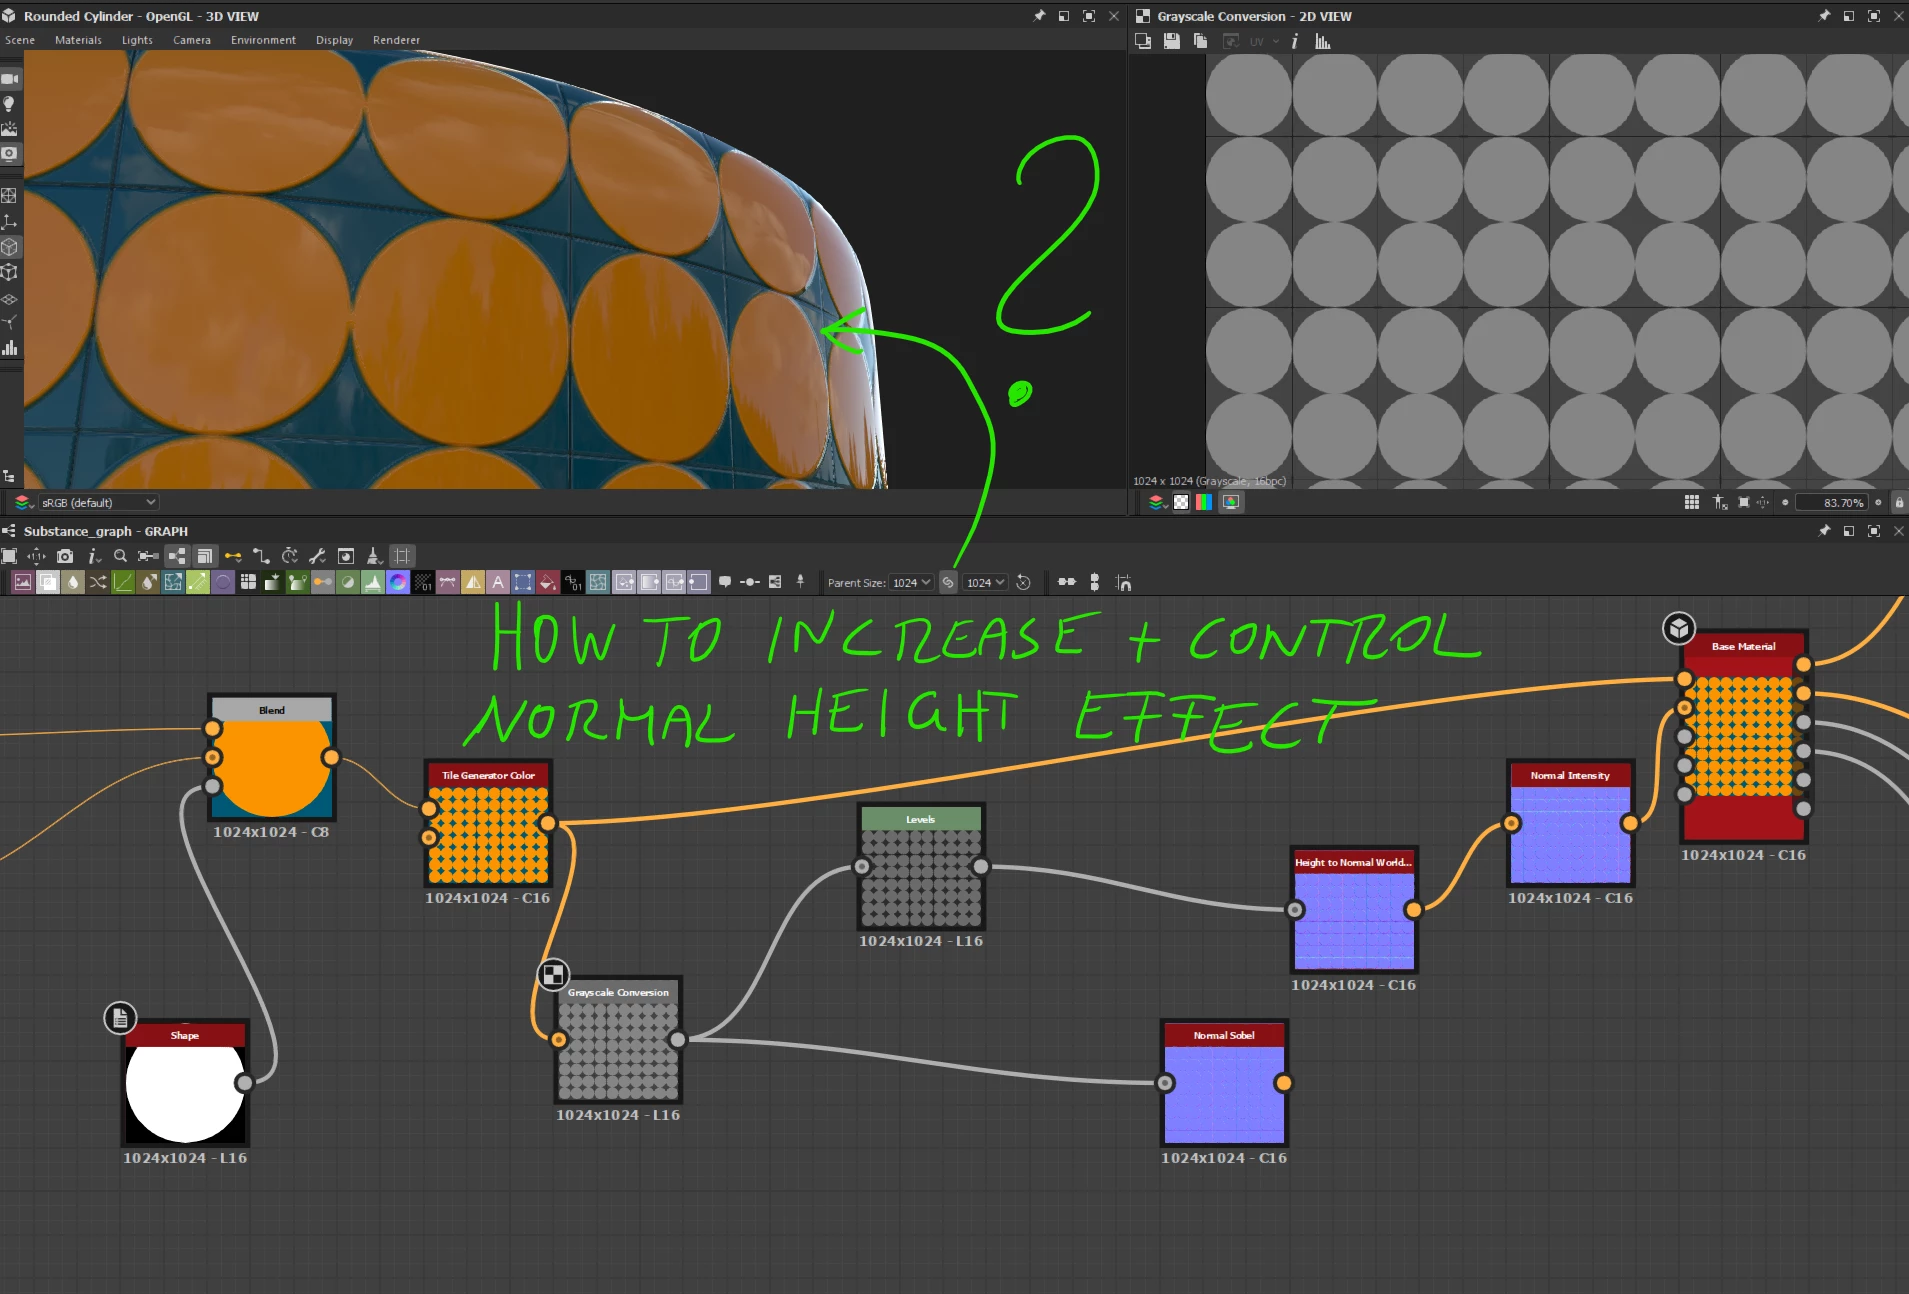
How to increase + control the Normal Map Height Effect?
How to increase + control the Normal Map Height Effect?
I don't want to use a Height Map or Displacement map. Also, I don't want to use Displacement in the preview. I want to focus mainly on the Normal Map effect and find a way to control the overall effect on the depth/height.
When I look at the sphere/circle, it doesn't pop.
If I want to increase the depth effect and let's say the circle should pop out from the bottom of the tiles, how do you set up the nodes?
thanks for any ideas, hints, tips and tricks,
appreciate it!