james ca60449927
Known Participant
July 12, 2017
Answered

Seeking a better Frequency Analysis Plug-In

  • July 12, 2017
  • 3 replies
  • 1338 views

I'm trying to use Audition to make certain measurements of audio equipment, as those of you who've seen my previous posts are aware. I know it wasn't made for that, but I've got it and I'm trying to make it work.

After several hours of frustration, I've concluded that Audition's Frequency Analysis module, while in some ways very good, is a serious limitation for me. The reason comes down to its windowing capabilities. I'll demonstrate the problem a little further down. For now I'll just get to the point: Is anyone aware of a plugin that works with Audition and offers expanded FFT-windowing capabilities? I really don't need much; in an ideal world--for my current needs--I'd simply add a rectangular (Dirichlet, or no windowing at all) windowing capability to the current program. I do not need or want real-time FFT: I just want to analyze files. (The only reason I'm interested in an Audition plugin is workflow. Stand-alone programs would require a couple of extra steps: saving files, switching programs, opening files.)

So that's it: I'm seeking recommendations of a plugin that offers similar functionality to the built-in module but adds rectangular windowing. Suggestions?

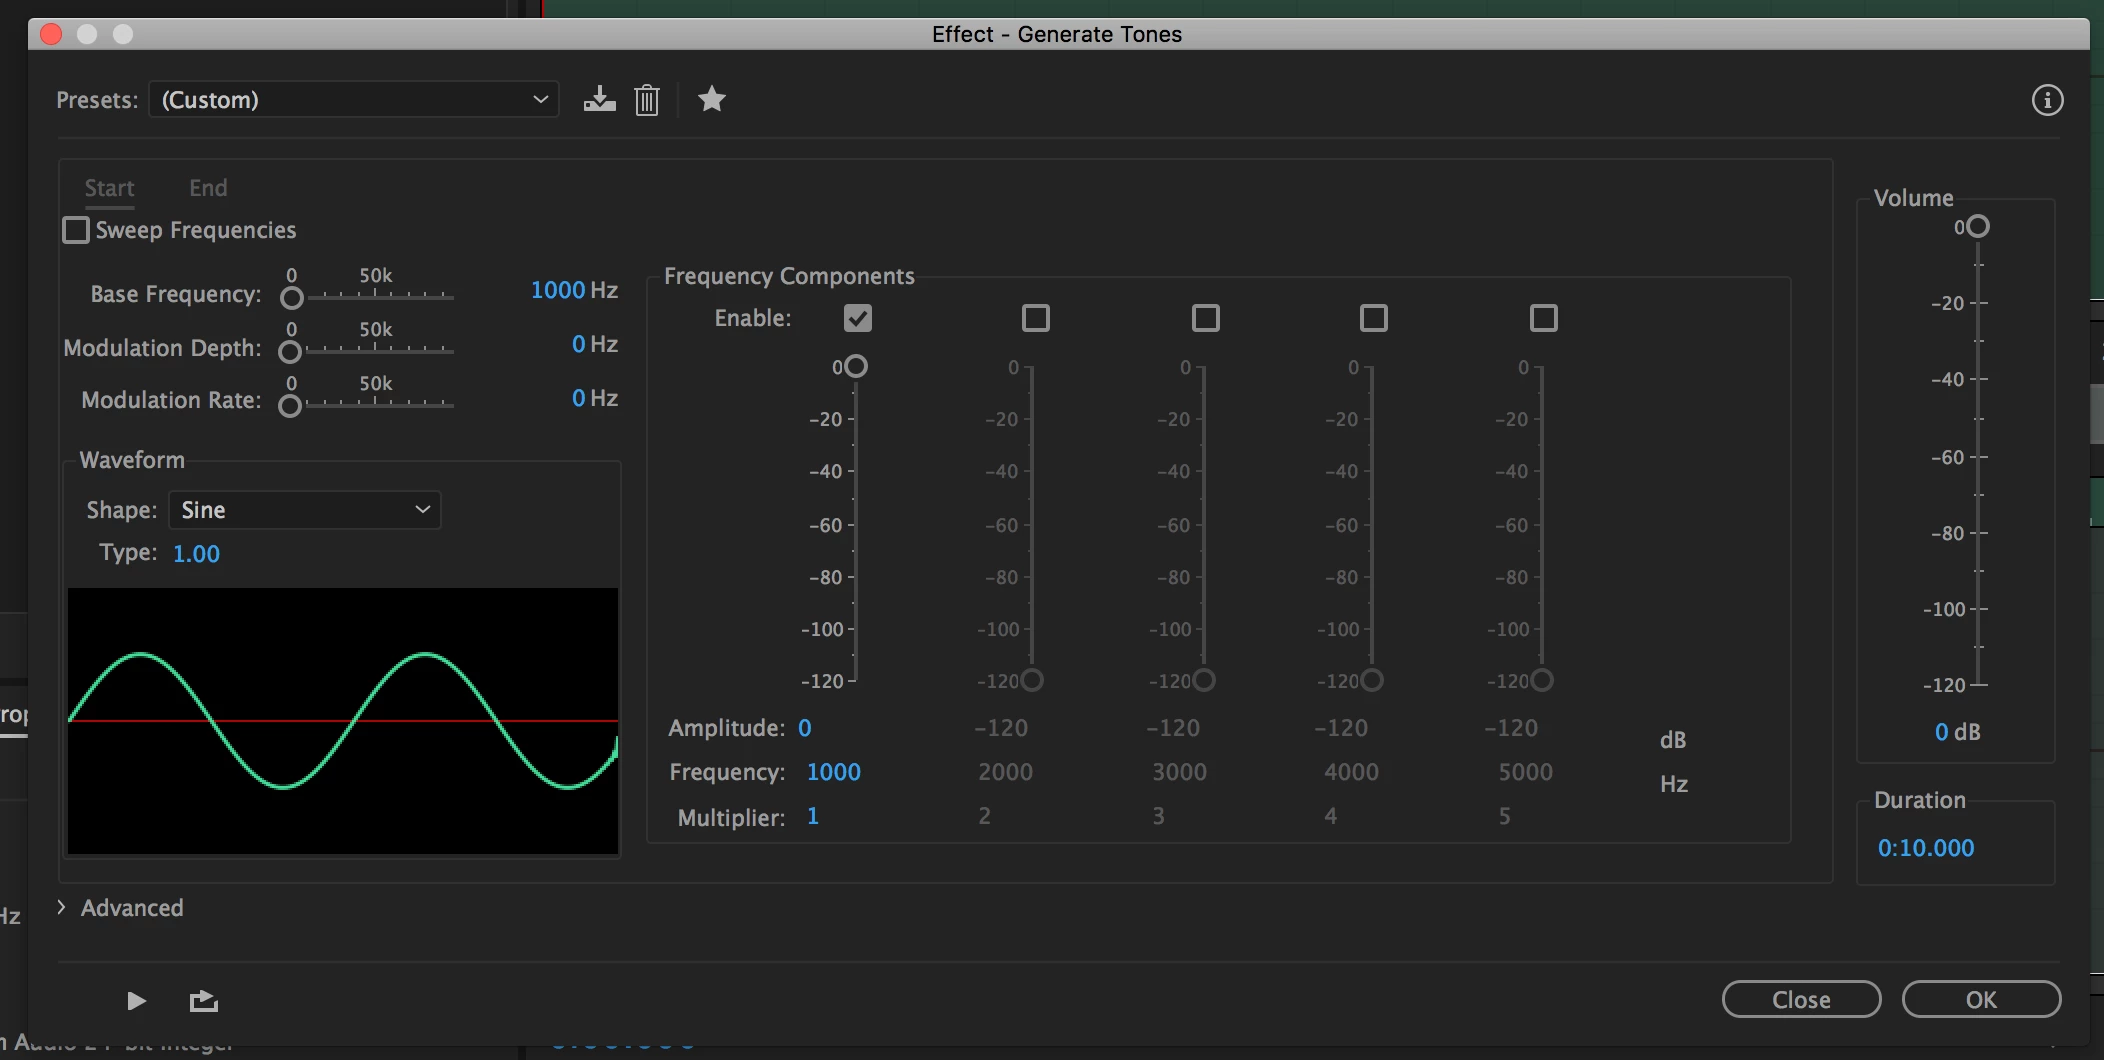
Now I'll demonstrate the problem. My goal is to create stimulus files (to send to various audio devices) consisting of either simple sine waves or combinations of simple sine waves. I'll then record and analyze the devices' output. Here, I'm creating a stimulus file containing a 10 second, 1kHz sine wave. Simple:

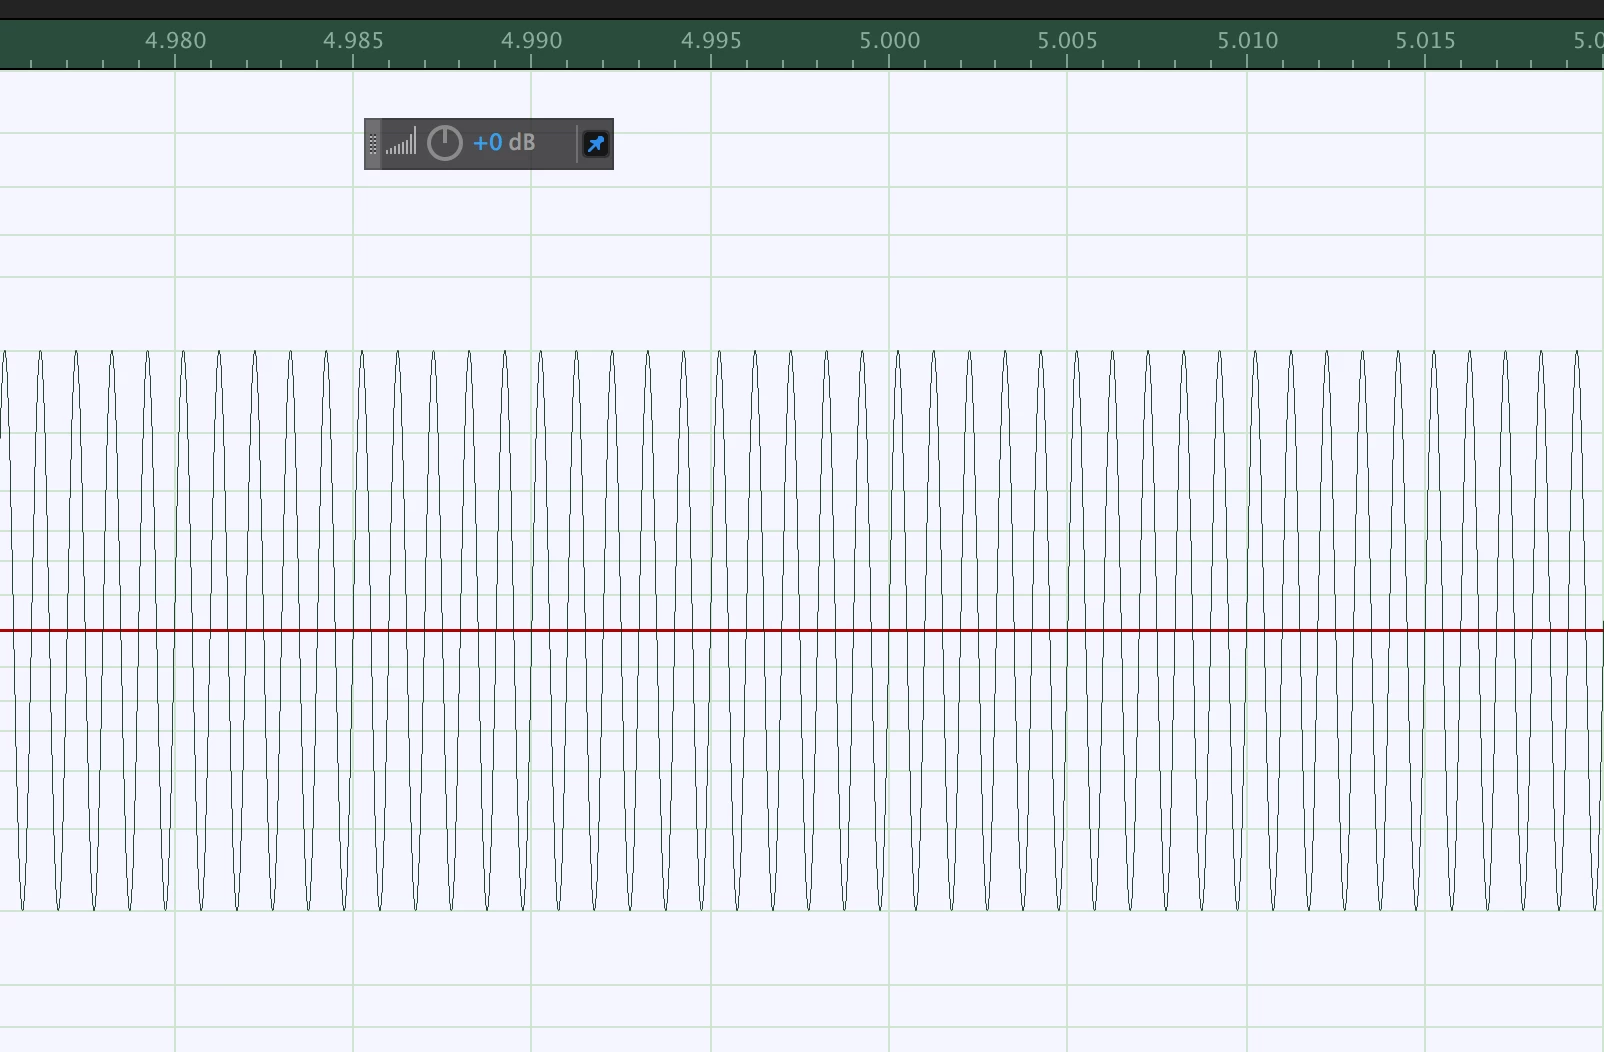
A little bit of the signal:

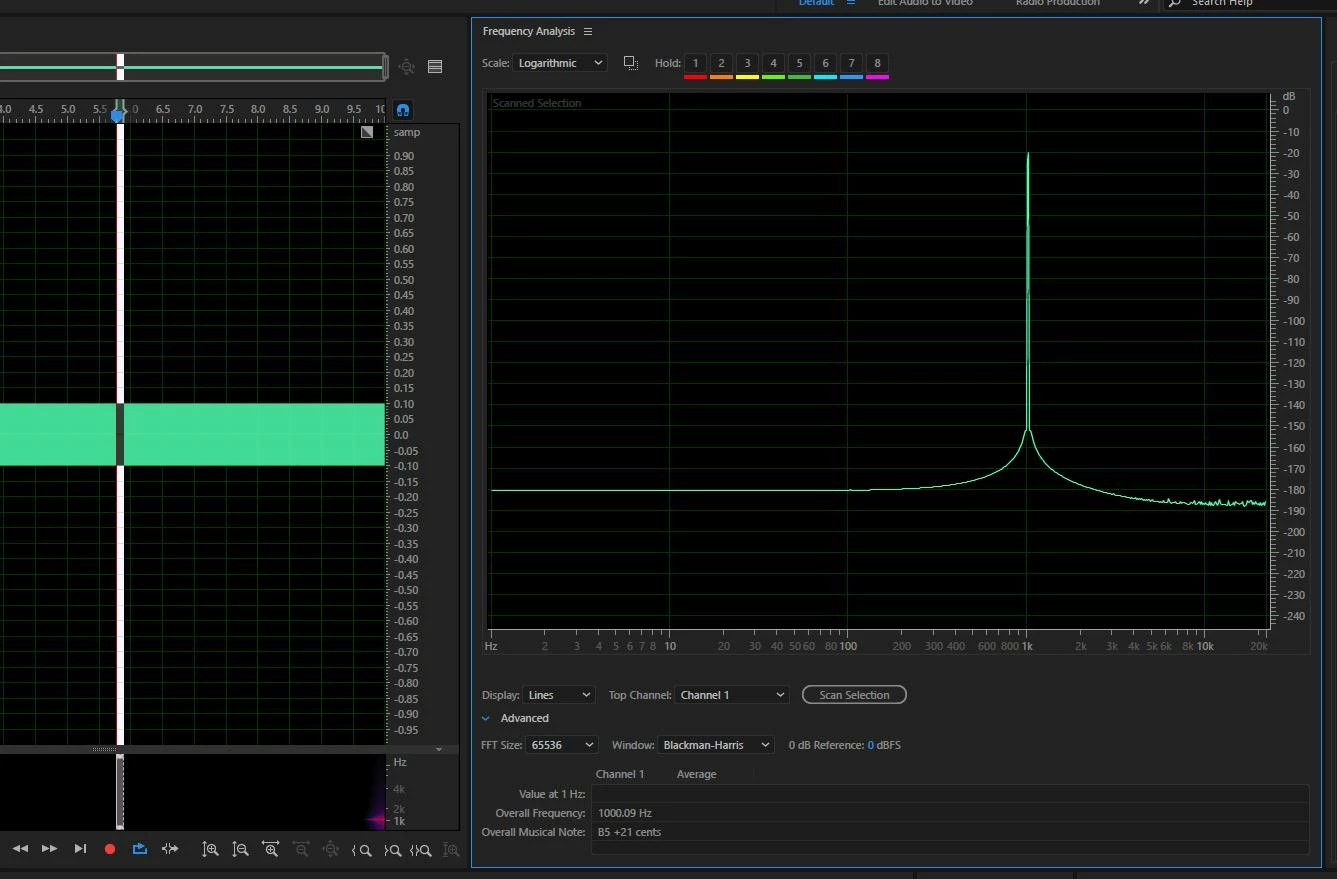
Now the problem: Here's what I see when I do an FFT (windowing choices shown):

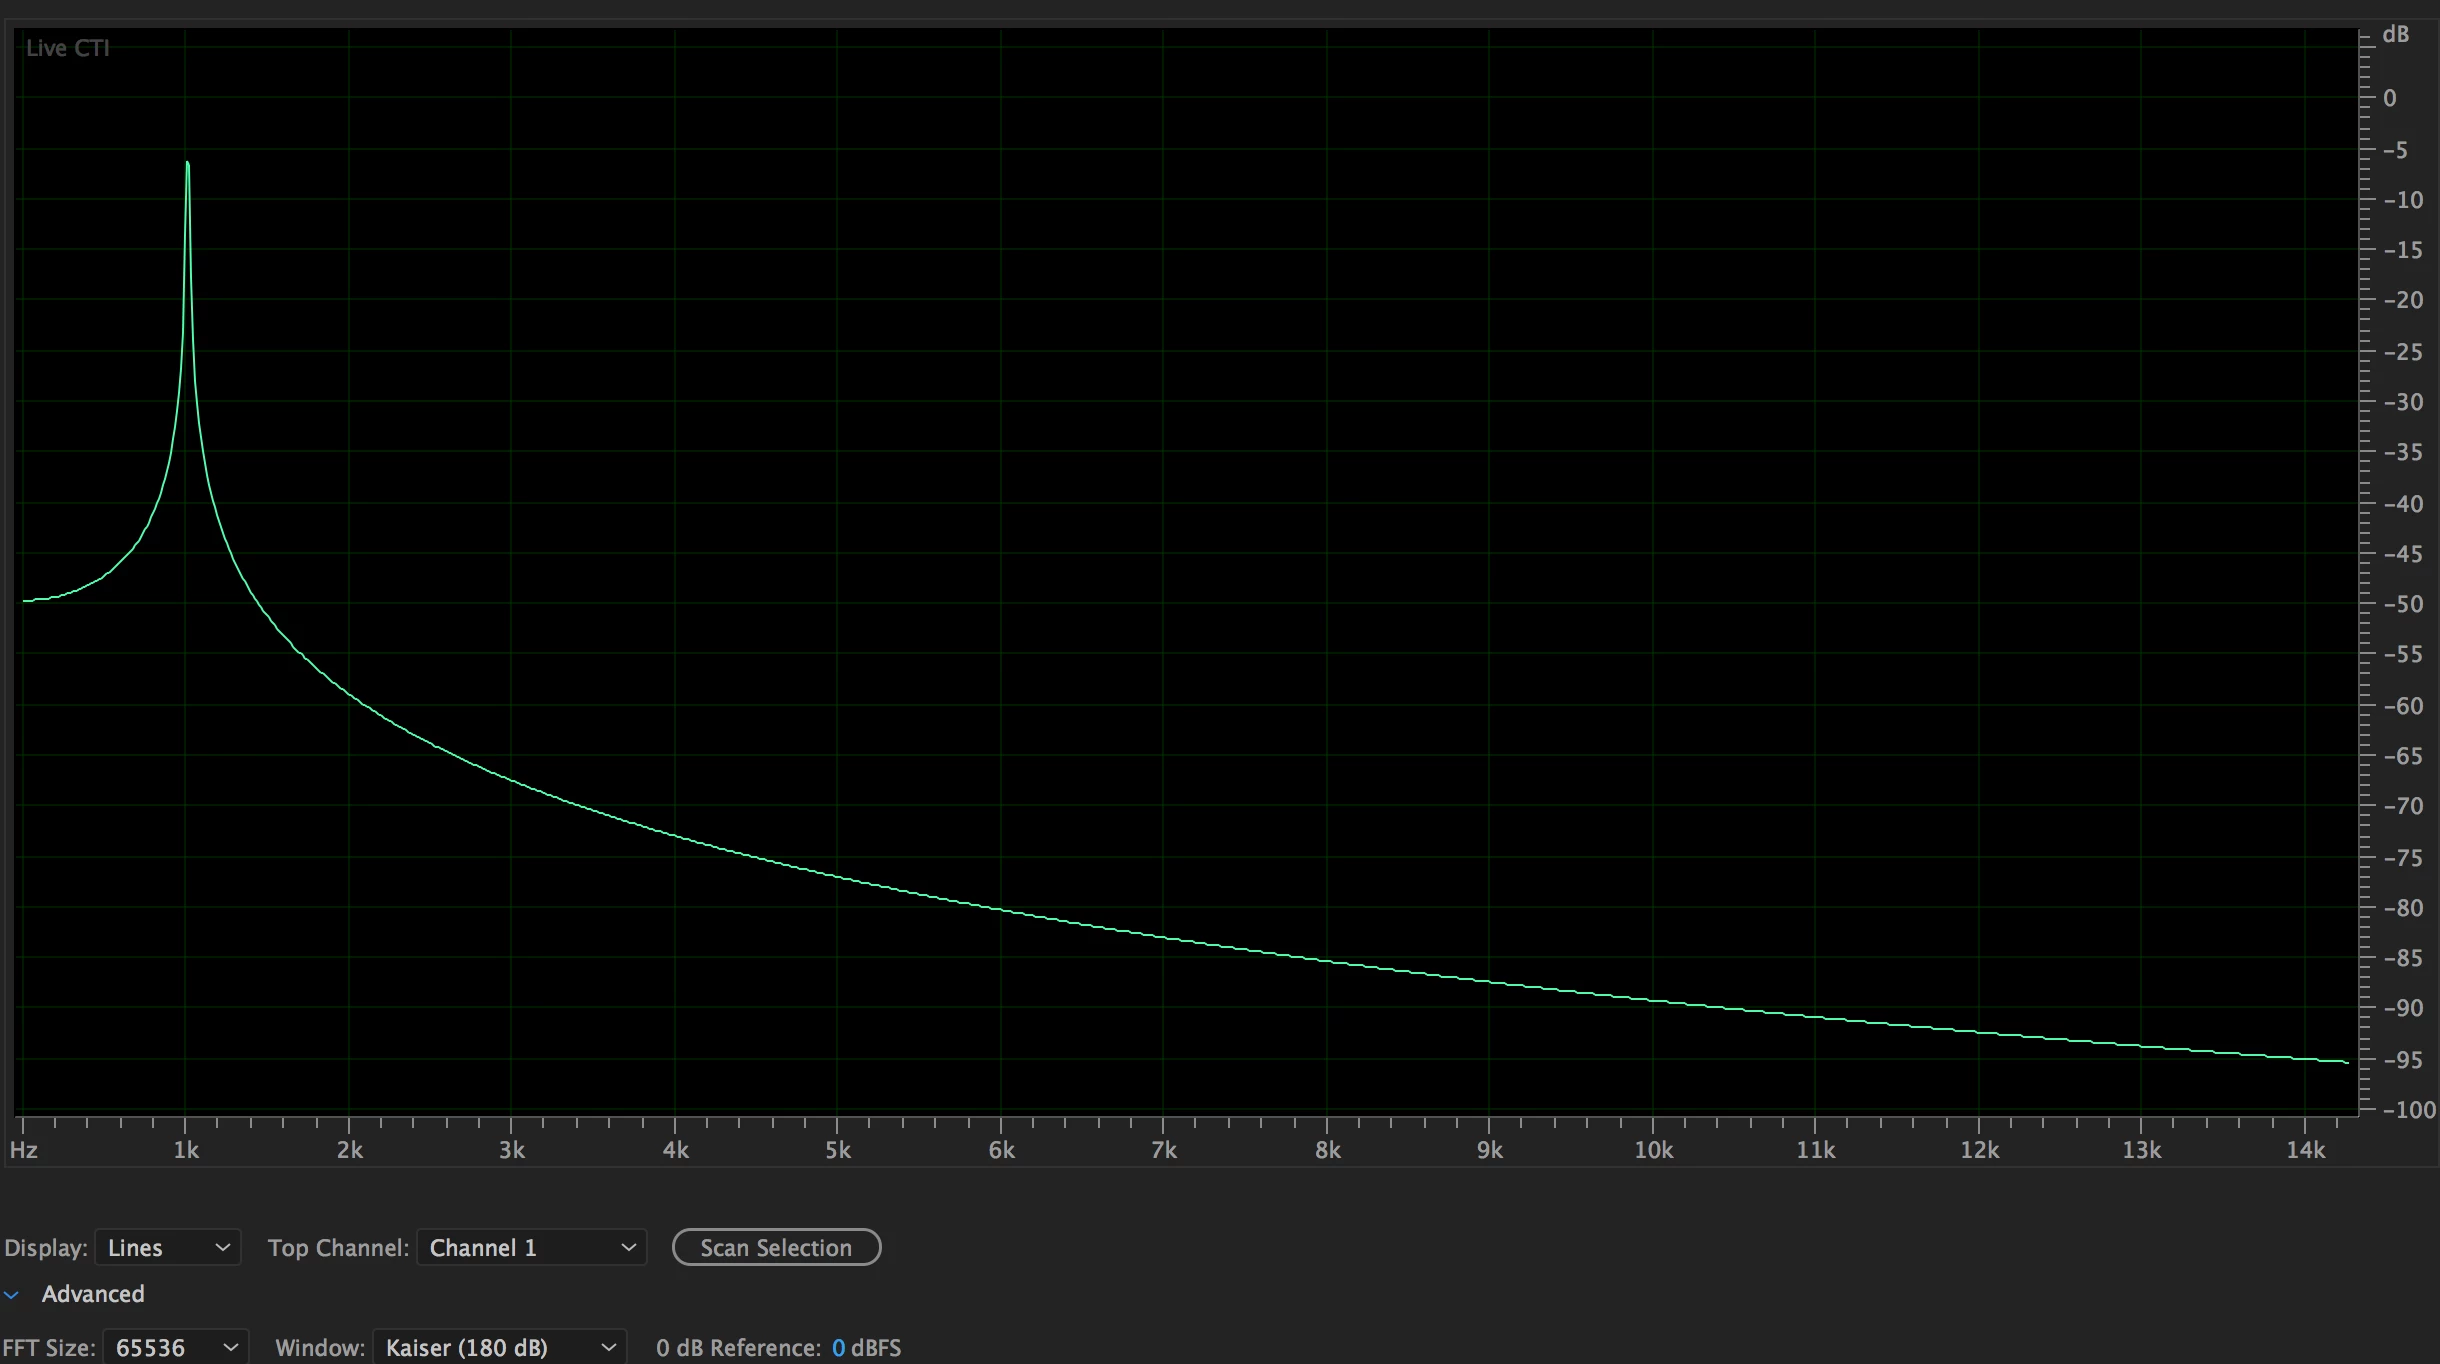
This is an FFT of the sine wave I just created. What I want to be seeing instead is a narrow peak at 1kHz and then a nearly constant noise floor. Changing the windowing choices changes the shape a bit, and can marginally raise or lower the apparent background "noise", but it's basically all the same. The signal itself looks OK, so I'm assuming the spreading here is indeed a consequence of the windowing. (What else could it be? If I'm missing something obvious, please let me know.) I'd like to see a noise floor that reflects the limitations of the equipment, not the windowing of the software. That's my goal.

Stimulus lengths will be multiples of seconds and so will have value zero at the beginning and the end, so there's no need for windowing at all: The ends will match up. So a "rectangular" option, which does not attenuate the signal at the ends, should work well. Make sense? Other ideas?

So, recommendations appreciated. And thanks.

Jim

This topic has been closed for replies.
Correct answer SteveG_AudioMasters_

That looks like the scan of the entire file you generated. If you leave the Frequency Analysis window open, but just select a small area  in the file, you'll end up with a display more like this:

3 replies

JohnVo
Inspiring
July 13, 2017

hi

have you tried  Voxengo Spam it's free?

does somebody use it?

thanks

james ca60449927
Known Participant
July 13, 2017

Giovannivolontè  wrote

hi

have you tried  Voxengo Spam it's free?

does somebody use it?

thanks

I have not. But my experience so far has been that any FFT plugin that says "real time" only works with music/sound files that are PLAYING. I was looking for a way to do better static FFTs, on files or parts of files. Thanks to people helping here, I was able to get Audition to do what I wanted it to.

ryclark
Participating Frequently
July 12, 2017

Just been copying your experiments and get similar results to yours. However if I reduce the audio selection so that it doesn't include the first 700ms of audio then you get a different result.

If you halve the FFT size then you can also halve the missing section from the start to around 350ms and so on. But it doesn't seem to matter how long the file is or how much is selected as long as you don't include the first few cycles depending on the FFT size. So I don't know if it is a bug in Audition or if there is some logical scientific explanation. But no doubt Steve will have something to add to this new discussion.

Edit. He got there before me. Try selecting a bit further into the file, say at least 1 sec in.

SteveG_AudioMasters_
Community Expert
Community Expert
July 12, 2017

I suspect that the anomalies are indeed a windowing function, and for reasons that I hope are obvious, I wouldn't get too close to either the start or end of the file!

Also, if you look at the amplitude of the discrepancies at the bottom of my file, you'd have to admit that this is pretty low...

james ca60449927
Known Participant
July 12, 2017

Weird. The only way I can get rid of the anomalies is to go to the very beginning of the file, or the very end. But then I'm back where I started, with very high apparent "noise". By dragging one end of the range, I can make things bounce around a bit, with multiples of 1 second giving the lowest noise. That's hardly ideal for what I'm trying to do, but I can probably work with it--if I can just get rid of the kinks. Perplexed.

Thanks.

SteveG_AudioMasters_
Community Expert
SteveG_AudioMasters_Community ExpertCorrect answer
Community Expert
July 12, 2017

That looks like the scan of the entire file you generated. If you leave the Frequency Analysis window open, but just select a small area  in the file, you'll end up with a display more like this:

james ca60449927
Known Participant
July 12, 2017

That looks very promising--thank you. Can you explain what's happening? Why does scanning a shorter segment of the signal give better results? BUT more importantly, I'm not getting the same result you are. Looks like you've got a 1kHz file, max FFTs, Blackman-Harris, and are looking at about a tenth of a second, log scale. Here's what I get when I do that:

What am I missing?

Thanks!

SteveG_AudioMasters_
Community Expert
Community Expert
July 12, 2017

https://forums.adobe.com/people/james+ca60449927  wrote

That looks very promising--thank you. Can you explain what's happening? Why does scanning a shorter segment of the signal give better results?

Because scanning the whole signal includes the start and end of the file, which represent anomalies, and clearly aren't pure tone. Ideally you select a section that starts and ends with a zero crossing (a snapping option if you right-click on the timeline), although this is nowhere near as destructive as the start/finish is. I redid this at 0dB just to see if that made a difference, and it doesn't appear to. This is a selection of about half a second: