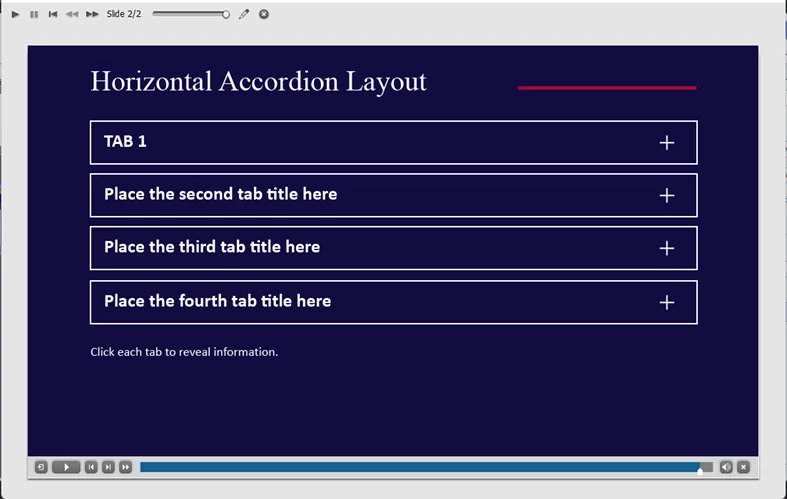
Recognize your screenshots to be from the Business Quick Start Project. As Rod points out, Horizontal Tabs is one of the most complicated layouts. It has a lot of grouped objects, and in the Timeline only one group is visible. The reason for the complication is that you cannot move any interactive object (button) without losing its functionality. If you look at Vertical tabs you'll find them some easier to understand but for someone new to the application it can still be overwhelming.
It is a good idea to start by exploring some Ready-to-go slides from the Quick Start Projects. Eventually you may have a look at some of the blog posts I wrote about them. Here are two links but if you use the tag QSP or 'Ready to go slides' on my blog you'll find some more:
https://blog.lilybiri.com/editing-ready-to-go-slides-quick-start-projects-part-1-text-and-images
https://blog.lilybiri.com/editing-ready-to-go-slides-quick-start-projects-part-2-interactions
Some tips if you want to continue with this specific slide:
- Open the Timeline panel because it is hidden by default in the Newbie UI. You'll see the title 'Timeline' at the bottom. It will be good to choose the zoom percentage Best Fit (CTRL-0) to have the stage adapt to the new situation.
- Drag the divider line between the timeline names and the timeline itself so that you are able to see the full names of the folders and have access to the radio buttons (where you see the multiple X) under the Visibility title. You see that the group 'HorizontalAccordionPosition0_9' is visible, while the other groups have the red X, meaning they are invisible. BTW you expand a group by clicking the tiny arrow to the left of the name. It is a toggle button, you can use it also to collapse a group. In this complicated situation it is often easier to select in the Timeline panel over selecting on the stage. The team who has developed this QSP has a good labeling discipline, although with very long names.
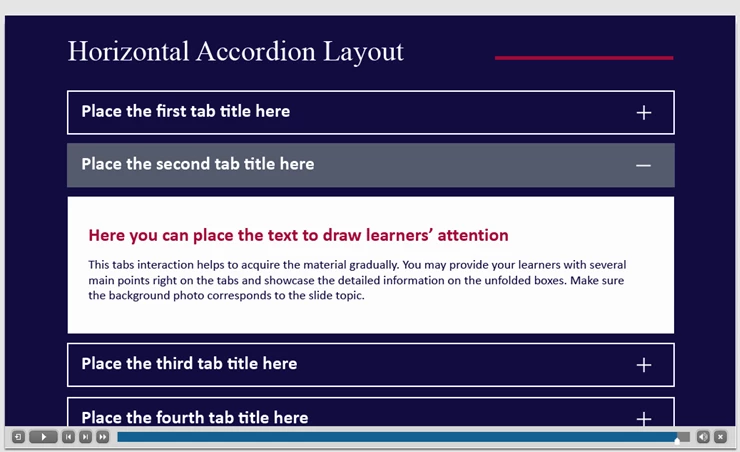
- Replace the placeholder text for the first tab and eventually other items in the group. Than collapse the group.
- Click the icon in the Visibility column to hide this group and click the same button for the next group 'HorizontalAccordionPosition10'
- Repeat this workflow for all the tabs.
Seems rather cumbersome for a new user, sorry about that but repeat that you have chosen probably the most complicated layout in the Ready-to-go slides.