Participant
October 12, 2025
Answered

Mesh Normals are facing inward importing from Blender3D

  • October 12, 2025
  • 2 replies
  • 124 views

I am currently exporting my shirt mesh into substance painter form Blender3D. I exported both the high poly and the low poly as a .FBX and made sure to tik 'selected objects'. Before that, I have already made sure that the face orientation for the obejcts were facing the correct way before exporting. I follow the basic fundamentals of importing into Substance by opening a new file as an OPENGL 2048x2048 and what not.

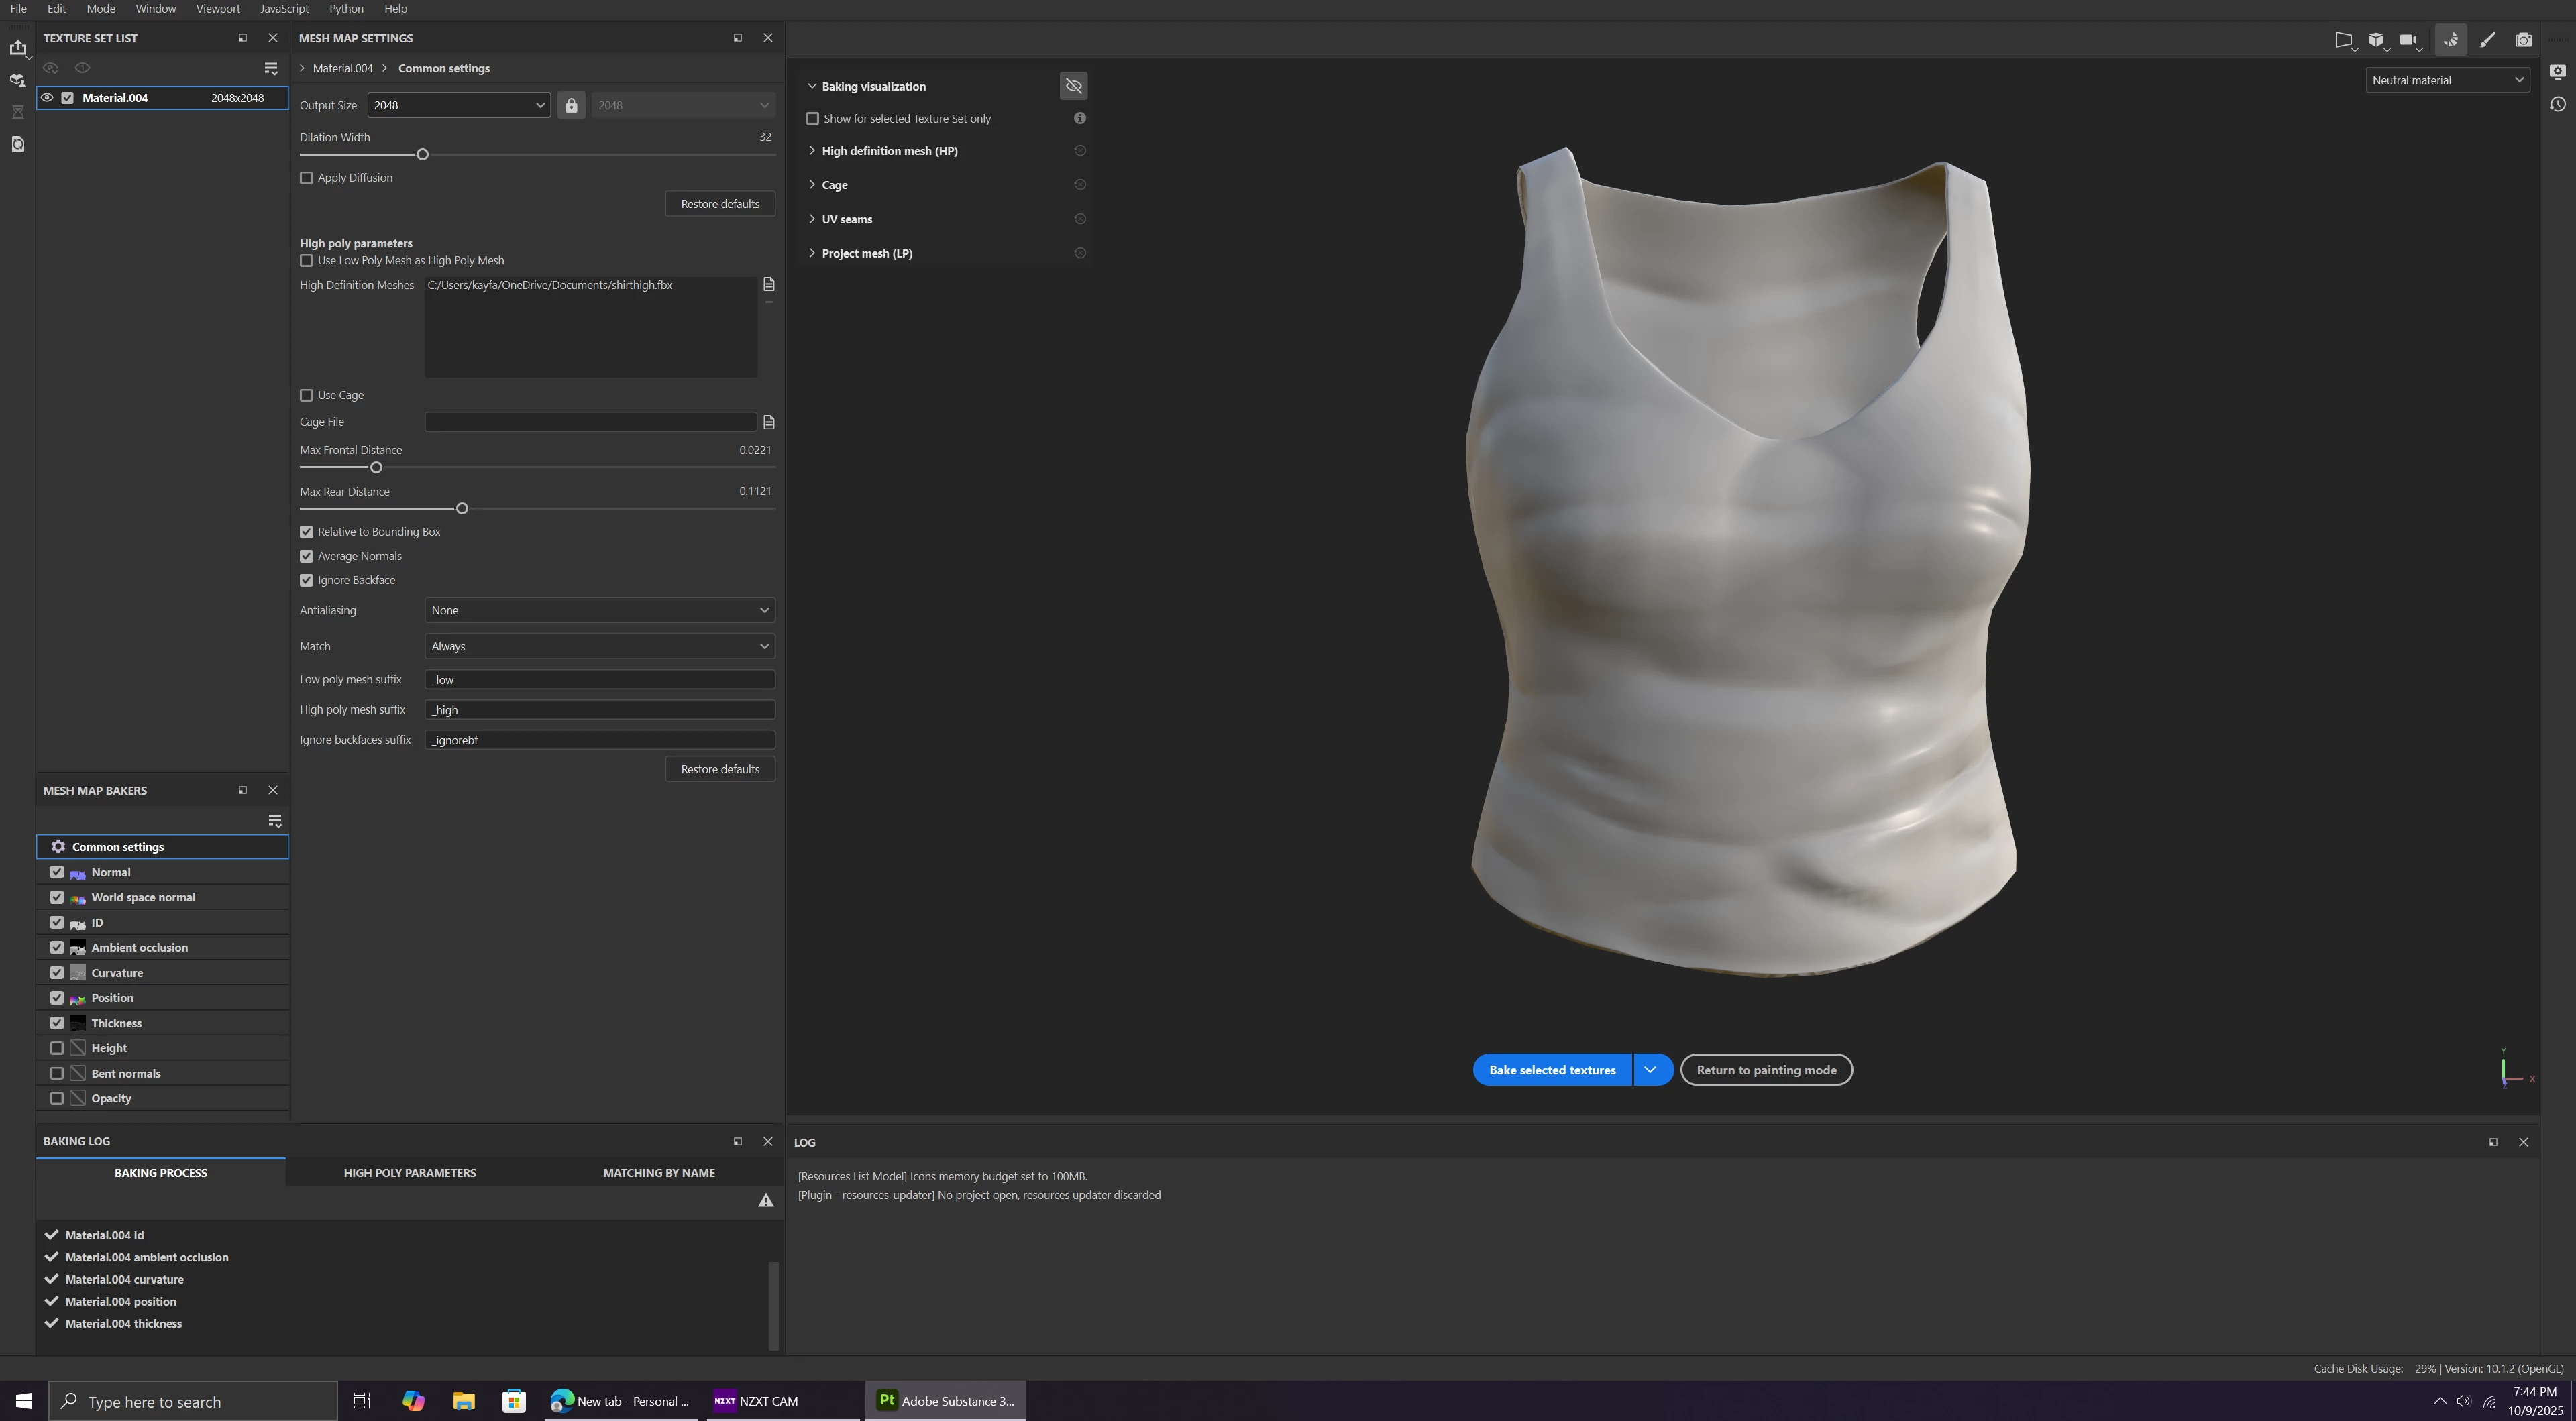
However, when I go to bake the High poly details on the low poly, my the high poly details are facing inward. To attempt to fix this, I saw a tutorial where you you click Colorspaces and saw that most of my maps were set to DIRECT3D even though I have already opened the file as a OpenGl.

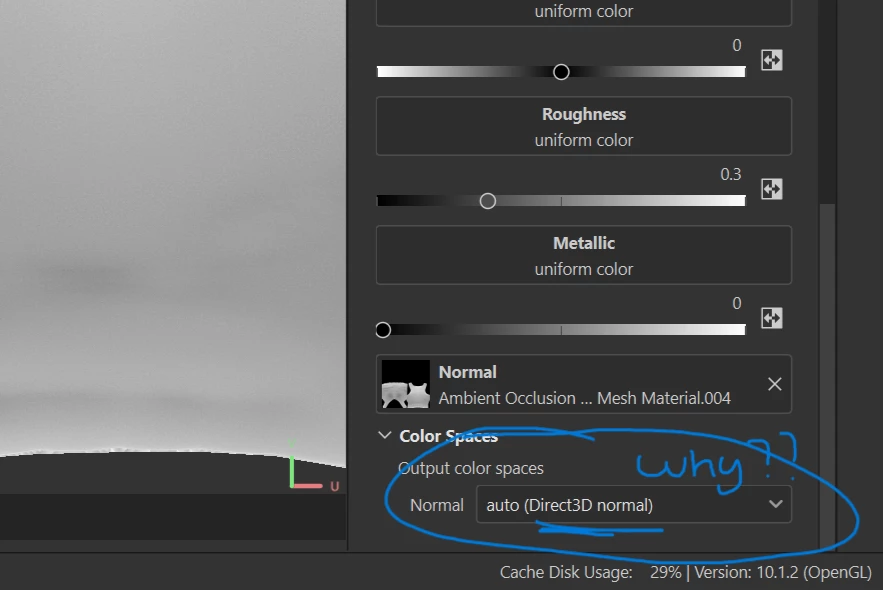
Most of my maps are set to this and I have tried to change it to OpenGl. Howver, once i exit out of it to go to another map thats displaying the same thing and return to it, It reverts back to direct. How can I fix this? Is this whats causing my sculpt to look weird?

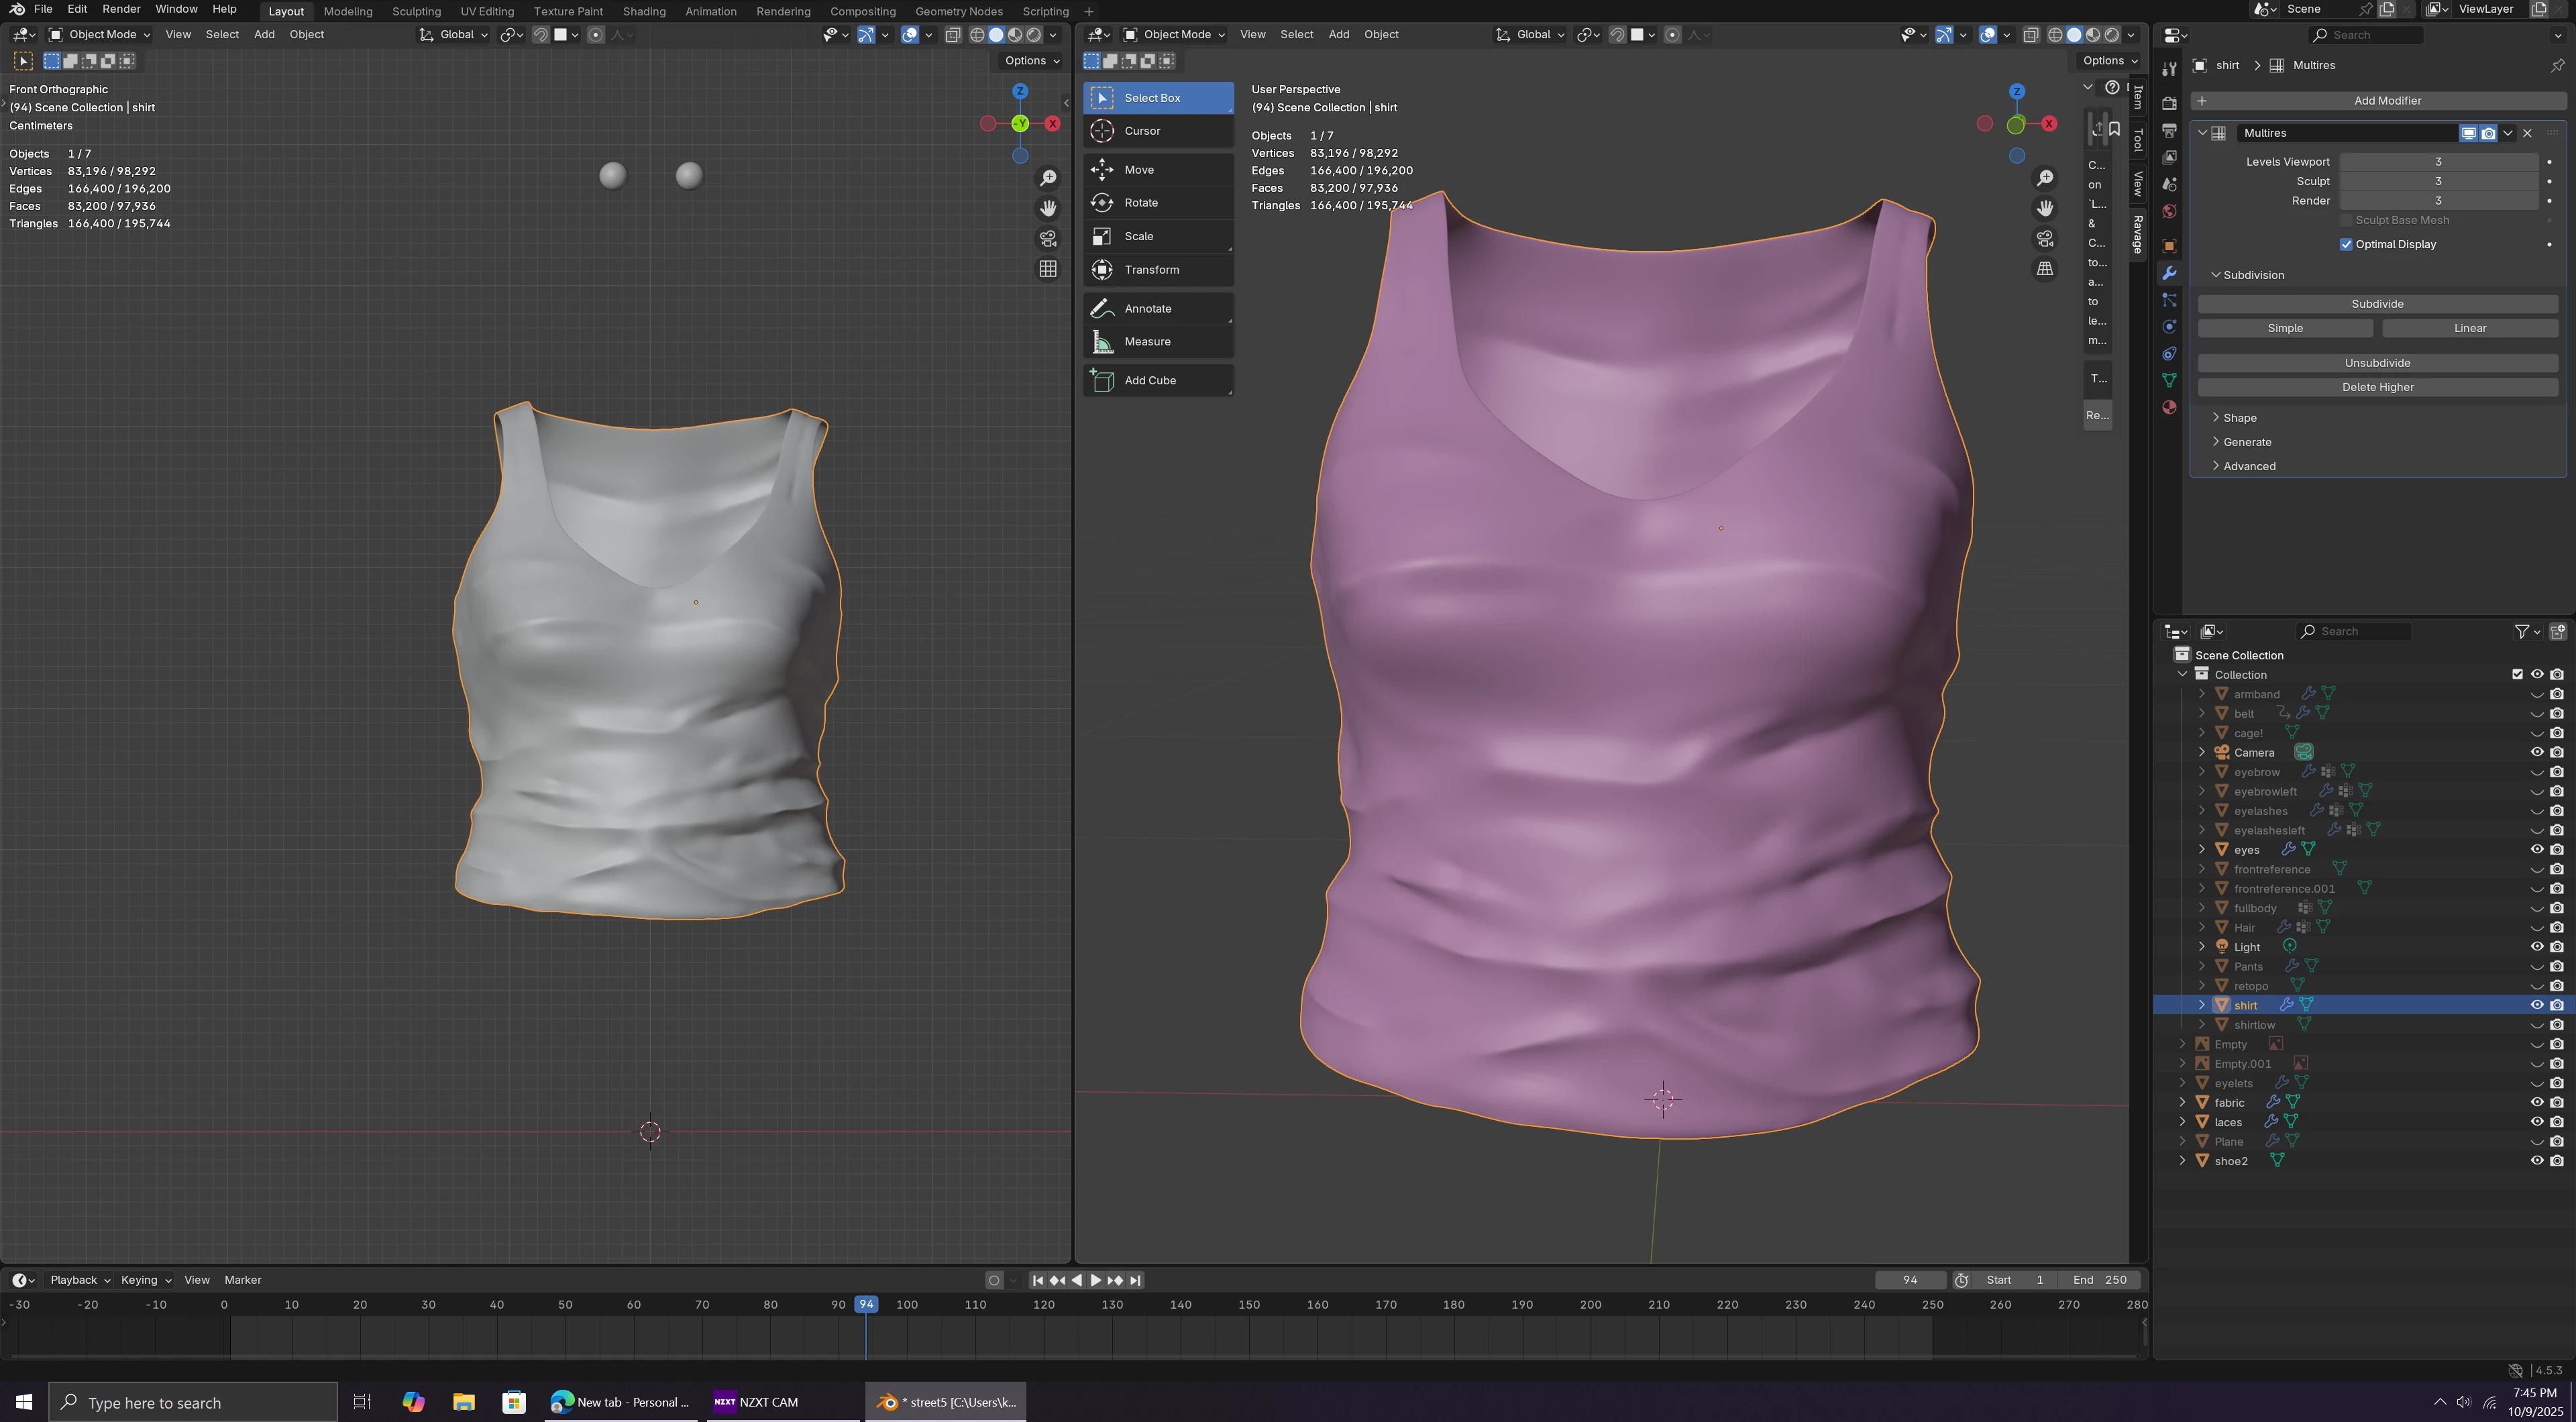
Heres how my mesh is suppsoed to look. Anybody know how to fix this?


Correct answer useredoughwu

I figured out the issue! In case anyone else goes through this. The solidify modifer was the culprit! I totally forgot that  a solidify modifer basically creates more faces within the shirt that ultimately face each other, which was causing the inversion. Luckily, I did an incremental save and I was able to go back and delete the solidfy modifer completely. However, if its already applied - you have too delete the faces manually. 

2 replies

Participant
October 13, 2025

Hey, thanks for your reply! So, I tried doing what you said and I placed the max frontal distance really low but It seems my mesh breaks even furthur.

I tampered with the settings and I am still getting the same result. I jsut dont know what it is I'm doing wrong?

Cyril Dellenbach
Community Manager
Community Manager
October 13, 2025

Hello @useredoughwu,


You don't need to edit the color space of your map. As long as you're baking it inside Painter, the map will be displayed properly, so I don't advise to change the color space of the normal map. If your rendering software needs OpenGL or DirectX, you can edit that at export.


For your issue, I suspect that the problem comes from the baking. Considering your mesh is very thin, make sure the Max frontal distance value is low enough, so the cage doesn't overlap itself.


Keep me posted.


Cyril Dellenbach (Micro) | QA Support Artist | Adobe
useredoughwuAuthorCorrect answer
Participant
October 13, 2025

I figured out the issue! In case anyone else goes through this. The solidify modifer was the culprit! I totally forgot that  a solidify modifer basically creates more faces within the shirt that ultimately face each other, which was causing the inversion. Luckily, I did an incremental save and I was able to go back and delete the solidfy modifer completely. However, if its already applied - you have too delete the faces manually.