Christina1111
Participant
March 27, 2026
Question

Remove UV seams

  • March 27, 2026
  • 1 reply
  • 54 views

Hi everyone,
I'm new to SP and am trying to understand how texture placement works with the various Projection options.
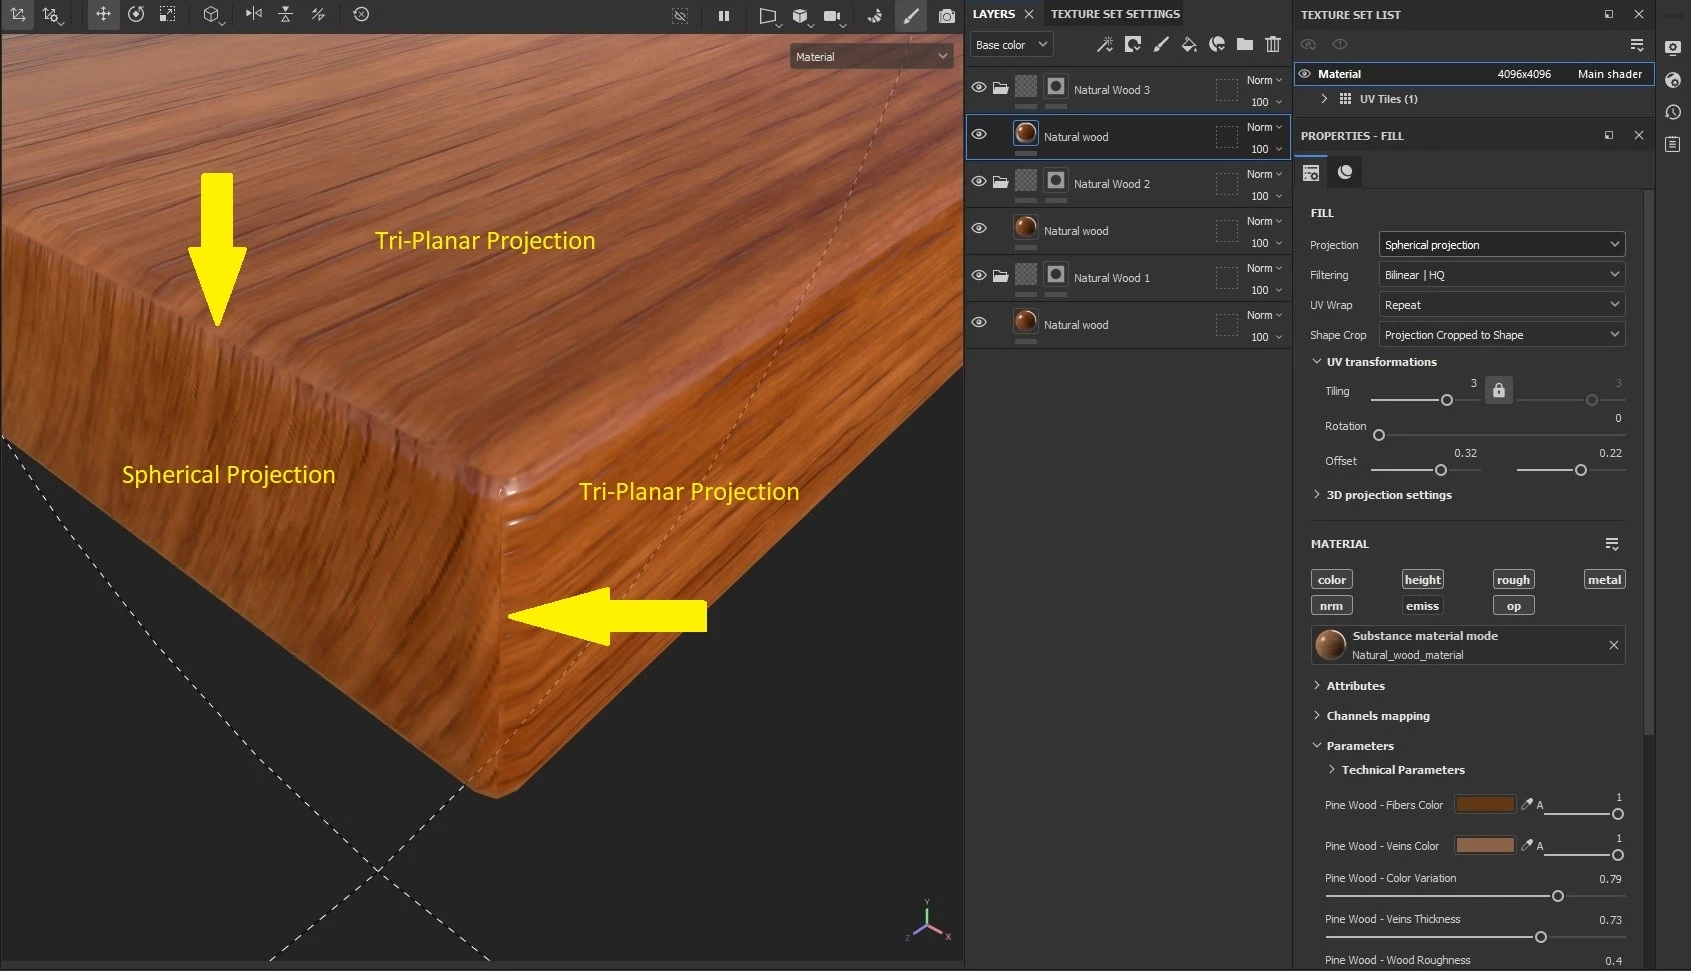
In Image 1:

you can see how I assigned the different projection modes for each side of the model. And from a relatively far away, it doesn't look bad.
But up close, in Image 2:

the UV stitching lines are clearly visible.

How can I fix this?

Thanks!


    1 reply

    Cyril Dellenbach
    Community Manager
    Community Manager
    March 27, 2026

    Hello Christina,


    Thank you for your question and screenshots.


    First of all, I’m curious to understand why this setup of 3 different layers with each their own kind of projection?

    I advise you to check this article from Maxon. It illustrates how different projections behave on geometries. In your situation, I feel like a single Tri-Planar should be enough.


    In addition, make sure there’s not already visible seams in your mesh normals. If mesh normals have a seam, it will also be visible in Painter.


    Best regards,

    Cyril Dellenbach (Micro) | QA Support Artist | Adobe
    Christina1111
    Participant
    March 27, 2026

    Hi Cyril,
    yes, the seams are there. This is the corresponding Blender file for the model:


    I used three different layers because I don't know how to give each side of the mesh its own directional angle of the wood grain with just one layer.