Participant
January 12, 2024
Answered

Why are generators messing with my masks?

  • January 12, 2024
  • 1 reply
  • 1948 views

Hi, everyone.


Maybe this is a very basic question, but I am kinda new to Substance Painter. How do you make generators affect only a specific part of a mesh?


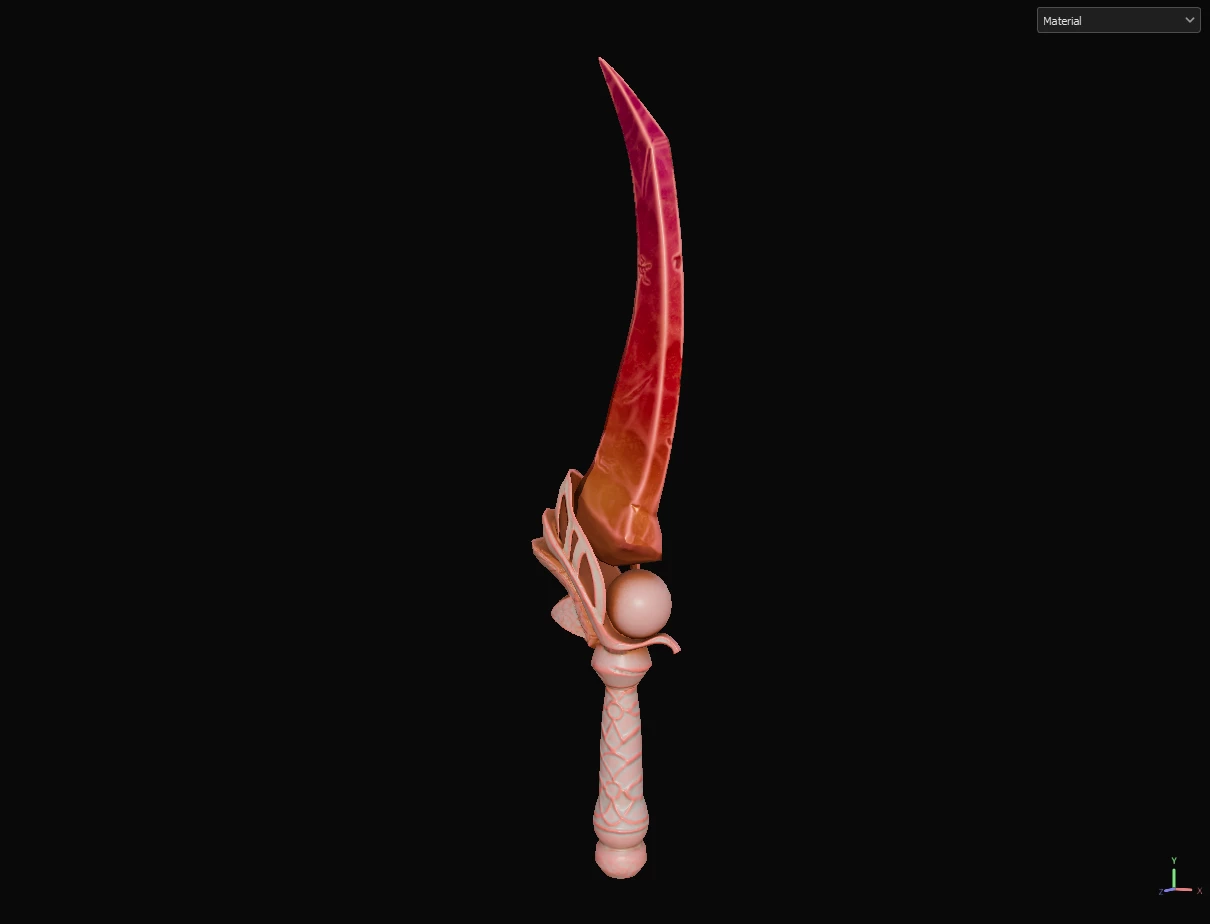
I'm working on this dagger and the main colors are working just fine:


But when I try to add curvature and dirt, it affects the whole thing and not just the blade which is what I want. It ends up looking like this:


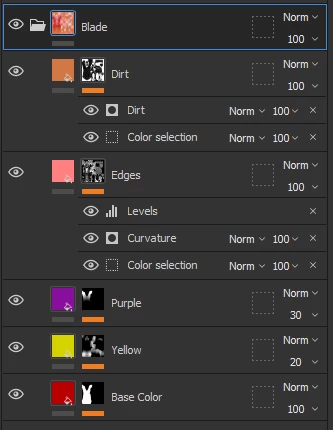
This is what the layers panel is looking like right now:


How can I fix that? What am I doing wrong?


I would really appreciate any help cause I am about to lose my mind trying to figure this out.


Thanks in advance.

Correct answer Cyril Dellenbach

Hi @valenciah.juanpablo,


Thanks for the question.


Smart masks like Dirt are ressources that use the Mesh maps (the maps created at baking) in order to build localized effects. Automatically, they'll cover the majority of your mesh, since the Mesh maps are (usually) baked from the entire mesh.


Therefore, if you want the smart mask to work on a specific part of your mesh, it's up to you to create a mask. I can see in your screenshot that you have regroup all the layers inside the group named "Blade". Now, you can RMB on the group, select "Add a Black Mask", select the newly created mask, and use the Polygon Fill tool with the Mesh fill option in order to select the Blade specifically.


Regards,

1 reply

Cyril Dellenbach
Community Manager
Cyril DellenbachCommunity ManagerCorrect answer
Community Manager
January 15, 2024

Hi @valenciah.juanpablo,


Thanks for the question.


Smart masks like Dirt are ressources that use the Mesh maps (the maps created at baking) in order to build localized effects. Automatically, they'll cover the majority of your mesh, since the Mesh maps are (usually) baked from the entire mesh.


Therefore, if you want the smart mask to work on a specific part of your mesh, it's up to you to create a mask. I can see in your screenshot that you have regroup all the layers inside the group named "Blade". Now, you can RMB on the group, select "Add a Black Mask", select the newly created mask, and use the Polygon Fill tool with the Mesh fill option in order to select the Blade specifically.


Regards,

Cyril Dellenbach (Micro) | QA Support Artist | Adobe
Participant
January 17, 2024

Oh, wow. Such a simple solution.


I almost gave up with this piece, but I just remembered recently that I had posted this so I took a look again and saw your answer.


I'm happy to say it worked. I don't know why it didn't cross my mind before. I think I wasn't sure wheter I could add masks to a group or not so I didn't even try, but that's what I should have done from the beginning.


Thank you very much. I really appreciate it.