Deployment Package can be created for FrameMaker 12 by using Creative Cloud Packager 1.6.
Please follow these steps to create package for FrameMaker 12.
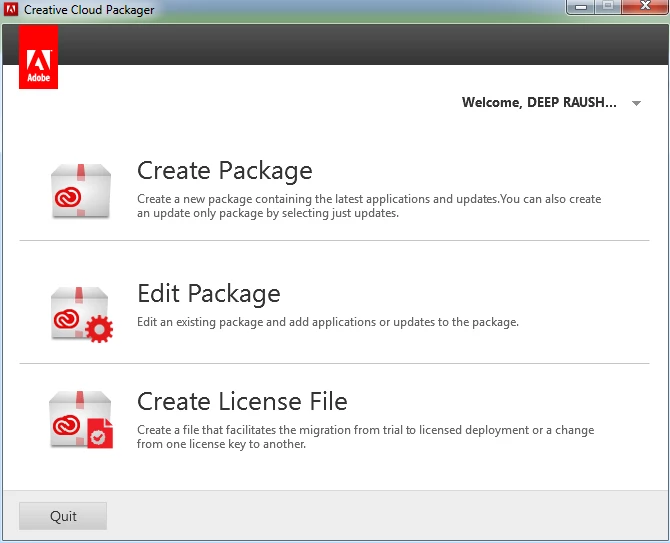
1) Select Create Package
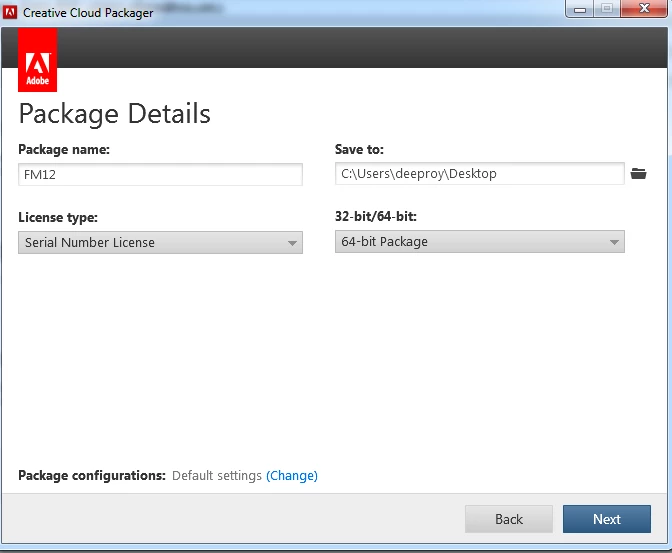
2) Enter package name and choose saved location
Select 32 –bit or 64 bit as per the computer configuration
3) Enter serial Key of FrameMaker 12 and click next.

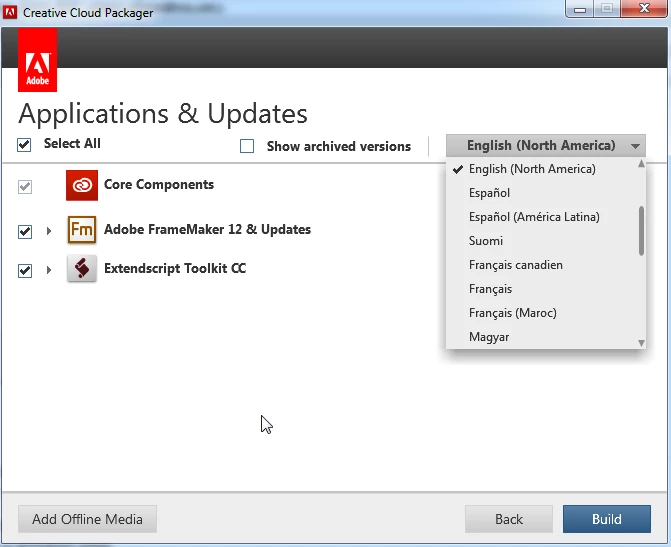
4) Choose language from the available language list and select FrameMaker 12 and click build.
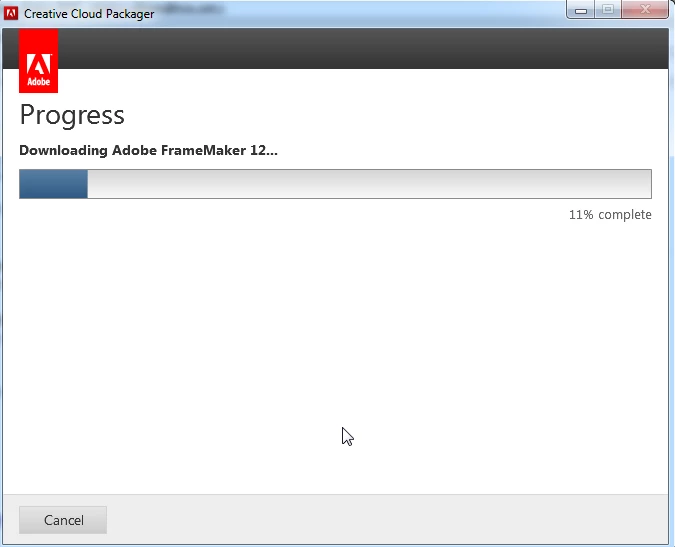
It will create deployment package at the destination folder.
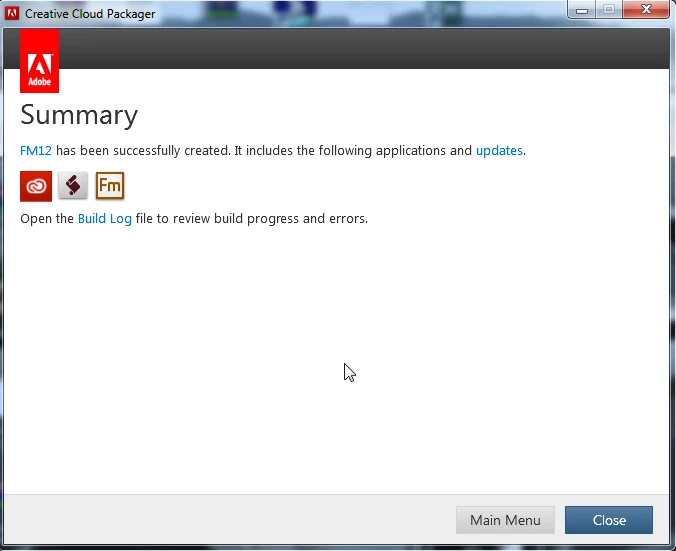
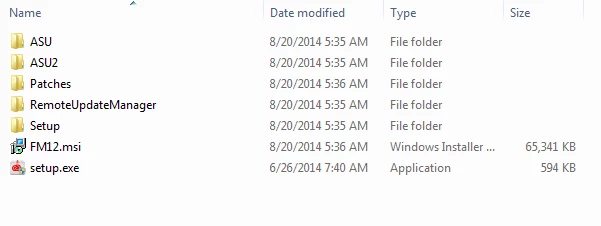
Once the package is created you will get the msi package in the build folder at the saved location.
Steps to follow to deploy silently on single machine:
- Open CMD in Administrator mode.
- Give the path till inside the build folder of the package. For Example if the build is saved on your Desktop the path in CMD should be as below:
- C:\Users\[username]\Desktop\Packagefolder\packagename\Build>
- Now type the following installation command: msiexec.exe /i packagename.msi /quiet
- Launch Task Manager.
- There will be three process of “msiexec.exe”
- One will be under System
- Other Two will be under [username].
- Installation will be completed once both the process of msiexec.exe under the [username] are finished.
- The installation process with take 5 to 10 minutes.
- After the successful installation of main package we need to run the Post Exception Deployer Application.
- In Command Prompt you have to go to the exact path where Adobe FrameMaker 12 package folder is placed and go inside Exceptions folder.
- Now Run the Command as mentioned below to run the Exceptions Deployer Application.
ExceptionDeployer --workflow=install --mode=post
9. Installation will be completed in next few minutes.
Regards,
Rajeev.

