nancy33534756
Inspiring
September 8, 2016
Answered

FM 2015 Cannot save custom rule in table format

  • September 8, 2016
  • 1 reply
  • 908 views

Hello. I'm using fm2015 in Win 7 environment.

I created a table with single 1-point rules throughout.

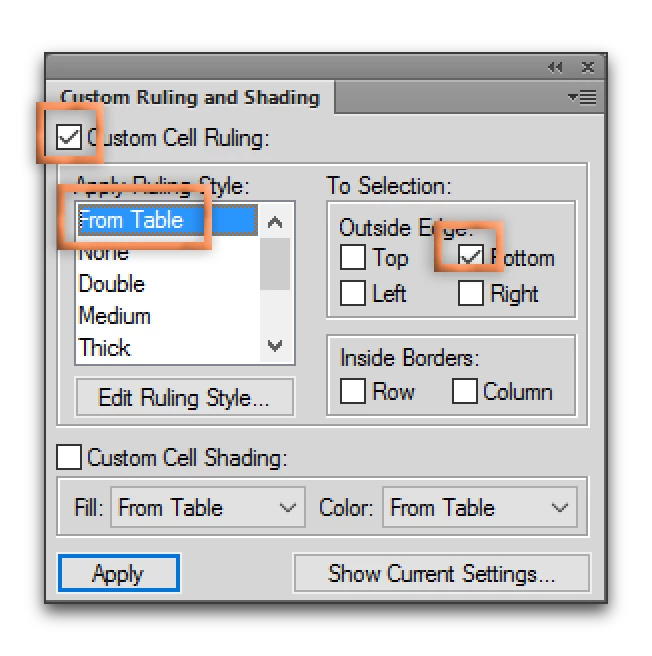
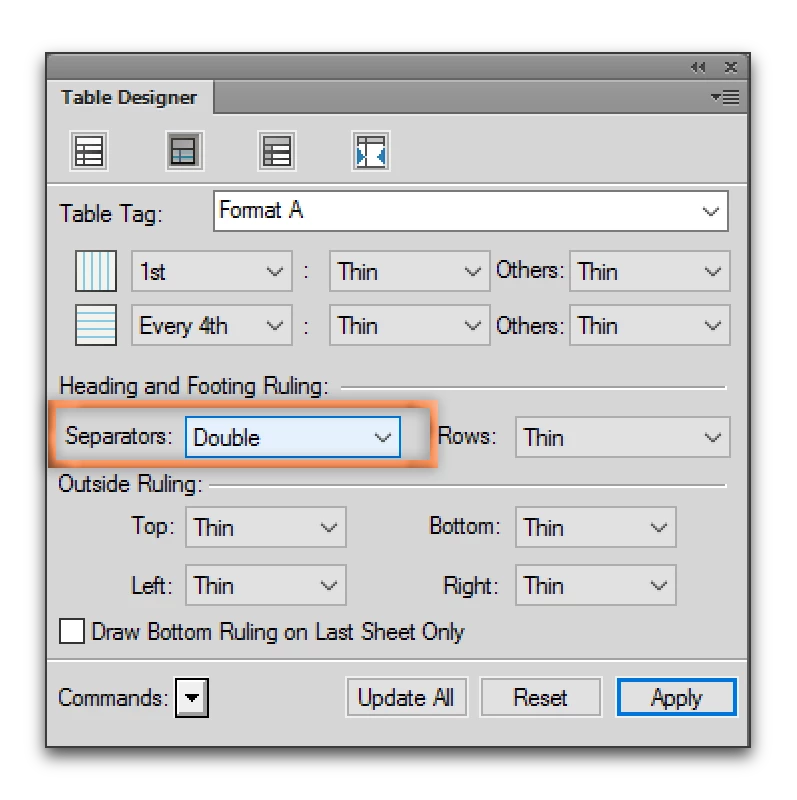
I then applied a double 1-point rule to the bottom edge of the Heading row. I did this in Custom Ruling and Shading, and then when I saw that I could apply that rule directly in the Table Designer, I applied it there.

I've saved it every which way, but the double rule is never saved. I get the uniform 1-pt rule throughout.

What am I missing? I'm sure I used to be able to do this.

Thanks.

    This topic has been closed for replies.
    Correct answer Barb Binder

    Custom Ruling & Shading overrides Table Designer settings. It sounds like you want a double rule between heading and body rows?

    1. Select the Heading row
    2. In Custom Ruling & Shading, check Custom Cell Ruling, pick From Table, check Bottom. Click on Apply. This removes the override and the table will use the settings from Table Designer.
    3. In Table Designer, add it back in via Separators:

    If that fails, you might have added the override to the top of the first body row instead of the bottom of the heading row. It might seem like the same place to us, but FrameMaker sees the difference. It can show you were the override is with the Show Current Settings button in the CR&S dialog box, but when a table gets too confusing with a bunch of overrides, I pull them all off, do what I can through Table Designer and then only use CR&S where absolutely necessary. To remove all the CR&S, enable all four Outside Edge checkmarks and both of the Inside Border checkmarks, and pick From Table in the Apply Ruling Style list. Click Apply.

    1 reply

    Barb Binder
    Community Expert
    Barb BinderCommunity ExpertCorrect answer
    Community Expert
    September 13, 2016

    Custom Ruling & Shading overrides Table Designer settings. It sounds like you want a double rule between heading and body rows?

    1. Select the Heading row
    2. In Custom Ruling & Shading, check Custom Cell Ruling, pick From Table, check Bottom. Click on Apply. This removes the override and the table will use the settings from Table Designer.
    3. In Table Designer, add it back in via Separators:

    If that fails, you might have added the override to the top of the first body row instead of the bottom of the heading row. It might seem like the same place to us, but FrameMaker sees the difference. It can show you were the override is with the Show Current Settings button in the CR&S dialog box, but when a table gets too confusing with a bunch of overrides, I pull them all off, do what I can through Table Designer and then only use CR&S where absolutely necessary. To remove all the CR&S, enable all four Outside Edge checkmarks and both of the Inside Border checkmarks, and pick From Table in the Apply Ruling Style list. Click Apply.

    ~Barb at Rocky Mountain Training
    nancy33534756
    Inspiring
    September 15, 2016

    Thank you, Barb. This worked perfectly.

    Barb Binder
    Community Expert
    Community Expert
    September 15, 2016

    Oh good! I was wondering if that took care of it for you.

    Here's why I believe CR&S is so painful: generally speaking, in any other dialog box in any other application, we enable checkmarks to turn a feature on, and disable them to turn the feature off. In CR&S, to turn a feature off (either the ruling or shading overrides), we have to enable the checkmarks, and then choose From Table. That logic isn't intuitive prior to being explained, and I've watch so many of my students struggle with it.

    So glad you are back on track.

    ~Barb at Rocky Mountain Training