Here is how to customize the text:
- Browse to your settings file ("Settings.sts").
- Make a copy of it and rename it with .zip appended (e.g., "Settings-Custom.sts.zip").
- Open the "Settings.sts.zip" with any Zip-App of your choice (e.g., 7zip, Winzip, WinRar, etc.).
- In the ZIP you will find \!Language!\en_US\RoboHHRE.lng
- Extract RoboHHRE.lng and open it in a text editor like Windows Notepad, Notepad++, or any professional XML Editor.
- You will find the content you want to change relatively at the end:
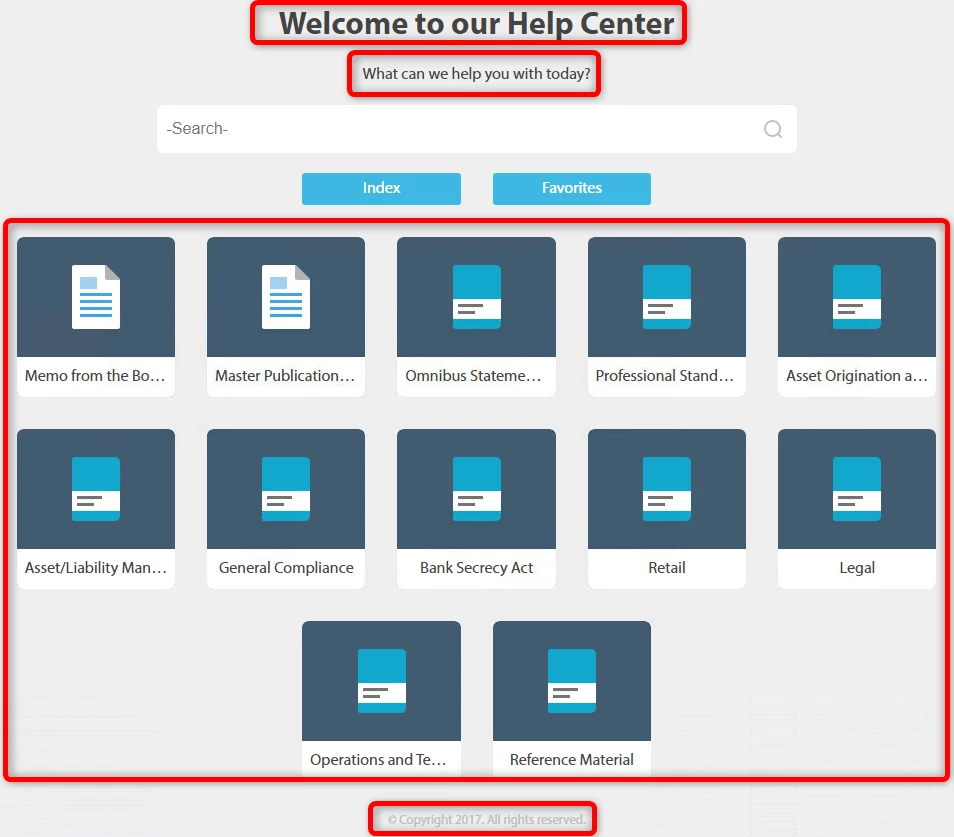
<section name="ResponsiveHTML5">
<!-- other strings -->
<element name="Copyright" value="© Copyright 2017. All rights reserved."></element>
<element name="Welcome_header" value="Welcome to our Help Center"></element>
<element name="Welcome_text" value="What can we help you with today?"></element>
<!-- other strings -->
</section>
You can change the text in the value attribute between the quotation marks.
- Save and close the file and add it back to the zip.
- Rename your new settings file from "Settings-Custom.sts.zip" to "Settings-Custom.sts"
- Load the new Settings-Custom.sts file into the publish dialog.
- Publish 🙂
Note, that the "preview" images shown in the Layout Customization Editor only show pixel images for illustration purposes. They will not show this changed text.
You can also find the two icons for the welcome page in this zip in folder \!ScreenLayout!\IndigoResponsive_HTML5:
- theme-1-toc-book.png
- theme-1-toc-book-over.png
- theme-1-toc-topic.png
- theme-1-toc-topic-over.png
You can replace them with your own (best, to keep the size the same). If you want to have different icons for the books, it would get more complicated (enough for a separate post).