October 5, 2015
Answered

Convert a solid filled shape into a single line.

  • October 5, 2015
  • 7 replies
  • 209576 views

Hello,

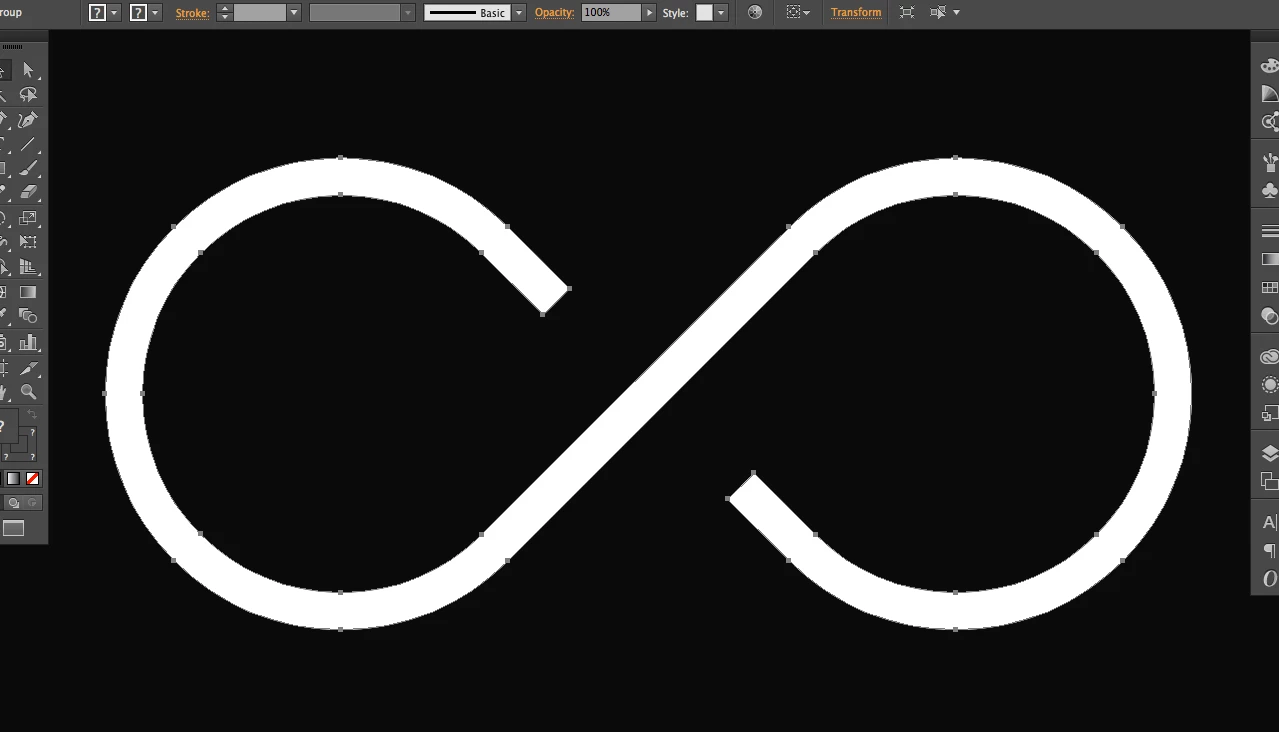
I am trying to convert a solid fill object (see attached image) into a single line.

The reason I want to do this is so that I can make the solid fill object thinner.

If it was a single line, this would be easy, because I could simply reduce the stroke of the line and have control over how thin the line was.

Is this possible please without having to re-draw it.

Thank you.

    Correct answer Jacob Bugge

    James,

    Here is an improved description, and a set of screenshots (using a Helvetica S):

    1) With the Direct Selection Tool (first deselect by Clicking an empty spot and then) Click each end path segment and press Delete (that will give you two paths forming the curved parts);

    2) Select everything and switch from Fill to Stroke in the Toolbox (that will give you stroked paths (and you can see what you are doing));

    3) Object>Blend>Blend Options, set Spacing to Specified Step with 1 step (that will prepare the right blend);

    4) Select everything and Object>Blend>Make, then Object>Blend>Expand, then Ctrl/Cmd+Shift+G to Ungroup, then hide or delete both the original paths (that will give you the stroked path midway between the curved paths), then set the Stroke Weight as desired (in the screenshot both paths are kept to show that the middle path fits).

    7 replies

    Participating Frequently
    August 21, 2025

    What about converting to raster then using image trace outline?

    Monika Gause
    Community Expert
    Community Expert
    August 21, 2025

    @shac40469206  schrieb:

    What about converting to raster then using image trace outline?


    Pretty sure you have noticed that the screenshot shows a very precise geometric shape. There is no way Image Trace can give you that.

    Abraham_MotionGraphics
    Participating Frequently
    June 16, 2023

    I WISH there was a simpler way to convert a fill into a stroke. Im a motion designer and EVERY graphic asset and template I download are compound paths that can't be used because they bascially did a  "Object > Path > Outline stroke". It's easy to turn a stroke into a closed fill. But not the other way around. Adobe, if you're reading this can you add a feature where this can be? Like "Object > Path > Create Strokes from Fill" or something?

    Sincerely,
    A Tired Motion Designer

    Ton Frederiks
    Community Expert
    Community Expert
    June 16, 2023

    Adobe will read feature requests here: https://illustrator.uservoice.com/

    Participant
    January 10, 2020

    Step 1 - Create Object without stroke

    Step 2 - Select your solid filled shape & newly created object

    Step 3 - Using the shape builder tool deselect the unwanted object and delete the solid filled shape.

    Step 4 - Convert a remaining object into stroke.

    Participant
    October 13, 2021

    this is the correct answer

    Kris Hunt
    Legend
    April 15, 2016

    Monika is correct — just use Offset Path if you want to make the shape thinner. Incidentally, if you really want to turn this particular shape into a single path, it should take you about 30 seconds to make it from scratch. Take a circle, delete one of the four arcs, rotate 45°, flip and duplicate, connect two of the endpoints, and extend the others a bit.

    Participant
    September 15, 2022

    Got this one to work. Thanks. 
    Found all other ways too complicated to follow for my purpose. 

    Jacob Bugge
    Community Expert
    Community Expert
    September 15, 2022

    Ricky,


    That is fine, but only if you have lower/other ambitions than James (the OP = original poster), firstly that you can live with a shortened path = greater distance between the open ends, secondly that you can live with a(nother) filled path istead of a stroke so you will have to start over if you need any further editing instead of just changing the Stroke Weight.


    Different ways can lead to identical results, or to fundamentally different ones, as in this case.


    I am convinced that the original path was stroke/nofill, and then it was unfortunately outlined, and my endeavour was to restore the original, and the freedom to edit freely.


    As mentioned on 6th October 2015:


    "As far as I can see the (negative) Offset Path will make the resulting path shorter, and it will still result in a filled path instead of a path with an easily (re)adjustable Stroke Weight."


    Participant
    April 15, 2016

    James,

    To convert all the shapes to lines is almost impossible, as you know all the shapes have X and Y dimension. For example how can you convert an ellipse to line?
    Ok, maybe, a line with a good profile can do that. But what about the star? The result is smaller shape.

    If you have one or two shapes, you can use all above mention methods. But what about some lines of text?

    There is another approach that can convert shapes to lines, but it works best with letters and numbers.

    First you Rasterize  (object>Rasterize), and then you Image trace, using LINE ART preset.

    I hope this helps!


    Monika Gause
    Community Expert
    Community Expert
    October 5, 2015

    To make it thinner just use Object > path offset path or Effect > Path > Offset path with a negative value.

    October 6, 2015

    Thank you Monika,

    A negative value doesn't seem to do anything in my version of illustrator

    unfortunately.

    Thanks for the help though.

    James

    On Mon, Oct 5, 2015 at 4:35 PM, Monika Gause <forums_noreply@adobe.com>

    Monika Gause
    Community Expert
    Community Expert
    October 6, 2015

    Antistandard schrieb:

    Thank you Monika,

    A negative value doesn't seem to do anything in my version of illustrator

    unfortunately.

    Then the value is probably too high.

    Jacob Bugge
    Community Expert
    Community Expert
    October 5, 2015

    Antistandard,

    You may (save a copy of the original path so you can fall back on it):

    1) With the Direct Selection Tool Click each end path segment and press Delete (that will give you two paths forming the curved parts);

    2) Select everything and switch from Fill to Stroke in the Toolbox (that will give you stroked paths (and you can see what you are doing));

    3) Object>Blend>Blend Options, set Spacing to Specified Step with 1 step (that will prepare the right blend);

    4) Select everything and Object>Blend>Make, then Object>Expand Appearance, then delete both the original paths (that will give you the stroked path midway between the curved paths), then set the Stroke Weight as desired..

    October 6, 2015

    Thank you Jacob,

    I can't seem to get this to work sorry.

    I deleted all 4 end corners of my path, then changed the object to stroke

    not fill, then did the blend options but the 'preview' button is disabled

    at this step and after changing the options to what you suggested nothing

    happened.

    thank you though, i'll keep trying.

    James

    On Mon, Oct 5, 2015 at 4:22 PM, Jacob Bugge <forums_noreply@adobe.com>

    Jacob Bugge
    Community Expert
    Community Expert
    October 6, 2015

    James,

    What happens if you click the end path segments as suggested in 1), not the Anchor Points (just Click between them), then go on as suggested? That should ensure that you only have the two curved paths.

    As far as I can see the (negative) Offset Path will make the resulting path shorter, and it will still result in a filled path instead of a path with an easily (re)adjustable Stroke Weight.

    And as far as I can see, the filled path must have started out as a stroked path that was Object>Path>Outline Stroke. So if the original path is hidden somewhere, you can just use it again. Without that, the 1 step blend may be seen as the reversal to it (as accurately as can be done).