Stephen_vooma
Participant
February 3, 2026
Answered

Creating live text fill in a shape that links up

  • February 3, 2026
  • 2 replies
  • 84 views

Hi all, I’m hoping there are some whizzes on here that can provide a smarter way to achieve the outcome I am looking for.


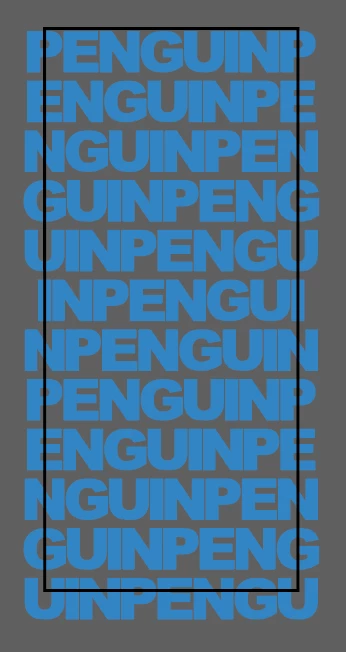
I am developing sock designs, and as such, any design that overflows over the left of the rectangular shape needs to connect with the right edge design - to ensure it is a seamless and continuous image.


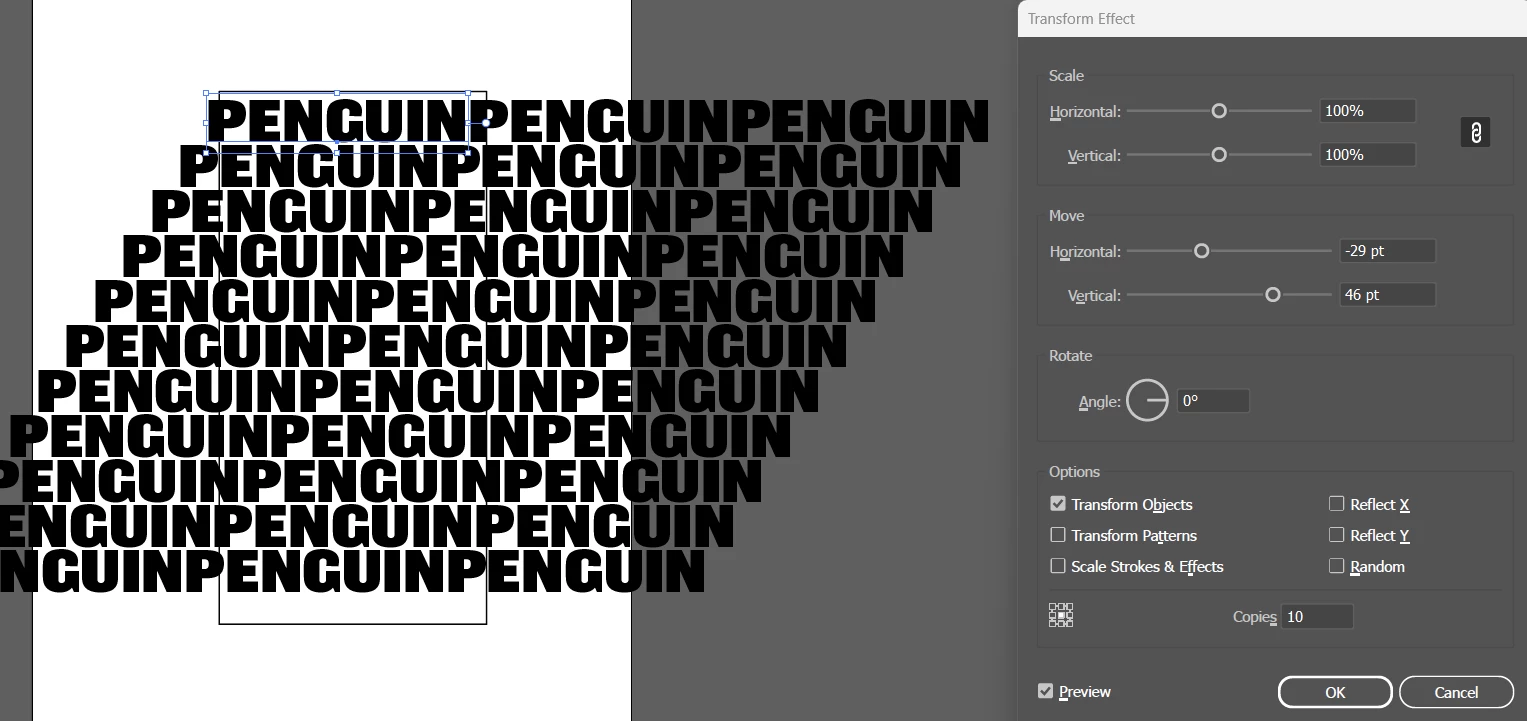
I am trying to do this for a text fill, where the text may change for future designs (i.e. different word and number of letters).


Currently the process I use is to use the type tool line by line, creating the outline and then ensuring the left overflow letter is centred over the edge at a similar position to the right edge - to ensure it matches up when applied to the 360 sock design. Then I apply a clipping mask.


I have previously just created a grid with a text fill per block - the issue is when the word changes, so I would need to create a template for each variation of different word lengths.


Any help or smart suggestions on how to automate or improve this process would be appreciated.


Correct answer CarlosCanto

would this work? this is live text so it can be changed. You would have to adjust the offset but it’s easy

I have two effects applied, the first makes two copies to the right. The second effect makes copies vertically and to the left as shown


2 replies

Emma Watson
Participant
February 3, 2026

Well i generated created this but the problem is when i click to export in png only half of text will be exported and half is not exported i don’t understand what’s going on.😥

CarlosCanto
Community Expert
CarlosCantoCommunity ExpertCorrect answer
Community Expert
February 3, 2026

would this work? this is live text so it can be changed. You would have to adjust the offset but it’s easy

I have two effects applied, the first makes two copies to the right. The second effect makes copies vertically and to the left as shown


creative explorer
Community Expert
Community Expert
February 3, 2026

also don’t forget to place an empty rectangle on top of all that (no stroke or fill). Aligned to be centered. Select All. Command 7 (for the Mac) or Control 7 (PC) for a Clipping Mask

m
Stephen_vooma
Participant
February 4, 2026

This looks like it may get me closest to the type of result I am looking for, as you say - I may have to tweak the offsets to ensure the letters over the left and right edges are synced up (this looks to only be the case for the first line).


Thanks for the suggestion!