
Participant
August 25, 2017
Question

Help with minus out shapes without losing detail

  • August 25, 2017
  • 4 replies
  • 790 views

G'day

Im trying to find out how one would knock out "shapes" with out any loss...

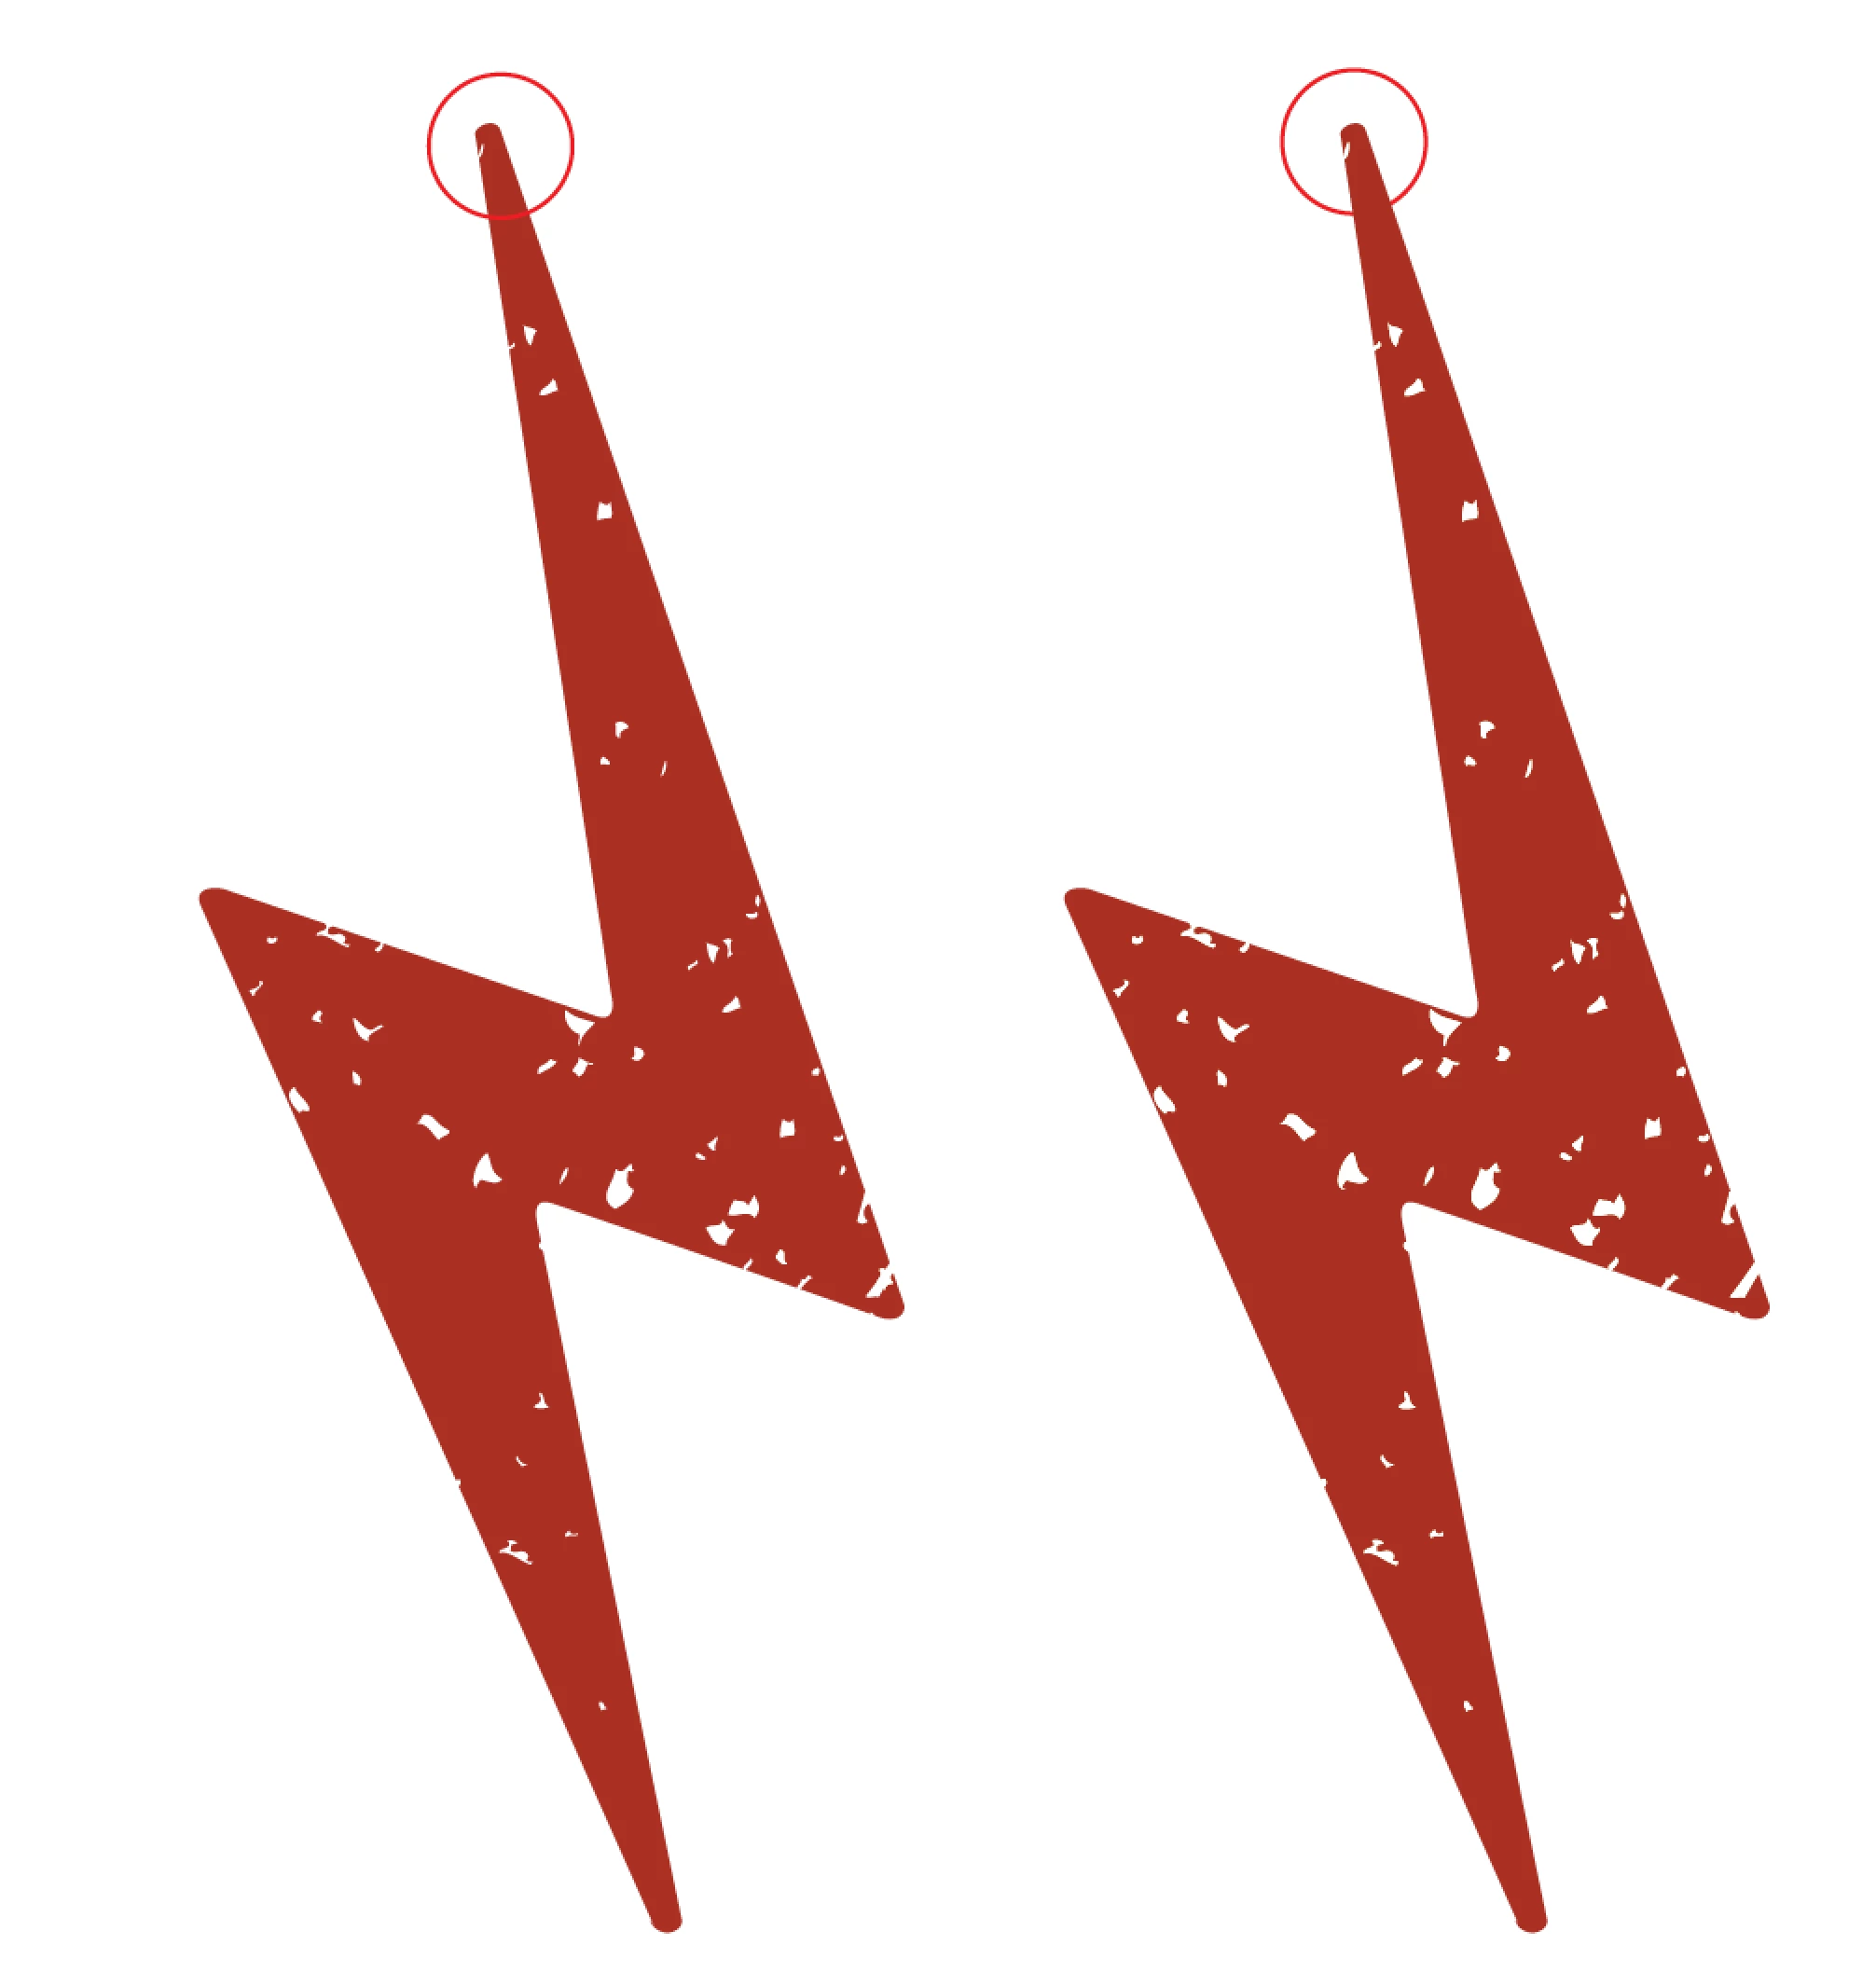
Image  on right is a shape with another layer of distress white on top. Now after I minus front shapes I'm left with the distress bits but they are fraction smaller

I tired to expand the distressed object, tried merge but its always a fraction  after "its knocked out"

So right image is original and left one is after the minus:

How do I keep it the same?
    This topic has been closed for replies.

    4 replies

    rogueant
    Participating Frequently
    June 30, 2023

    I'm having the same issue and it has never happened before and my pathfinder tolorance is already set to .001.


    I'm on a new M1Pro machine and it has gone mad.


    If I knock a shape or a letter out of anotehr shape using Minus Front or Devide or even a simple compound path, the object is noticably smaller or slightly "plugged up. Alost like illustartor is adding a trap. And it's not just a screen renderign issue. It prints that way as well. Also, if I copy the compound path and paste into photoshop it's smaller there as well.


    It's wrecking my illustration workflow. No strokes, no GPU performance, pathfinder tolorance is set .001.


    Any thoughts?

    Monika Gause
    Community Expert
    Community Expert
    June 30, 2023

    Compare the paths - are they the same?

    The printer: what kind of printer is it? A desktop printer might just not have sufficient resolution.


    It's caused by the different rendering of objects. If your prionter cannot handle that, then you have to edit the paths and make the white areas larger.

    rogueant
    Participating Frequently
    June 30, 2023

    Thanks for your response.


    I think you're partly right, but something else is happening. Yes, mathematically, the paths are the same. Illustartor says they are the exact same size, and I can lay them over each other and see little to no difference as paths.


    However, what has changed is the way it's rendering the color and creating this "trapping" effect. I can toggle back and forth with undo and see it happening.


    My printer is a Canon Pixma iP8720. I have plenty of res, and I've never had this issue. I have my 2017 laptop sitting here with a copy of AI 2021 running on it, and it doesn't do this. On screen or on the printer.


    I've never had this issue on any machine, and I've worked professionally in Illustrator since 1994.


    Thanks again


    Ton Frederiks
    Community Expert
    Community Expert
    August 25, 2017

    Try setting the Precision option in the Pathfinder panel menu to something very small; 0,001 pt

    Participant
    August 28, 2017

    Solved!! thx mate no idea what its not default settings.

    Monika Gause
    Community Expert
    Community Expert
    August 25, 2017

    Often this is just a screen rendering issue.

    On the right you have white shapes

    on the left a hole is rendered inside a read shape.

    Antialiasing might cause this.

    Try and in Preferences > General uncheck the Antialiasing/Smoothing setting. Do the images still look differently?

    Mylenium
    Legend
    August 25, 2017

    Without actually seeing the paths nobody can tell you much. From strokes changing teh appearance to the limitations of the process in terms of precision and number of points a path in AI can have this can be anything. Likewise things like snapping to the pixel grid and otehrs can affect the precision of geometric operations. You simply haven't provided enough information.

    Mylenium