zakb37575145
Participating Frequently
September 23, 2019
Answered

How to evenly place objects along a path?

  • September 23, 2019
  • 1 reply
  • 3083 views

I want to place objects evenly along a path. I have six objects and I want them spaced evenly along a path that is a circle. What is the easiest/quickest way to do this?
I have tried using the Blend technique along with "replacing spine" for the circle path but my result is not spaced evenly along the path.


Here are the steps I took:
Ultimately I want the text to replace the circles but I was using the circles to derive placement and then I was just going to manually place the text objects where the circles were once I had even distribution along my path.
1. I created the circle path.
2. I created the 2 circle graphics which I am going to use the blend operation on. (these objects were placed an arbitrary distance away from one another).
3. I open up the blend options and set to, "Specified steps: 4" (so that I will have a total of 6 objects along the path)
4. The Blend is created with a total of 6 circle objects.
5. I then select both objects (the blend and the circle path) and I go to "Blend > Replace Spine"
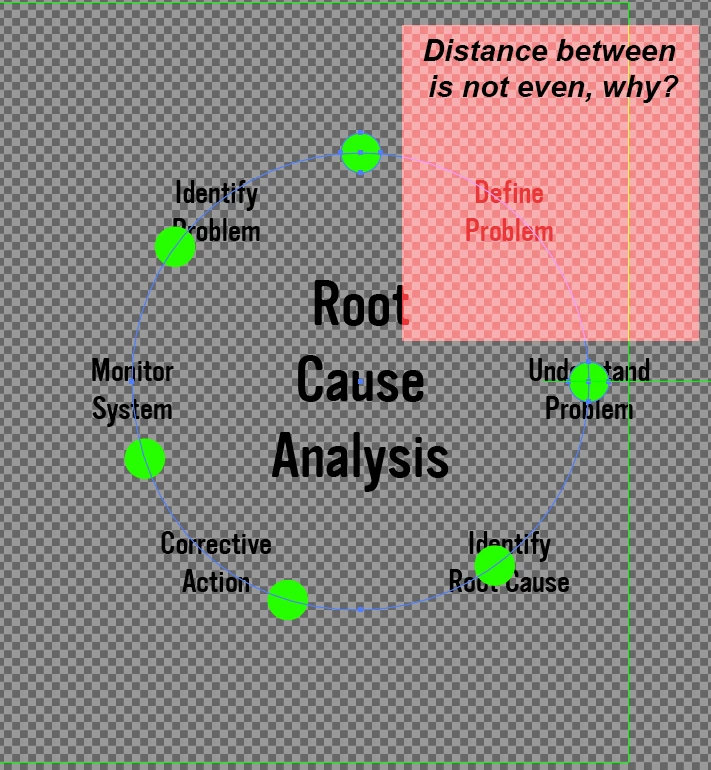
6. My circle objects are now on the circle path and the placement looks even except for the portion marked in the attached image. This result in unacceptable as I need the placement of objects to be across the entire length of the circle path, not just a portion of it.

Hopefully that makes sense.
Your guidance is appreciated, thanks.


    This topic has been closed for replies.
    Correct answer tromboniator

    Starting with the circular blend in your screenshot:


    1. With the Scissors Tool click on the spine path to make it an open path.


    2. Go back to Blend Options and set the number to 5.


    Visually, that should give you what you want. If you expand the Blend you will find that at the place of the Scissors Tool cut there are two coincident circles — the start and end of the blend — one of which you may delete if you so desire.


    Peter

    1 reply

    tromboniator
    Community Expert
    tromboniatorCommunity ExpertCorrect answer
    Community Expert
    September 24, 2019

    Starting with the circular blend in your screenshot:


    1. With the Scissors Tool click on the spine path to make it an open path.


    2. Go back to Blend Options and set the number to 5.


    Visually, that should give you what you want. If you expand the Blend you will find that at the place of the Scissors Tool cut there are two coincident circles — the start and end of the blend — one of which you may delete if you so desire.


    Peter

    zakb37575145
    Participating Frequently
    September 25, 2019

    Oh awesome, yep that totally worked.
    That was a confusing paradigm shift. Ive worked in other software where it looks at the whole path as 100% but I guess Illustrator wanted to treat the 4th anchor point as the end point (which makes a kind of sense I guess). Spent an annoying amount of time trying to figure that out.
    Thank you very much for your reply!