
How to make globe with lat/lon seen from the pole?
Hi,
I am trying to make a globe with longitude and latitude. I have sucessfully made the first globe in this illustration (this is not my design):
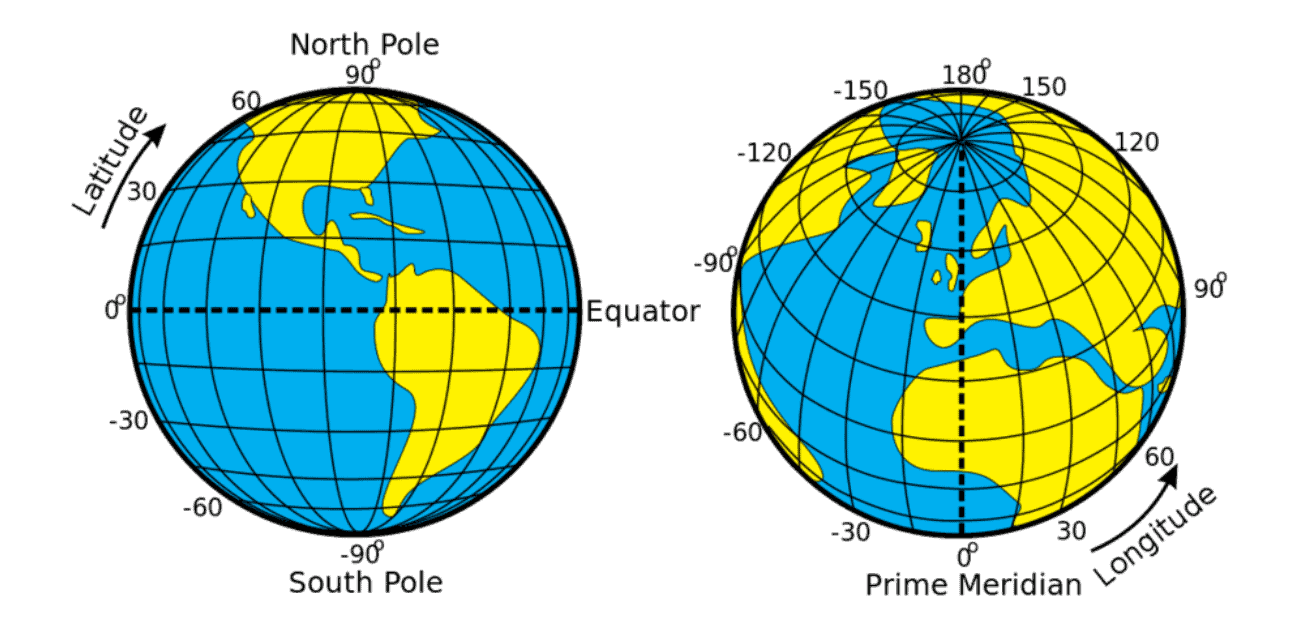
...but what I’m struggling with is the second globe. Ignore the map, colouring and labels, I’m simply looking at drawing the concentric circles of latitude and longitude, all heading towards or meeting at the north pole. I think I can get my head around the latitude by drawing circles and then using Shape Builder to trim them, but it’s the lines of longitude that are difficult.
I asked AI and it gave me these instructions:
Step 1: Create the Grid (The "Map Art")
Before we make the globe, we need a flat grid to wrap around it.
-
Draw a Rectangle. Hold Shift to make it a perfect square. Give it a stroke and no fill.
-
With the square selected, go to Object > Path > Split into Grid.
-
Set the number of Rows (Latitude) and Columns (Longitude). For a standard look, try 12 Rows and 24 Columns. Click OK.
-
Open your Symbols Panel (Window > Symbols).
-
Select your entire grid and drag it into the Symbols panel. Give it a name like "Globe Grid" and click OK. (You can delete the grid from your artboard now).
Step 2: Create the Sphere
-
Draw a perfect Circle using the Ellipse Tool (L + Shift).
-
Use the Direct Selection Tool (A) to select only the anchor point on the far left of the circle. Press Delete. You should now have a Semicircle.
-
Ensure the semicircle has a stroke color (so you can see it) but no fill.
Step 3: Apply 3D Revolve
-
Select your semicircle.
-
Go to Effect > 3D and Materials > 3D (Classic) > Revolve...
-
Note: Using "Classic" is often easier for mapping simple line art.
-
-
In the dialog box, set the "Edge" to Right Edge. You should see a sphere appear.
-
The Perspective: To get the North Pole view, look at the blue/gray cube in the dialog. Rotate it so the Top of the cube is facing you (X-axis around -90°).
-
Click the Map Art button.
-
At the top, change the "Symbol" to the "Globe Grid" you created earlier.
-
Click Scale to Fit. You will see the grid wrap around the sphere.
-
Check the box for Invisible Geometry if you only want to see the lines and not the shaded sphere itself.
-
Click OK on both windows.
Step 4: Final Adjustments
-
Changing Line Weight: If the lines are too thick or thin, you can go back to your Symbols Panel, double-click the "Globe Grid" symbol to edit it. Change the stroke weight there, and the globe on your artboard will update automatically.
-
Rotation: If you want the "tilt" shown in your example, go back to the Appearance Panel (Window > Appearance), click the "3D Revolve (Classic)" effect, and adjust the rotation cube until the pole is positioned exactly where you want it.
-
Making it "Flat" Art: If you are finished and want to edit the lines as regular paths, go to Object > Expand Appearance. (Note: This makes the 3D effect permanent and no longer adjustable).
And I ended up with this:
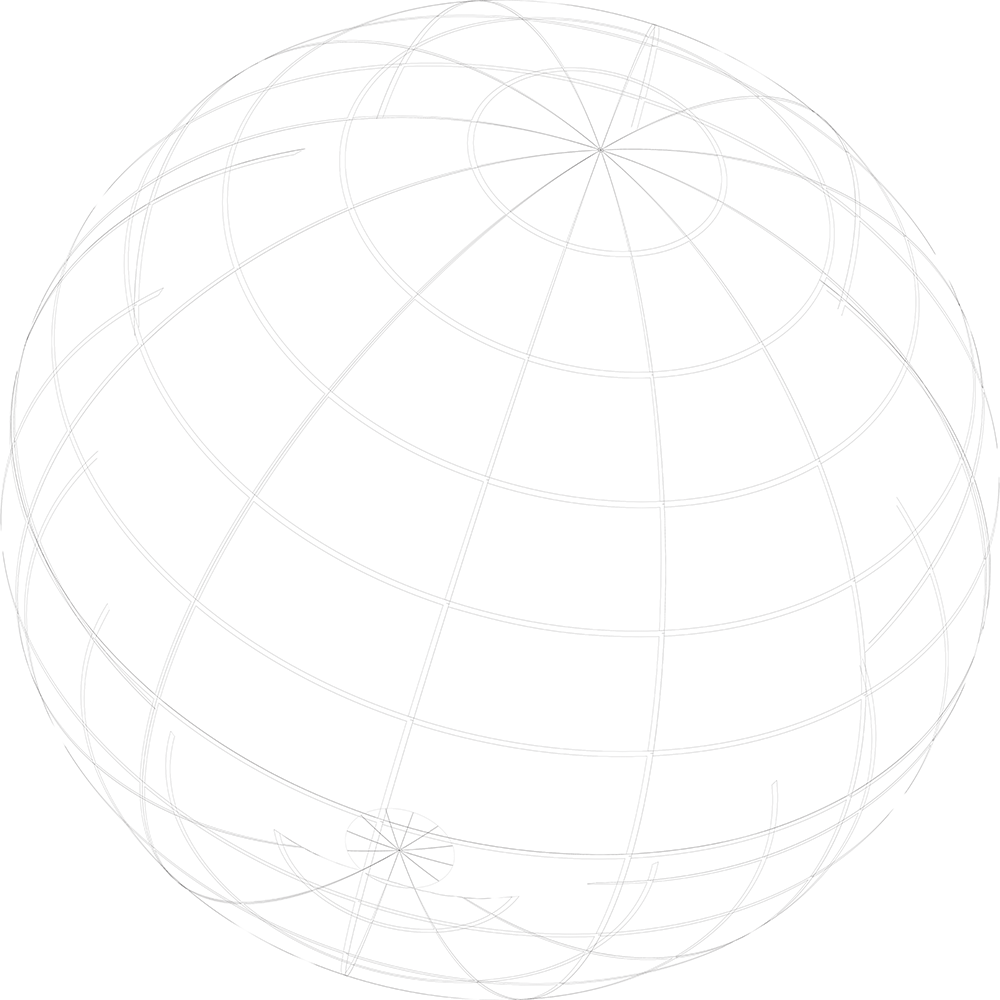
So I’m kinda half way there!
Any tips appreciated, thanks.
