MahaB82A
September 11, 2025
Question

How to make many layers into one single editable layer?

  • September 11, 2025
  • 3 replies
  • 919 views

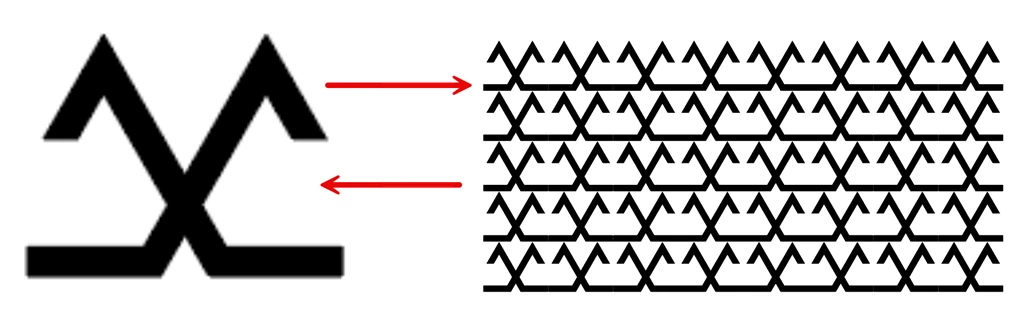
This is a combination of single pattern. Is it possible to make it one single layer? not image. That means I should be able reverse it to original state of single pattern. File is uploaded as well.


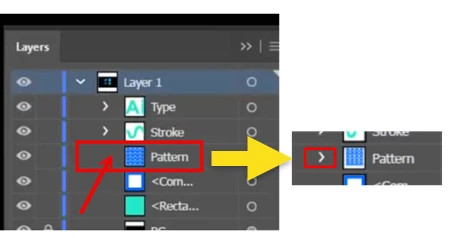
This is what I want. You can see here pattern layer without dropdown arrow mark, which is converted into a with dropdown arrow mark. I want my layer be made possible to convert into both direction.

Pattern


<Title renamed by MOD>

3 replies

Jacob Bugge
Community Expert
Community Expert
September 13, 2025

Maha,


Whenever you ask a question based on a video, please state it, and preferably post a link.


If the video linked to in your latest reply had been in your OP, my very first reply would have been something like this, including an extended version of my dual suggestion above based on the basic path shown in red, choosing the one that best fulfills your actual purpose.


Both Expand and Expand Appearance are irreversible/destructive in all cases, including those

shown in the linked video.


There is no way back.


Always keep a backup of the artwork before changing it irreversibly, so you can fall back on what you had. This applies to Expand and Expand Appearance as well as to many other irreversible actions.


We have countless threads about help to recreate the original artwork after Expand and/or Expand Appearance has been performed, in many cases done before the asker has received the artwork.


Luckily, in this case you do have the original artwork, namely the basic path shown in large size in your OP.


My dual suggestion is that you go back to the basic path, here shown as a sample (Compound) Path, and then, depending on what you wish to obtain, see the samples in red below based on a different shape of the basic path, shown as Path:


Either:

  • Apply Effect>Distort&Transform>Transform twice with Move, first horizontally then vertically (or the opposite), here shown, here shown with 3 copies, to give the appearance of 4 x 4 instances to obtain a regular set of instances of the basic path;
  • When using the Effect for the second time you are asked, and just confirm; this will work on both the original instance and the apparent ones to literally give the full picture, just like in your screenshot. This is shown as Transformed twice.
  • It is still one instance, which you can edit and immediate see the change throughout.
  • Obviously, the horizontal and vertical moves are identical to those used with plain copying. You can always apply Object>Expand Appearance to a copy.
  • If you wish to only show part of this regular pattern, you can add a bounding path on top and use that as a Clipping Path for a Clipping Mask and thereby only show the desired parts of the regular pattern.


Or:

  • Or simply Drag the basic path into the Swatches palette and give it a suitable name, then apply that as a pattern fill to any closed path, here shown with a Rounded Rectangle with the same height as the Transform set
  • This is shown as Used as Pattern (Tile).
  • Presumably you already have the pattern swatch, but in any case you just need to apply the pattern swatch to an identical path, and then you have the arrowless editable entity you named Pattern, so you can edit the path and keep it filled with the pattern.


As it appears, you can obtain the same appearance with both the ways described.


Click to get closer, Click again to get closer still


Jacob Bugge
Community Expert
Community Expert
September 12, 2025

Maha,


Based on a my having another look at the screenshot and wording in your OP (original post), as well as the video, I have a different dual suggestion, see the samples in red below based on a different shape of the basic path.


I am unsure what the arrowless entity in the OP named Pattern is, but the entity in the video named Pattern seems to be a Group of four instances of the basic path shown in large size in the OP.


My suggestion is that you go back to the basic path, here shown as a sample (Compound) Path, and then, depending on what you wish to obtain:


Either apply Effect>Distort & Transform>Transform twice with Move (by the width and the height) and with the desired number of copies, here shown with 3 copies, to give the appearance of 4 x 4 instances to obtain a regular set of instances of the basic path, Transformed twice.


Or simply Drag the basic path into the Swatches palette and give it a suitable name, then apply that as a pattern fill to any closed path, here shown with a Rounded Rectangle with the same height as the Transform set, Used as Pattern (Tile).


Click to get closer, Click again to get closer still


MahaB82A
MahaB82AAuthor
September 12, 2025

As far as I know if the layer is empty only you can see it without drop-down arrow mark.

But in this video initally pattern layer is without drop-down arrow mark, after activating the Expand tool only arrow mark appears. I do not know how it happens. Time 4.13-4.24.

Expand And Expand Appearance In Adobe Illustrator


pixxxelschubser
Community Expert
Community Expert
September 14, 2025

Hi @MahaB82A

This guy works in his video with a normal rectangle. This rectangle has a pattern as fill colour that was (previously) saved as a colour field. The rectangle has also been renamed ‘Pattern’ in the layer panel.


In my video you can see how the rectangle ‘Pattern’ was created.

https://vimeo.com/1118566726?share=copy#t=0


Jacob Bugge
Community Expert
Community Expert
September 11, 2025

Maha,


Effect>Distort&Transform>Transform twice with Move, first horizontally then vertically (or the opposite); when using the Effect for the second time you are asked, and just confirm; this will work on both the original instance and the apparent ones to literally give the full picture, just like in your screenshot.


Then it is still one instance, which you can edit and immediate see the change throughout.


Obviously, the horizontal and vertical moves are identical to those used with plain copying.


You can always apply Object>Expand Appearance to a copy.


MahaB82A
MahaB82AAuthor
September 11, 2025

There are many options. Which option do you mean?


Jacob Bugge
Community Expert
Community Expert
September 11, 2025

Maha,


Just Move Horizontal and Move Vertical, one after the other, leaving the others be.


Obviously with the same distances you have used for copying.


And obviously, you may need to adapt the Moves if you edit the original instance (in a way that changes the size).