


Participating Frequently
Nov 2, 2026 7:22 AM UTC
Question

How to Remove Segment in Illustrator 2020?

Hi everyone, I am a beginner in Illustrator.

Can someone please tell me how do I remove these three yellow arcs in Illustrator 2020?

I also would like to ask what is Shape Builder Tool and tell me the procedure of how do I use it in Illustrator 2020?

Thank you very much
 

    13 replies

    Participating Frequently
    Nov 3, 2026 1:14 PM UTC

    Hi Mr. Bugge, do you mind if you show me step by step using image or Gif animation?

    Translate
    Jacob Bugge
    Community Expert
    Community Expert
    Nov 3, 2026 4:04 PM UTC

    smart,


    I have elaborated to make a fuller and better answer with images of the steps,


    Translate
    Jacob Bugge
    Community Expert
    Community Expert
    Nov 3, 2026 12:00 PM UTC

    smart,


    Quoting you from the other question,

    “Do you mean the one that size is 60 mm x 85 mm? If so, I create it in AutoCAD.“


    If you made the circle in AutoCAD, you will be happier if you start over, which you can do in a very simple way without the Shape Builder Tool, Smart Guides still being you friends, telling you when you are within snapping distance, see my other answer,


    1)) With the Ellipse Tool (bundled with the Rectangle Tool), click the Artboard and insert the desired W = H values in the Transform palette, you can move it to the desired spot by ClickDragging to snap or just to the desired position X an Y;

    2)) With the Line Segment Tool, ShiftClickDrag from the topmost to the bottommost Anchor Point of the Ellipse, then apply Object>Path>Divide Objects Below to divide the Ellipse in two halves;

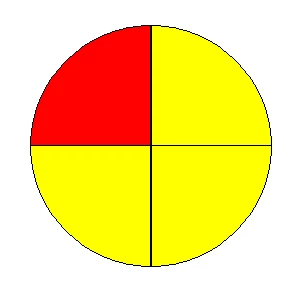
    3)) With the Line Segment Tool, ShiftClickDrag from the leftmost to the rightmost Anchor Point of the Ellipse, then apply Object>Path>Divide Objects Below to further divide the Ellipse in four quarters (the latter shown twice below);

    4)) Click each of the undesired quarters and delete.


    Below are images of the steps with Circle in black Stroke and red Fill, Line (Segment) in yellow with Butt Cap so you can see the ends at the Circle Anchor Points.

    The images are shown like the ox turns (before the plough, Boustrophedon, left to right, right to left, left to right) as I always do, usually you can see it by the numbers.


    Click to get closer, Click again to get closer still


    The Line Segment Tool looks like this to the right here,

    https://helpx.adobe.com/illustrator/desktop/draw-shapes-and-paths/draw-shapes/draw-lines.html

    The Rectangle Tool (bundle) is to the left in the next row.


    Edit: Fuller answer with addition of images, improvement, and clarity.

    Translate
    Participating Frequently
    Nov 3, 2026 12:33 AM UTC

    Does in order to use Shape Builder Tool the object must be filled with color first?

    Translate
    Participating Frequently
    Nov 3, 2026 12:32 AM UTC

    How do I create this in Illustrator 2020 step by step in PC? Note that the size of the artboard is 60 mm x 85 mm. Thank you.


    Translate
    Jacob Bugge
    Community Expert
    Community Expert
    Nov 3, 2026 11:44 AM UTC

    smart,


    You can, Smart Guides being you friends, telling you when you are within snapping distance:


    1)) Create a 60 x 8 mm Rectangle with the desired black Stroke and a blue Fill, then deselect (just Click an empty spot on the Artboard) and ClickDrag its top left Anchor Point to snap to the top left corner of the Artboard;

    2)) Create a copy of the Rectangle, then ClickDrag its top left Anchor Point to snap to the bottom left corner of the original Rectangle;

    3)) Create a first 8 x 8 mm Ellipse (bundled with the Rectangle Tool) and ClickDrag its rightmost Anchor Point to snap to the top right corner of the Artboard;

    4)) Create a second 8 x 8 mm Ellipse, then deselect and:

    4a)) ClickDrag its leftmost Anchor Point to snap to the left side of the Artboard below the rectangle from 1));

    4b)) ShiftClickDrag its topmost Anchor Point to snap to the bottom side of the Artboard below the rectangle from 1));


    5)) Use the Shape Builder Tool to remove the unwanted parts as described and shown by Ton here,


    Translate
    Jacob Bugge
    Community Expert
    Community Expert
    Nov 2, 2026 11:16 PM UTC

    smart,


    There are often multiple ways to do something, but which way(s) will depend of what you actually have.


    How did you create the artwork, in other words which steps?


    Translate
    Participating Frequently
    Nov 3, 2026 1:20 AM UTC


    How did you create the artwork, in other words which steps?


    Do you mean the one that size is 60 mm x 85 mm? If so, I create it in AutoCAD.

    Translate
    Ton Frederiks
    Community Expert
    Community Expert
    Nov 2, 2026 4:53 PM UTC

    ​@smart_society8a44 If the object you showed is a vector object it is already filled. If it is an image, you need to do that in Photoshop or create a similar vector object in Illustrator.

    Translate
    Ton Frederiks
    Community Expert
    Community Expert
    Nov 2, 2026 8:08 AM UTC

    ​@smart_society8a44 You can check this article for the Shape Builder tool: https://helpx.adobe.com/illustrator/using/creating-shapes-shape-builder-tool.html

    Translate
    Participating Frequently
    Nov 2, 2026 1:22 PM UTC

    How do I remove the yellow arcs and leave the red arc?

    Translate
    Ton Frederiks
    Community Expert
    Community Expert
    Nov 2, 2026 2:25 PM UTC

    Select the objects. Select the Shape Builder tool.

    Move it above the element you want to remove.

    Hold down the Option key (a - sign becomes visible) and click.


    Translate