January 21, 2026
Answered

Round multiple corners to maximum radius

  • January 21, 2026
  • 4 replies
  • 288 views

Hi!

First, I would like to apologize for any mistranslations. I'm from Sweden and have my Illustrator installed in Swedish.

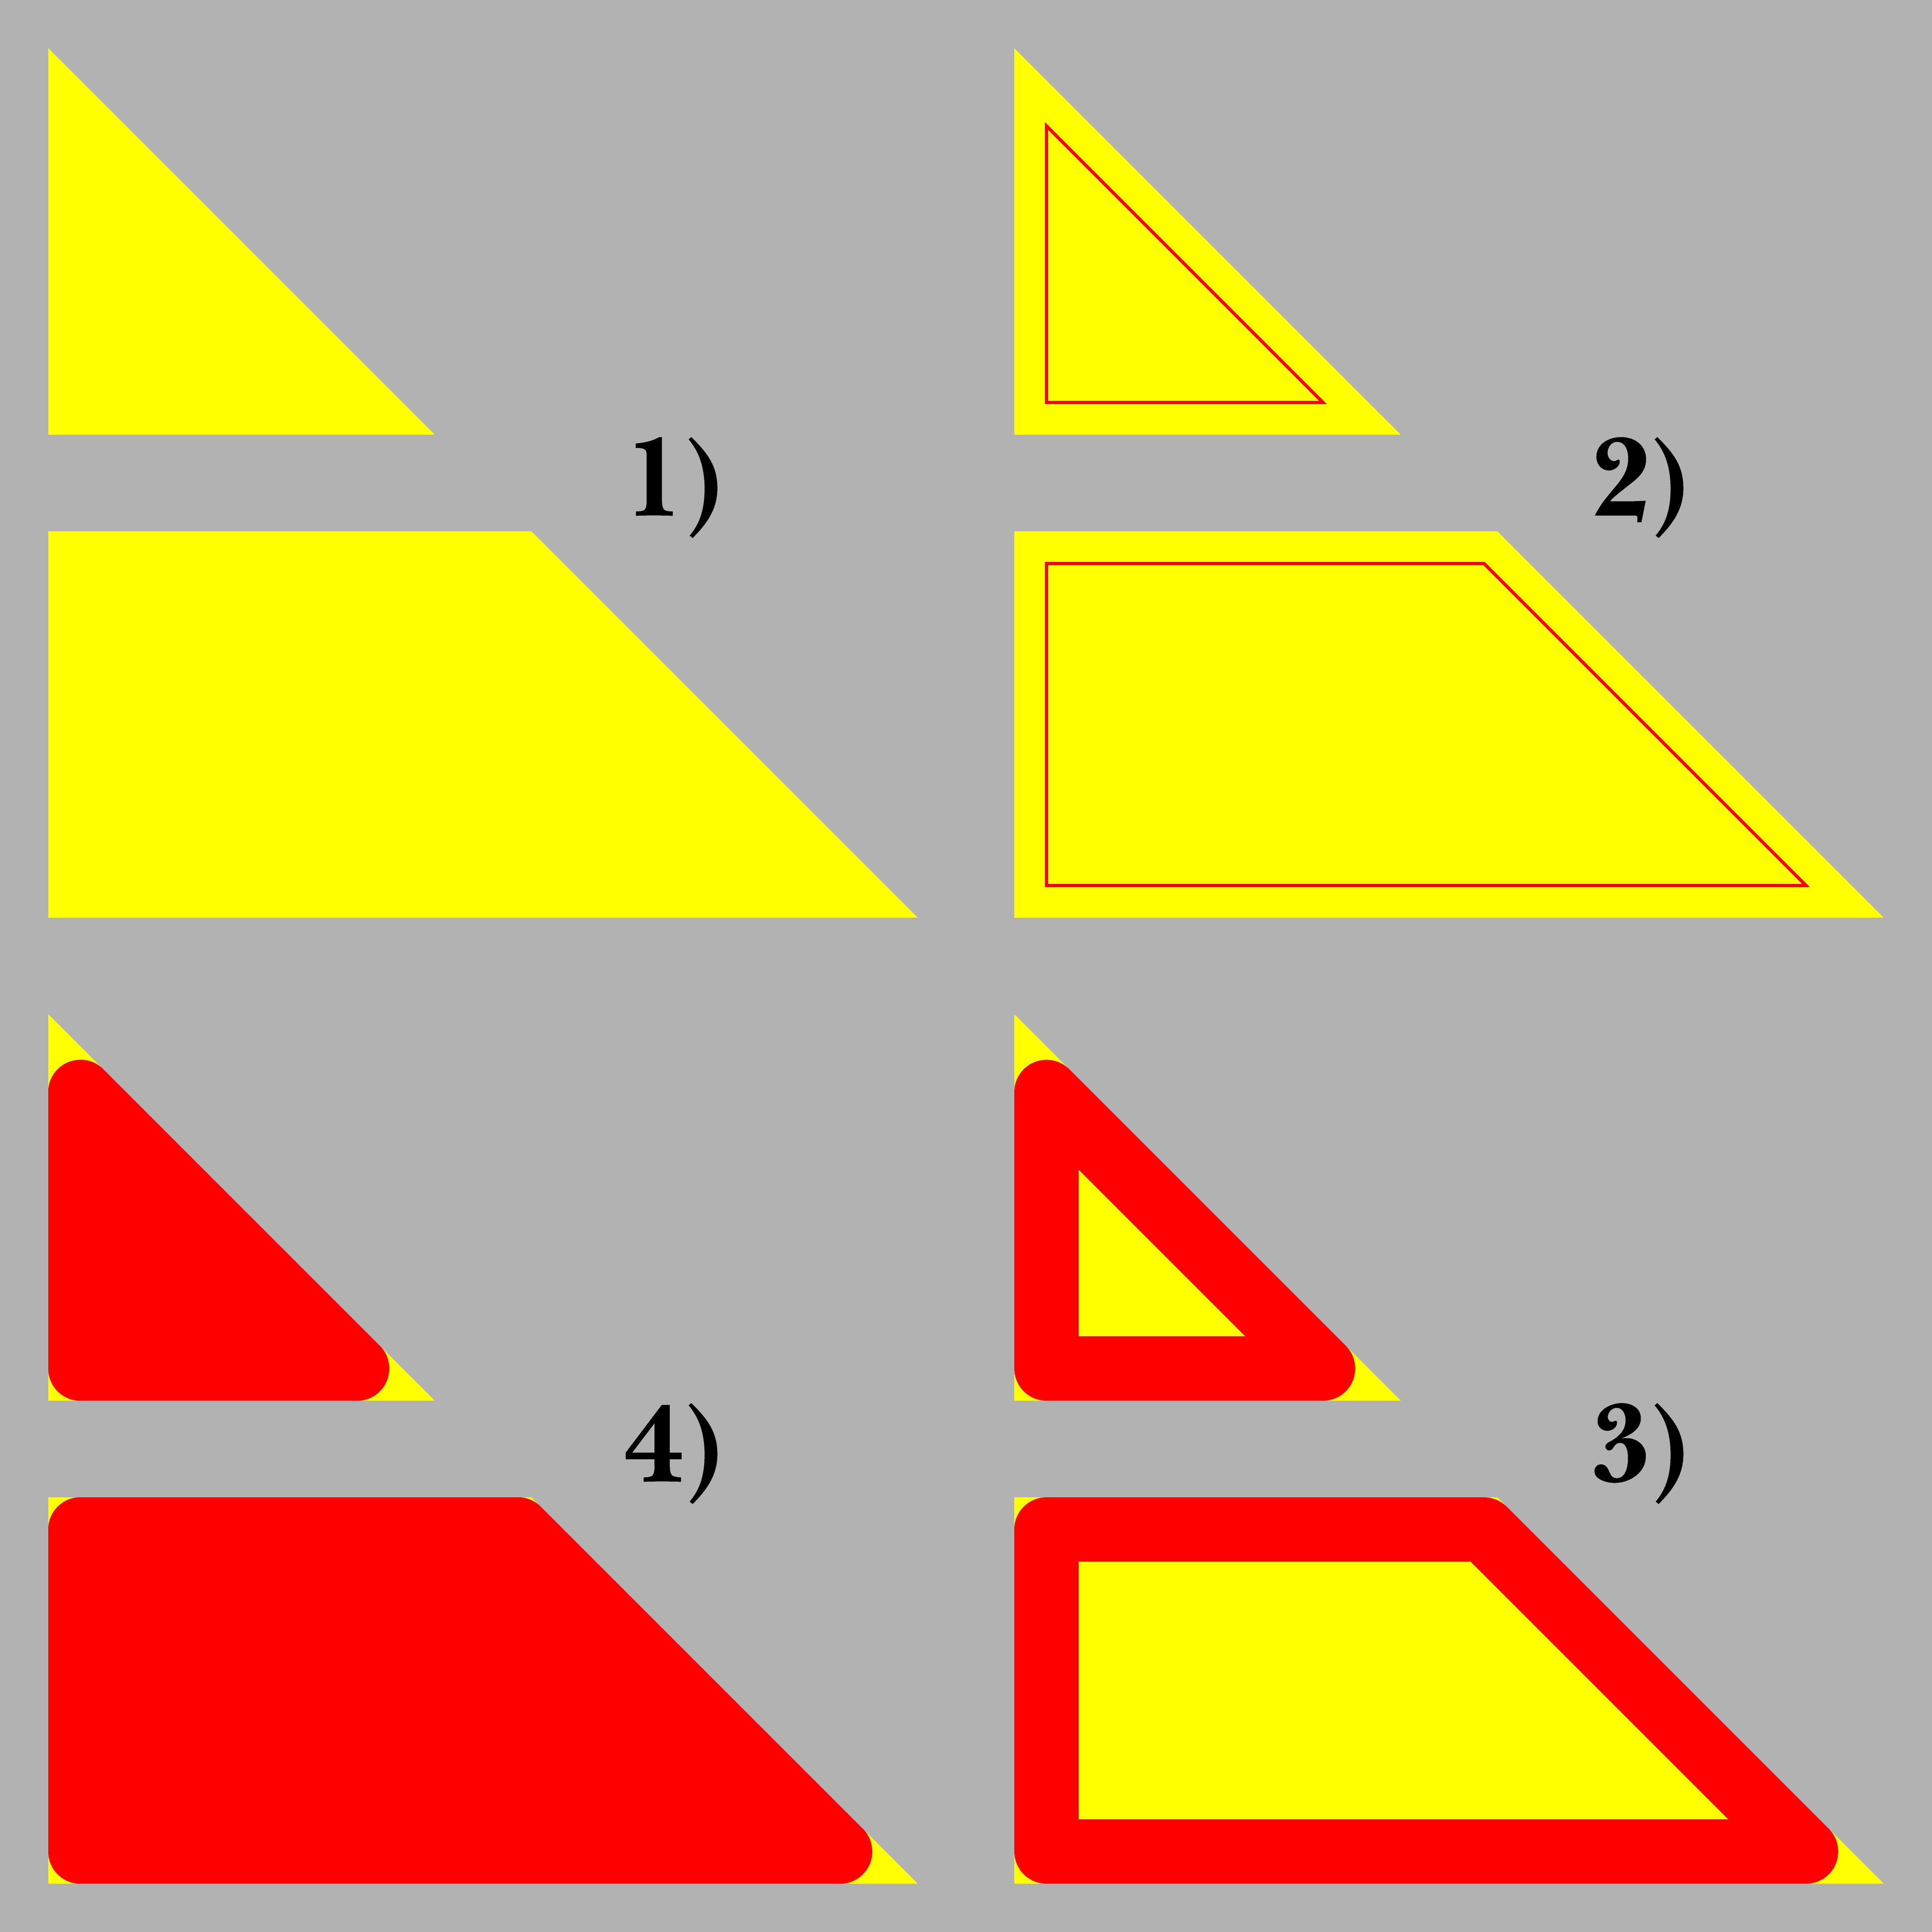
Now to my problem. This decoration (see screenshot 1) consists of several hundred shapes, and I need to make sure that all corners have a 5 mm radius rounding. The problem is that some of the parts are cut off, which causes anchor points to end up close to each other or that some parts become very small. When I then set a corner radius of 5 mm, all corners only become as round as the smallest corner allows (see screenshot 2).

I've tried Effects - Stylize - Round Corners. The problem is that only the right corners actually get a 5 mm radius. Pointy corners get a smaller radius and obtuse corners a larger one. See screenshot 3 for comparison, where the black is the original shape, the green is Effect - Round Corners and the yellow and red are the result I want.

Since I work for a company that does these jobs regularly, it would be nice if there was some way to automate this, so I don't have to go through all the shapes and manually adjust the points that are too close together. Either so that all corners get as big a radius as possible (but a maximum of 5 mm) and don't all stop at the minimum allowed, or even better if there was some way to get all corners to 5 mm regardless of how close the anchor points are.

I've tried asking ChatGPT for a script but haven't been completely successful. Any tips from you real people out there?

Correct answer Jacob Bugge

Gustaf, or whoever may find it useful, whenever, as a follow up on this,


Here are the steps in a nimble way to get the requested appearance with (mathematically) identical roundings, as in the sketchy sample of steps below, shown for two typical original shapes with sharp, right, and obtuse, corners in yellow on top of a grey background, and the rounding steps shown in red:


1) Is the original set of (yellow) shapes;
2) Select all the original shapes (maybe with (the dropdown) Select>Same>Fill Color) and Ctrl/Cmd+G to Group them if not already, then apply (the dropdown) Effect>Path>Offset Path with the desired rounding radius followed by a switch from (yellow) Fill to (red) Stroke in the Toolbox and, to give the thin stroked shapes; now you are working with Effects;
3) In the Stroke palette, change the Stroke Weight to twice the the desired rounding radius followed by a switch from Miter Join to Round Join, to give the desired outer rounding;
4) Apply (the dropdown) Object>Expand Appearance followed by Object>Expand to obtain filled Compound Paths, then apply Object>Compound Path Release to get the full appearance followed by (the palette) Pathfinder>Unite to end up with a group of Simple (red) paths with the desired rounding radius corresponding to the Group of the original set of (yellow) shapes from 2).


As you can see, the appearance of the rounding are quite different, those at sharp angles much larger and those at obtuse angle much smaller, but the identity can be seen at close up, as opposed to your screenshots.


Click to get closer, Click again to get closer still


4 replies

Jacob Bugge
Community Expert
Community Expert
January 27, 2026

Gustaf, everyone,


I have just learned that the forums are planned to switch to new software this afternoon (maybe GMT), and that this and all other threads started between 17th November and the switch tomorrow will be unavailable until some day in March 2026, which means that the new forum will be starting with older threads and then the new threaads tomorrow.


Obviously, threads unfinished by tomorrow will remain so during the following month(s).


Therefore, if needed, it may be necessary to start over in a new thread based on what has been achieved, more easily if crucial parts are copied so they can be repeated.


Ton Frederiks
Community Expert
Community Expert
January 27, 2026

Yes, Jacob.

A good idea to make a backup of the main suggestions in an unsolved post.

Jacob Bugge
Community Expert
Jacob BuggeCommunity ExpertCorrect answer
Community Expert
January 25, 2026

Gustaf, or whoever may find it useful, whenever, as a follow up on this,


Here are the steps in a nimble way to get the requested appearance with (mathematically) identical roundings, as in the sketchy sample of steps below, shown for two typical original shapes with sharp, right, and obtuse, corners in yellow on top of a grey background, and the rounding steps shown in red:


1) Is the original set of (yellow) shapes;
2) Select all the original shapes (maybe with (the dropdown) Select>Same>Fill Color) and Ctrl/Cmd+G to Group them if not already, then apply (the dropdown) Effect>Path>Offset Path with the desired rounding radius followed by a switch from (yellow) Fill to (red) Stroke in the Toolbox and, to give the thin stroked shapes; now you are working with Effects;
3) In the Stroke palette, change the Stroke Weight to twice the the desired rounding radius followed by a switch from Miter Join to Round Join, to give the desired outer rounding;
4) Apply (the dropdown) Object>Expand Appearance followed by Object>Expand to obtain filled Compound Paths, then apply Object>Compound Path Release to get the full appearance followed by (the palette) Pathfinder>Unite to end up with a group of Simple (red) paths with the desired rounding radius corresponding to the Group of the original set of (yellow) shapes from 2).


As you can see, the appearance of the rounding are quite different, those at sharp angles much larger and those at obtuse angle much smaller, but the identity can be seen at close up, as opposed to your screenshots.


Click to get closer, Click again to get closer still


January 26, 2026

Thank you so much! This works perfectly!

Jacob Bugge
Community Expert
Community Expert
January 26, 2026

You are welcome, Gustaf.


I believe it is quite manageble to deal with the small triangles separately.


Have you considered an adaptation of the horizontal lines, maybe so that every fifth line hits the top/bottom corners of the chevron with no small triangles?


Community Expert
January 22, 2026

I am not a math expert. However, the only way for a curve with a 5mm curve radius to be identical to curves on other corners is if every corner where the radius was applied started out as a 90 degree angle. If the corners are more acute or obtuse the length of the curve at the corner will be longer or shorter. The arc of the curve will have a 5mm radius. But the length of the curve will differ. Depending on how you want the shape to look the curve radius on the corners may have to be changed to a different value.

January 22, 2026

Thanks for answering!
I want the arc of the curve to be 5 mm radius, the length does not matter. The reason for the corners to be rounded is because we are going to make decals from the shapes. Decals with sharp corners come off more easily than decals with rounded corners, that's why we want the 5 mm radius 🙂

Community Expert
January 22, 2026

I think the solution is using the Round Corners effect (Effect menu>Stylize>Round Corners) and applying the 5mm value there. Depending on how sharp a corner is the arc will pull farther away from the corner. The effect is live; the corners can be adjusted in the Appearance panel or by manipulating the corner widgets on the object.

Jacob Bugge
Community Expert
Community Expert
January 21, 2026

Gustaf,


To get help:


Owing to software changed, attached images show an error rather than screenshots, but unknown to most, it is quite easy to directly show images in posts, hence the following general suggestion:


Please show images by using the Insert Photos button (looks like moon over mountains) for each at the top of the reply box which makes everything appear right there in your post together with your text, rather than the more conspicuous Drag&drop attachment which requires helpers to open a new tab for each image and wait for its showing, then go back and forth; and if they just click it and wait for its showing and press the X to get back to the text, the image is gone, so if they need another look they have to open it again and wait to see it again.


January 22, 2026

I see. Here are the screenshots 🙂

The original shapes:
shapes.png


Maximum radius too small due to close anchorpoints:

max-radius.png


Comparison between the original shapes (black), the effect Round Corners (green) and what I want to achieve (red and yellow):

comparison.png