I think you'll find that whoever created this shape used very convenient dimensions and shapes.
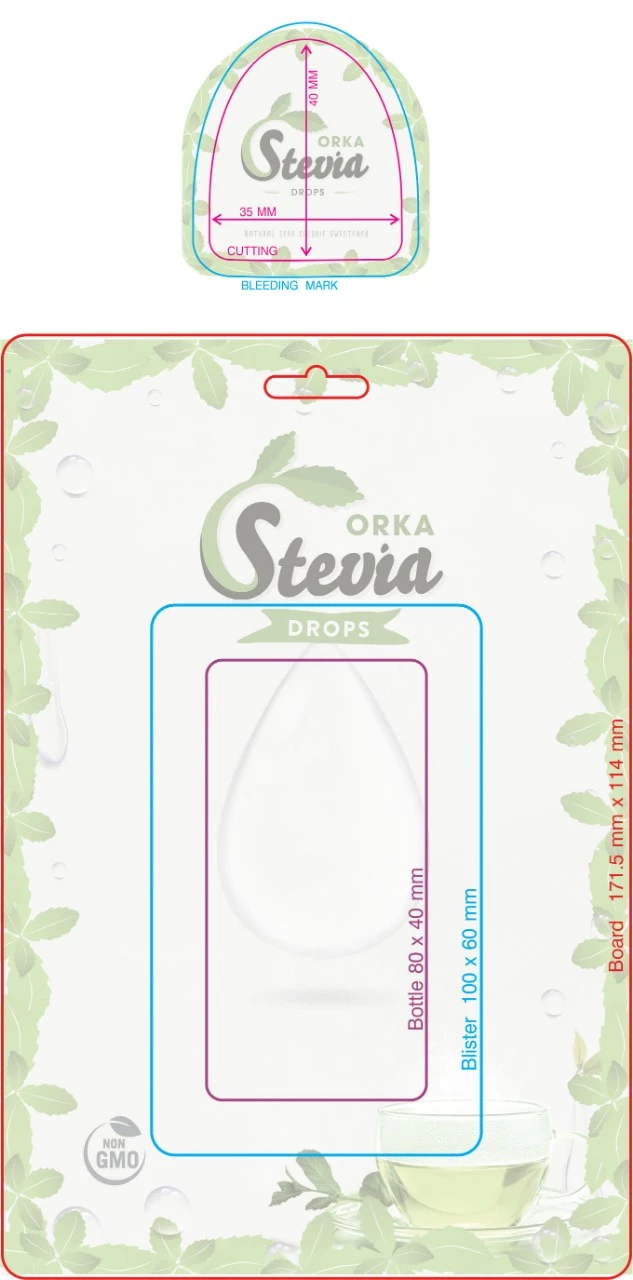
1) Create a 35 mm × 40 mm rounded rectangle with corner radii of 3.75 mm.
2) Create a 35 mm × 60 mm ellipse.
3) With the Direct Selection tool select, then delete, the bottom half of the ellipse.
4) Select the rounded rectangle and the half ellipse, then Vertical Align Top and Horizontal Align Center.
5) Deselect the rounded rectangle and lock the half ellipse.
6) Make sure that Smart Guides are active, and with the Scissors tool click on the vertical sides of the rounded rectangle where Smart Guides show the intersection of those sides and the ends of the half ellipse.
7) Select and delete the upper portion of the rounded rectangle.
8) Unlock the half ellipse, select it and the bottom section of the rounded rectangle, and Object > Path > Join.
Peter