lucasm86974246
Known Participant
February 9, 2017
Question

shearing paths to look like they are laying down on a photo

  • February 9, 2017
  • 3 replies
  • 4512 views

Illustrator CS6

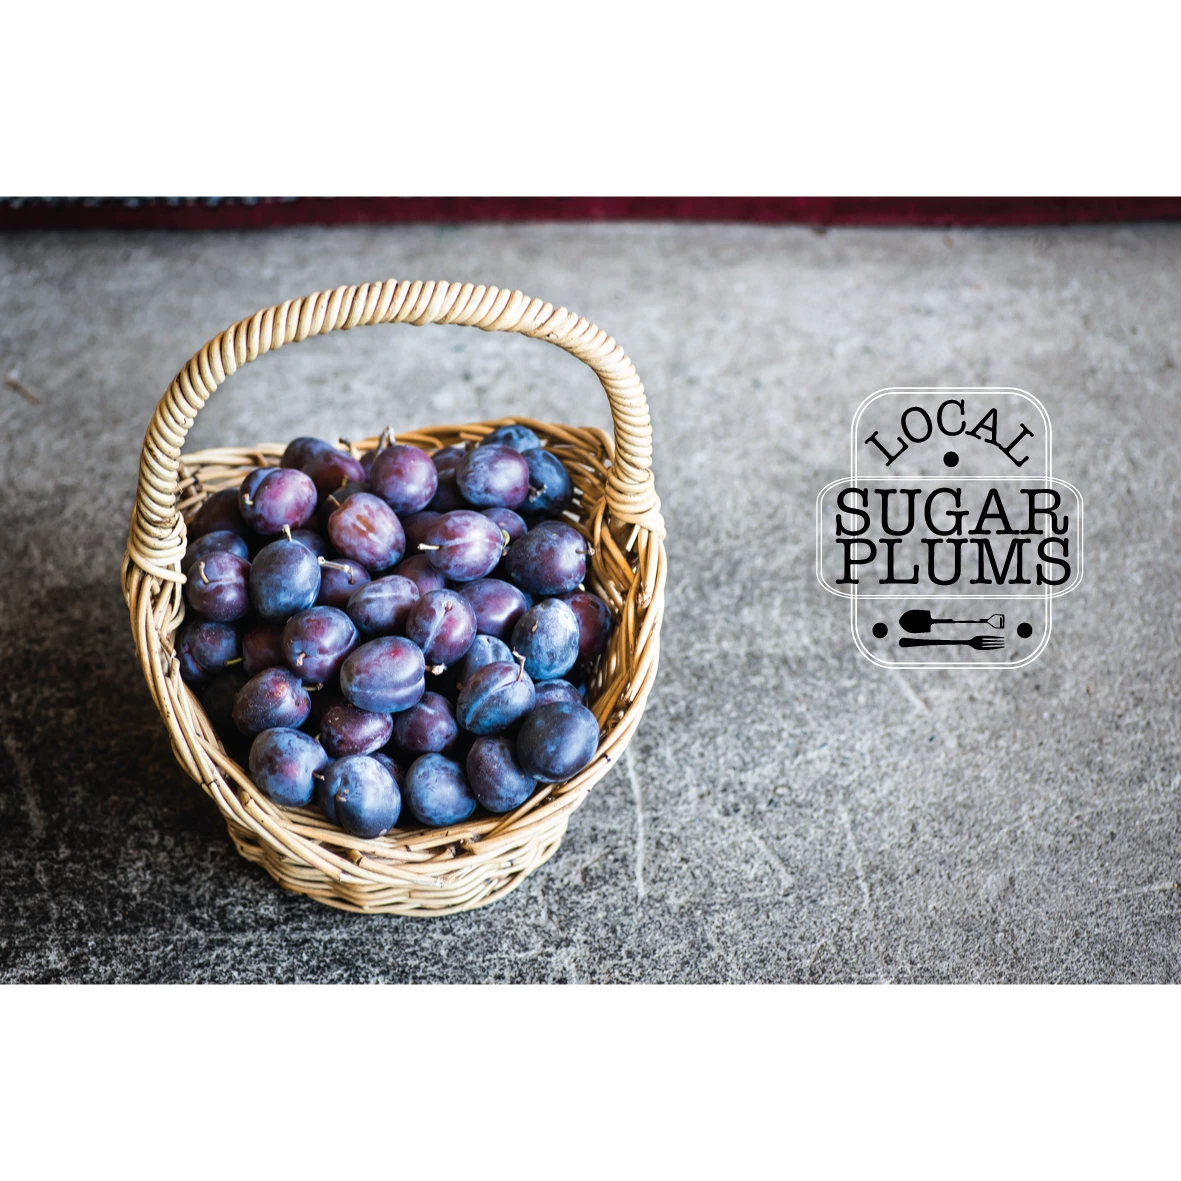
Hello! I am currently producing a series of images to be used as promotional material for a small grocer. Each image is of a particular fruit or vegetable that is in season and available.

I am including a small amount of text in each image to identify both the product and the brand.

My goal is to make the text look embedded in the background surface of the image. I have had succes with straight on shots and directly from above. In these circumstances the text is correctly align to fit the perspective. I then use the draw inside feature along with the outer grow filter to make the text look part of the surface.

The problem I have now is an image taken at a "3/4" perspective. I need to shear the text to look like it follows the path of the ground. I've fiddled with the shear settings but can't find a convinving result.

This is the image with a quick mock up of the kind of text I intend to use.

Any help would be greatly appreciated! - Thankyou.

    This topic has been closed for replies.

    3 replies

    lucasm86974246
    Known Participant
    February 14, 2017

    I'm going to stick with the original thread for the moment.

    So I'm trying to match the perspective of the large steel plate that the capsicum is sitting on. The plate is round as you can see by the curve of the lip in the top left corner.

    So I have a few issues.

    1. The capsicum is not actually in the centre of the plate.

    2. I want the curvature of the text to run parallel with the circumference of the plate.

    3. If the text is placed as such it will not be in the correct location in relation to the capsicum for this crop of the image. My attempt shown above is pretty close compromise.

    So what is the correct workflow?

    Create a perfect circle path for text or match the curve I want before I shift into perspective?

    I keep having to rotate the text after it is shifted in perspective. No matter how I setup the grid this is an issue. I cannot rotate the grid, so how do I get the grid to follow the correct perspective? I am using a 1 point grid, is that correct?

    I've looked for tutorials on how to use the grid, but they are all houses and cereal boxes. I want to know how to accurately match a plane of the grid to a surface in a raster image.

    Thanks folks.

    lucasm86974246
    Known Participant
    February 14, 2017

    Here's another attempt that I've made (logo on table). It's heading in the right direction but it still misses the mark quite a bit. I also need to drastically improve the texture, lighting etc to make it look a part go the wood. Currently applying a transparency mask using the same image. Any suggestions there are welcome too.

    Really want to perfect this, as it is going to be part of a 2 - 4 post a day social media campaign moving forward.

    Thanks again.

    lucasm86974246
    Known Participant
    February 12, 2017

    So using your help I've got my head around this. This pic is of the next image (screen capture). The text and logo are my first attempt & I'm little undecided as to whether it is successful or not. Does the perspective look right? Ill improve the contrast in the final image.

    Next issue I've come across is that for some reason, when exporting this image as either .png or jpeg the text & logo are missing!

    Any ideas?

    Thanks folks..

    Eternal Warrior
    Inspiring
    February 12, 2017

    Hmm.. not sure... might suggest making a separate thread about this so we can all pitch in some new ideas?

    Regardless, I'll try and see if i can replicate the problem etc when i get a moment.

    Best,

    EW

    Ton Frederiks
    Community Expert
    Community Expert
    February 9, 2017

    You can try the Free Transform tool (E) with the Perspective distort variation.

    Or the 3D Effect > Rotate around the X axis  with an amount of perspective

    Eternal Warrior
    Inspiring
    February 9, 2017

    Either this or import your image and illustration back into Photoshop and use the Perspective Warp feature would be my suggestion.

    Eternal Warrior
    Inspiring
    February 9, 2017

    Also on a final note, you could try experimenting with the perspective grid in illustrator.

    Click View > Perspective Grid > Show Grid.

    Press Ctrl+Shift+I (on Windows) or Cmd+Shift+I (on Mac) to show the Perspective Grid. ...

    Click the Perspective Grid tool from the Tools panel.

    Then simply define the perspective grid first... snap your object to the grid and then move it accordingly into position.

    This video is quite helpful with the first part as is this latter adobe article:

    Defining perspective grids

    How to define perspective grids in Illustrator