umaynome
Inspiring
December 11, 2018
Answered

Using live trace for outline of logo

  • December 11, 2018
  • 5 replies
  • 7759 views

Hello I am using illustrator to do live trace and outline, it shows a nice outline of what i want to be able to save as PSD on a transparent background so i can drag it into another project. I am only wanting the cyan blue lines shown on live trace (see attach). But when i try to save i get an artboard empty error.

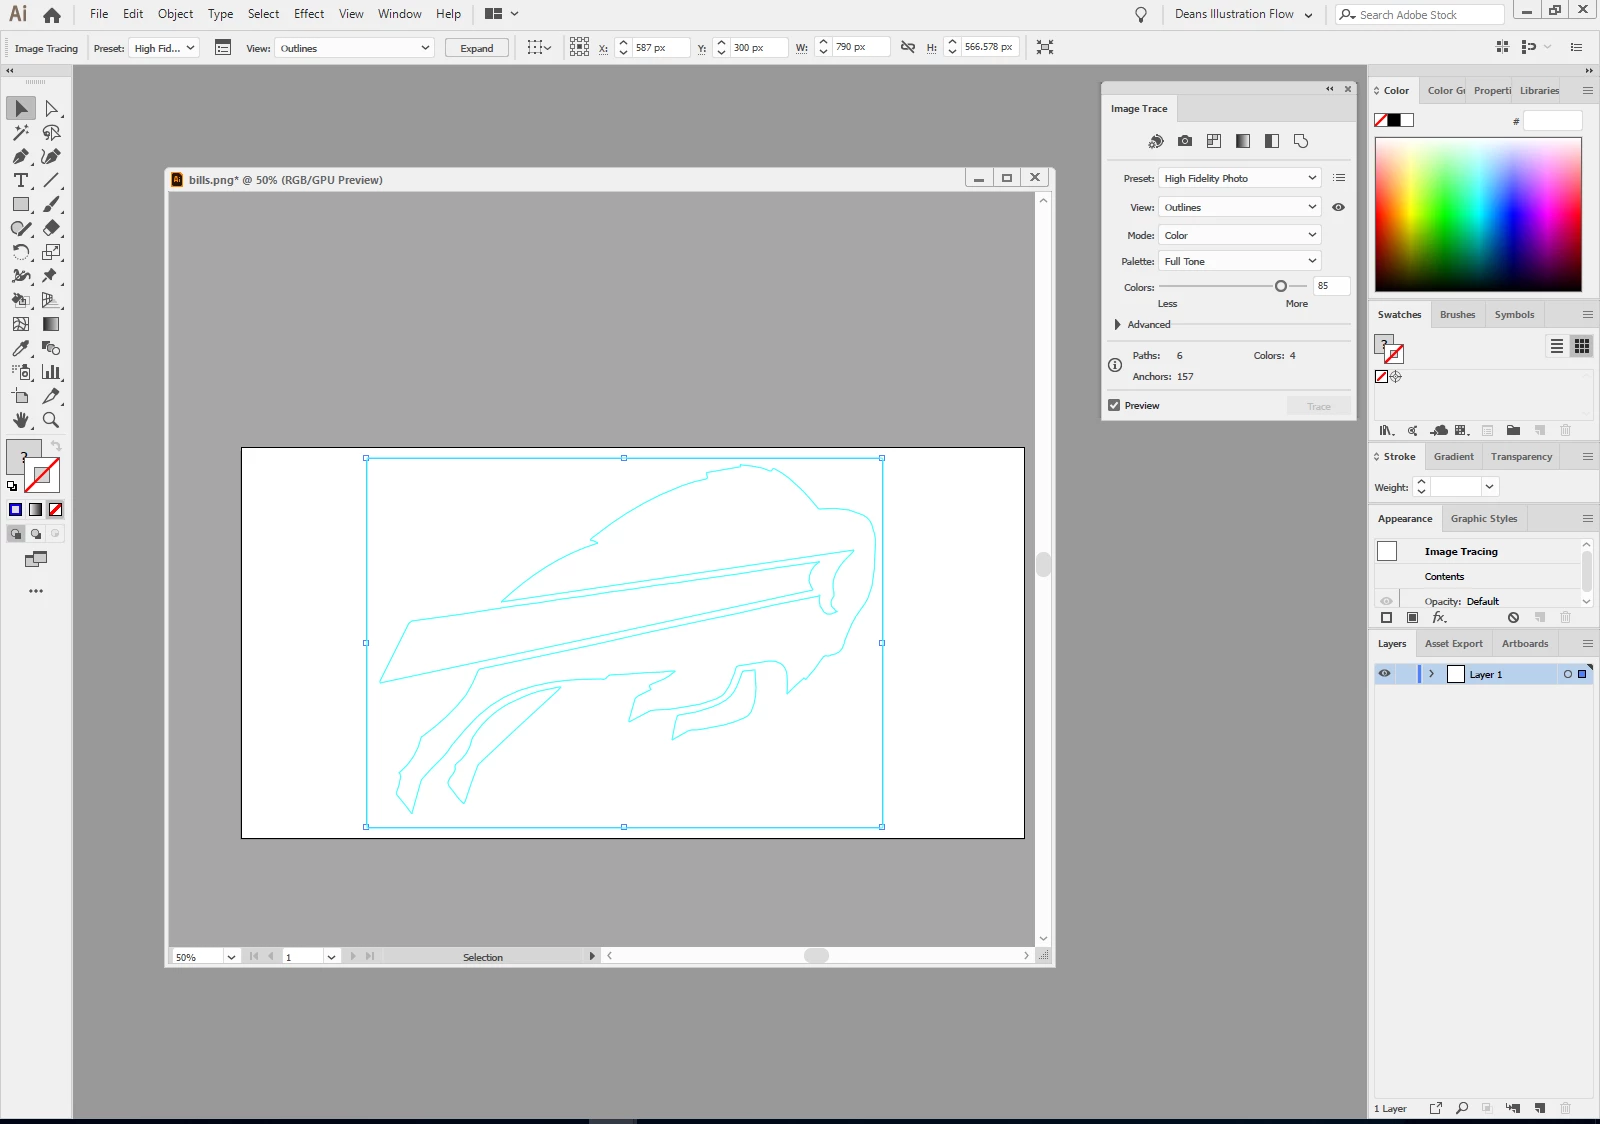
I am going for something like this, it has more line detail then the above image in live trace, ideally the black lines would be either grouped as one transparent piece or layers ungrouped on transparent background. Then in photoshop you can move to new artboard of work and it is only thin lines (trace) is what you see only, and i could change color of those lines to black, white, red, blue etc.

Alternate would be a PS action that does this result if possible.

I am just trying to avoid doing the lines by PEN TOOL at all cost.

Hopefully i have explained this project well enough to know if it is doable or not, if it is doable can you please respond with steps of 1-2-3 as i am a mid range user in illustrator only at best.

Thank you to all for looking in and trying to help.

cheers

Dean

    This topic has been closed for replies.
    Correct answer Bobby Henderson

    Here is my recommendation for getting the best results.

    First of all, ditch the live tracing attempts of some dopey pixel-based bitmap image. Accurate, authentic, vector-based NFL team logos are not hard to acquire via PDFs online. Just search the related team name, including terms like "PDF" and things like "media guide."  I've done it to create cool looking pick sheets for an office pool. Found the logos and even versions of them placed on helmets. Mind you, this is all just stuff for fun and NOT for any sort of commercial product for sale. Those logos are registered trademarks and the NFL is one of those companies that doesn't mess around regarding that.

    When you find a PDF that works, open the relevant page of the PDF in Illustrator. Grab the logo out of it. If the object has any line strokes make sure they are expanded into actual editable paths. Line strokes will not cross over into Photoshop's paths palette. Only pure paths.

    Copying AICB paths into Photoshop is the BEST method. Select the object in Illustrator. Press Ctrl-C or "copy" from the edit menu. The press Ctrl-V in your Photoshop layout. Choose "Paths" on the paste dialog. The object should show up as a "Work Path" in the paths palette. You can transform it and select individual parts of the object to fill directly or turn into selections for other tasks. Illustrator often does not have the AICB option turned on in Preferences. Sometimes copying paths from Illustrator to Photoshop will still work with just SVG code and PDF checked. Sometimes it doesn't.

    5 replies

    superc51632781
    Participating Frequently
    December 12, 2018

    remove the background by placing transparent

    backgroud and then you will be able to make the lines with ease.

    to make the lines with ease.

    Bobby HendersonCommunity ExpertCorrect answer
    Community Expert
    December 12, 2018

    Here is my recommendation for getting the best results.

    First of all, ditch the live tracing attempts of some dopey pixel-based bitmap image. Accurate, authentic, vector-based NFL team logos are not hard to acquire via PDFs online. Just search the related team name, including terms like "PDF" and things like "media guide."  I've done it to create cool looking pick sheets for an office pool. Found the logos and even versions of them placed on helmets. Mind you, this is all just stuff for fun and NOT for any sort of commercial product for sale. Those logos are registered trademarks and the NFL is one of those companies that doesn't mess around regarding that.

    When you find a PDF that works, open the relevant page of the PDF in Illustrator. Grab the logo out of it. If the object has any line strokes make sure they are expanded into actual editable paths. Line strokes will not cross over into Photoshop's paths palette. Only pure paths.

    Copying AICB paths into Photoshop is the BEST method. Select the object in Illustrator. Press Ctrl-C or "copy" from the edit menu. The press Ctrl-V in your Photoshop layout. Choose "Paths" on the paste dialog. The object should show up as a "Work Path" in the paths palette. You can transform it and select individual parts of the object to fill directly or turn into selections for other tasks. Illustrator often does not have the AICB option turned on in Preferences. Sometimes copying paths from Illustrator to Photoshop will still work with just SVG code and PDF checked. Sometimes it doesn't.

    umaynome
    umaynomeAuthor
    Inspiring
    December 12, 2018

    @bobbyh5280 while i see using a pdf will give you the clean lines of the logo already, can you explain to me this step please?

    Copying AICB paths into Photoshop is the BEST method. Select the object in Illustrator. Press Ctrl-C or "copy" from the edit menu. The press Ctrl-V in your Photoshop layout. Choose "Paths" on the paste dialog. The object should show up as a "Work Path" in the paths palette. You can transform it and select individual parts of the object to fill directly or turn into selections for other tasks. Illustrator often does not have the AICB option turned on in Preferences. Sometimes copying paths from Illustrator to Photoshop will still work with just SVG code and PDF checked. Sometimes it doesn't.

    Much like @Ares Hovhannesyan post, once the paths are in PS how do you stroke them or have more control of them as a group or individual paths? When i go to the menu to stroke, i get a error "could not stroke the layer as its nothing to stroke" ???  If i can get some help here that would be ideal to solve this, and this logo is just an example i was using.....I will likely use AI art in general to stroke paths to get outline of image on projects.

    thx

    Community Expert
    December 12, 2018

    Once you have paths placed in the paths palette you have to select those paths using the Path Selection Tool (black arrow in the tool box) or Direct Selection Tool (white arrow in the tool box). The black arrow thingie will select an entire path while the white arrow thingie will allow you to modify specific elements of the path.

    The path selection tool will let you apply the current fill or outline stroke directly to a selected path. If you want to use traditional Photoshop selection tools to do things like feathering selections and what not you'll have to choose the "Make Selection" command from the options menu of the paths palette in upper right corner of the palette.

    Another tip. Double click the thumbnail image of the path in the paths palette to "save" it. As long as it is listed as a work path it's not really saved. If you paste another path into Photoshop it will erase that path. So save it so the path has another name in that palette so it doesn't get over-written.

    Ares Hovhannesyan
    Community Expert
    Community Expert
    December 12, 2018

    You can create vector outlines from these image directly in PS.

    Select separately blue. white and red pixels with Magic Wand Tool then use make "Work path from selection" command from path panel.

    And you will create outlines from these image. See capture

    umaynome
    umaynomeAuthor
    Inspiring
    December 12, 2018

    So once you have this in PS "work path from selection" outlines. how do you give the paths a stroke of color? I cant seem to select the paths to make them active to stroke them?

    Ares Hovhannesyan
    Community Expert
    Community Expert
    December 12, 2018

    1. Choose Path with Direct Selection Tool then Right click and choose Define shape. After that you can use it as Shape.

    2 At the bottom of path panel you have two option for coloring path. See Help Add color to paths in Photoshop

    Fill a path using the current Fill Path settings

    • Select the path in the Paths panel.

    • Click the Fill Path button at the bottom of the Paths panel.

    Fill a path and specify options...  (reference Add color to paths in Photoshop

    KShinabery212
    Community Expert
    Community Expert
    December 12, 2018

    I would just use the original as a template and then redraw the original how ever you like in a new layer.

    Less pain.  Easy to plot points and change the curves.  Less hassle. 

    Let's connect on LinkedIn. https://www.linkedin.com/in/kshinabery/
    Monika Gause
    Community Expert
    Community Expert
    December 11, 2018

    Make a compund shape out of it in Illustrator.

    Fill it with some color.

    Export it as a PSD file with full editability.

    The paths will then be a shape layer in Photoshop.

    umaynome
    umaynomeAuthor
    Inspiring
    December 11, 2018

    Got to be a better way then this Monika? I just need the lines (paths) to be a thin line (outline) once saved as the examples above show.

    Monika Gause
    Community Expert
    Community Expert
    December 11, 2018

    Copy to the clipboard.

    Paste in Photoshop as a path.