CryoSneasel
Participant
May 7, 2019
Answered

Why is my clipping mask getting lighter?

  • May 7, 2019
  • 4 replies
  • 4347 views

Okay, I have been fighting with the clipping mask on this project.

What I am trying to do, is make this yellow circle to be inside of the gray part. Like, I want to keep the shape of the gray part and the yellow circles gets cut off by the gray.

Here's the image before the mask

Heres the image after the mask

This is the effect I want, but why is it getting so pale? I am not changing the colors or anything. I am making a copy of the gray part (so I have 2) and make the mask with one of the copies, the one on top of the yellow circles.

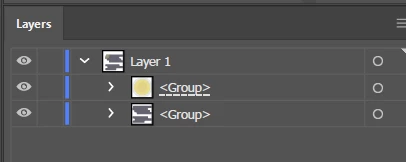
These are the layers before the mask

And this is after

I don't understand if I am doing something wrong. The gray is just rectangles that I "merged" in the pathfinder. The yellow was 3 circles I did the same thing with. One ring has a "soft light" overlay over it, the dark ring has an opacity of black. When I am making the mask, the yellow is merged.

I don't know what I am doing wrong. I don't understand why the yellow is getting darker. Could someone explain what's happening?

Thanks in advance.

This topic has been closed for replies.
Correct answer Ray Yorkshire

Those 2 cloud shapes are grouped, maybe that's why is not working .

From the start

Ungroup and just use one shape  to create the clipping mask with the yellow.

or  if you need both -  ungroup the clouds ,  select both and go

Object > Compound path > make

then use that, plus the yellow to create the clipping mask

4 replies

rcraighead
Legend
May 9, 2019

Jacob Bugge
Community Expert
Community Expert
May 8, 2019

CryoSneasel,

In addition to what Ray said, after Ungrouping you can hide/delete the grey shapes not used for the Clipping Mask, then after applying the Mask you can select the grey Clipping Path which has turned transparent and give it the grey fill again; you can Click the invisible path with the Direct Selection Tool (Smart Guides are your friends), or you can select it in the expanded Group in the Layers palette.

CryoSneasel
Participant
May 8, 2019

I didn't get a chance to try this, but I will keep this in mind if I ever have disappearing things again. Thank you for the input!

Jacob Bugge
Community Expert
Community Expert
May 8, 2019

For my small part you are welcome, CryoSneasel.

barbara_a7746676
Community Expert
Community Expert
May 8, 2019

One way you could do it would be to draw the gray shape, and select it.

Then click the Draw Inside icon near the bottom of the Tools panel. A dashed line will appear around the gray shape.

Then draw each of the circles.

CryoSneasel
Participant
May 8, 2019

I actually didn't know about that tool. I gave it a try and I honestly think it might be easier for me that way. I didn't have to get mad at it for 3 days like the mask! Thank you for the advice!

barbara_a7746676
Community Expert
Community Expert
May 8, 2019

You're welcome. The way does simplify the process and the number of shapes.

Monika Gause
Community Expert
Community Expert
May 7, 2019

That's not a clipping mask with the dashed underline, but an opacity mask.

CryoSneasel
Participant
May 7, 2019

Okay, I realized the mask I did was the wrong one. I tried again by doing ctrl + 7 which is what the Object > Clipping Mask > Make says the shortcut is.

When I do that, the yellow circles just disappear.

Ray Yorkshire
Ray YorkshireCorrect answer
Participating Frequently
May 8, 2019

Those 2 cloud shapes are grouped, maybe that's why is not working .

From the start

Ungroup and just use one shape  to create the clipping mask with the yellow.

or  if you need both -  ungroup the clouds ,  select both and go

Object > Compound path > make

then use that, plus the yellow to create the clipping mask