

Remove Tool in Beta for Photoshop Desktop
Hello Beta Team,
The Remove tool replaces areas of your image with realistic and relevant content. Use this tool to remove any distracting regions or elements, no matter how small or large.
Simply brush this artificial-Intelligence-powered tool over objects and people to make them disappear… as if they were never there.
Complicated backgrounds and structures, such as fences or edges are seamlessly completed.
What we want for you:
This should seem like the magic you expect out of Photoshop!
For our experienced users and those with a discerning eye, our goal is to reduce or eliminate the clean-up after the fill. You should be spending less time repeating a fill for better results. You should also not need to clean-up by switching to another tool, such as the Clone Stamp.
What we want from you:
If you have multiple systems, please try this tool on all of them. Hardware will make a difference.
Please compare the results to your usual method of removing/filling objects. Let us know…
Was it like magic?
Did this save you time?
Let us know by clicking on the Beaker and giving the results a thumbs-up or a thumbs-down.


How to use the Remove Tool in Photoshop Desktop Beta
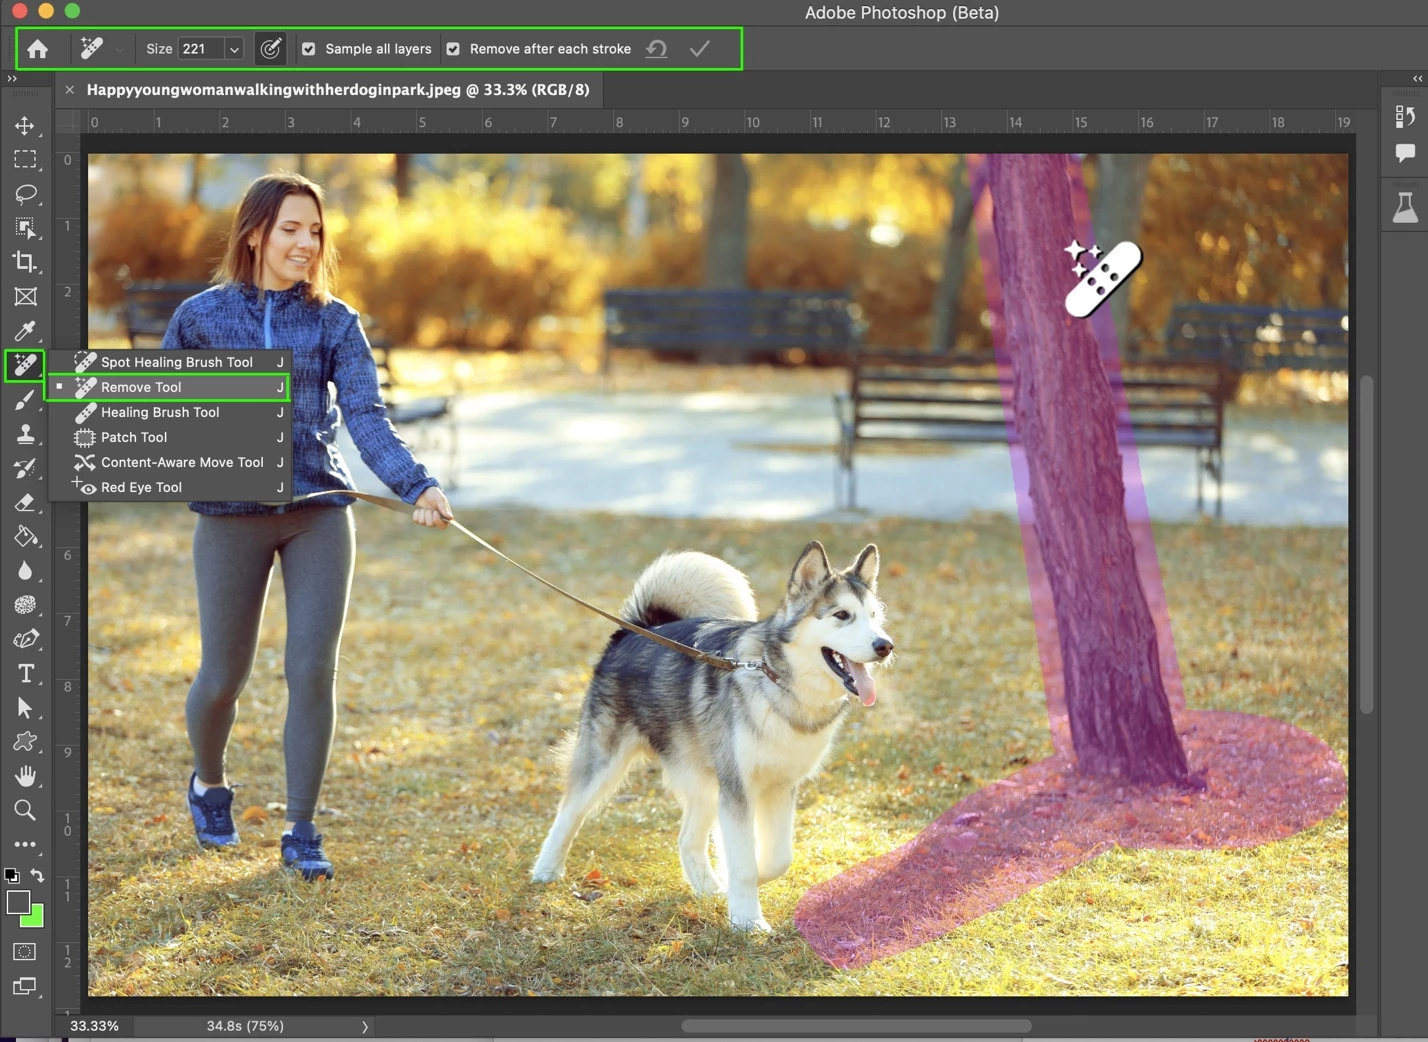
- Select the Remove tool from the toolbox.
Find it in the Healing brush tool group. Expand the group by clicking on the Spot Healing Brush tool, Patch tool, or Red Eye tool to show the Remove Tool.
Note: You may see a “Installing required components…” dialog the first time you use the tool after installation. Don’t worry, that’s normal. - Choose a brush size in the options bar.
• Choose a brush size that lets you brush over the entire object – with a little extra for good measure – so you don’t have to do a lot of brushing!
• Brush hardness and brush opacity settings are not used by this tool
- (Optional) If you want to make multiple brush strokes to cover the large or complex object, turn off Remove after each stroke in the options bar.
- Remove after each stroke = ON will apply the fill as soon as you complete a single stroke with the tool.
- Remove after each stroke = OFF will apply the fill after clicking the apply button; allowing for multiple strokes of the brush on the object before applying the fill.
- (Optional) Turn on Sample All Layers in the options bar to sample data from all visible layers.
Note: The new pixels will be created on the current, selected layer.
Hint: Create & select a new layer, then turn on Sample All Layers for a non-destructive workflow. - Click and drag over area you want to remove.
• Be sure to cover the entire area. Results are better if a bit of the background behind the object or person is also covered.
If Remove after each stroke = ON is selected, the new pixels will be appear after completing the stroke. Skip the next step. You’re done!
- If Remove after each stroke = OFF, continue to stroke of the area(s) to be removed, then click Apply in the Options bar or Enter/Return on the keyboard.
• Use Reset all Brush Strokes to clear all the strokes and start over.
We are looking forward to hearing from you!
Thank you,
The Remove Tool Team
