Laura Foulds Moody
Participant
November 22, 2022
Question

Adding Lens Flares

  • November 22, 2022
  • 1 reply
  • 1293 views

Adding lens flare

  1. Import your images into Photoshop
  2. Duplicate your images in the layers panel
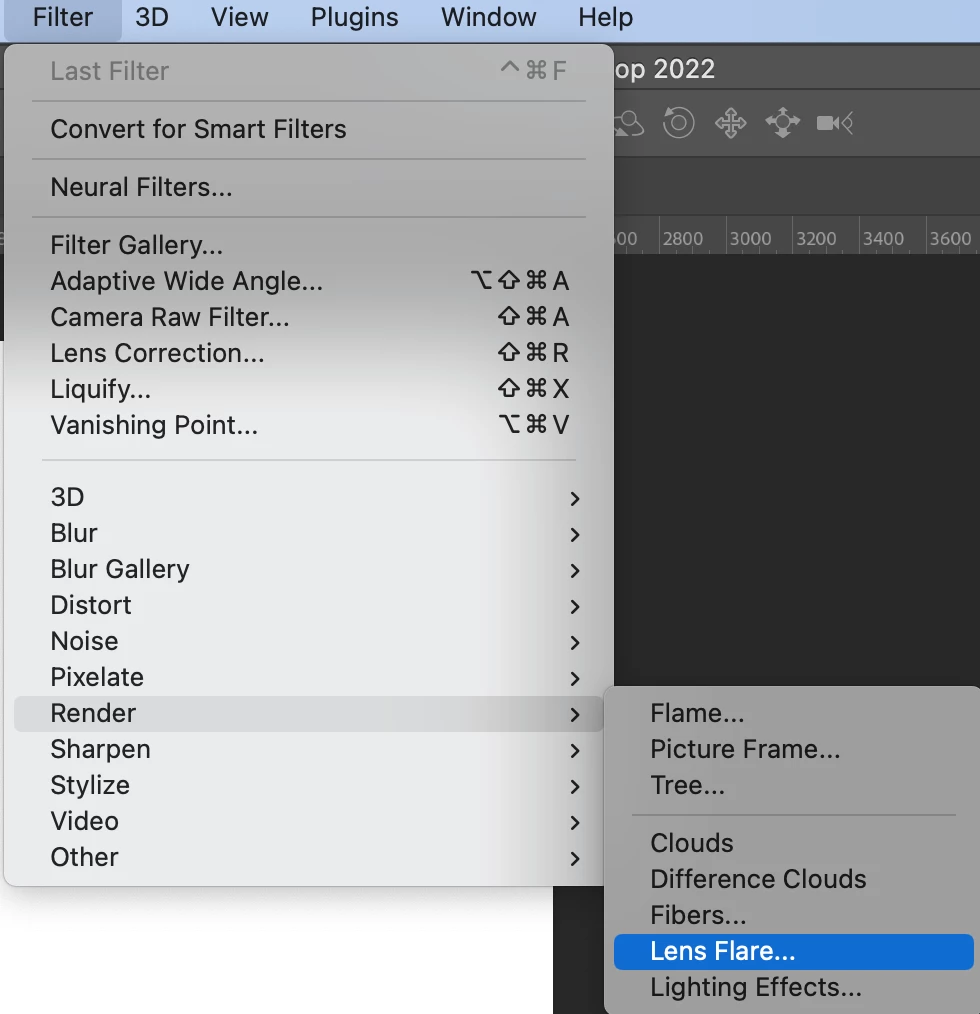
  3. Locate the menu bar at the top of the interface
  4. Locate and select the filter menu
  5. From the drop-down menu select, Render
  6. From the drop-down menu select, Lens Flare


  7. A new dialog box will open and now you can choose a lens flare and manually adjust the brightness. When you are confident with your adjustments select, Ok.
  8. Adjust the Eraser tool and remove the flare that you do not wish to be present.
This topic has been closed for replies.

1 reply

J E L
Community Expert
Community Expert
November 22, 2022

Thanks for the prompt, @Laura Foulds Moody on adding Lens Flare effects. Here's another way to go about that:

  1. Open an image in Photoshop.
  2. From the Layers panel, right-click on the Background image and select “Duplicate Layer...” and rename the layer if you like.
  3. Right-click on the Duplicate Layer and choose “Convert to Smart Object” for non-destructive editing. This also allows you later to reposition the Lens Flare if needed.
  4. From the top menu, select Filter > Render > Lens Flare.
  5. In the Lens Flare dialog box, select the Lens Type and Brightness level. Use your mouse to adjust the position of the Flare in the preview window. Click OK when done.
  6. To soften or remove areas of the Flare effect, select the Layer Mask on the Smart Filter layer.
  7. With a large, soft brush, set with an Opacity of around 33% to start (depending on your image and desired outcome), paint on the Layer Mask with black. If you go too far, switch to white and re-brush over the area.


Before:


After: