Participating Frequently
November 2, 2025
Answered

Ai WINDOW REPLACEMENT FOR INTERIOR REAL ESTATE PHOTOGRAPHY

  • November 2, 2025
  • 6 replies
  • 448 views

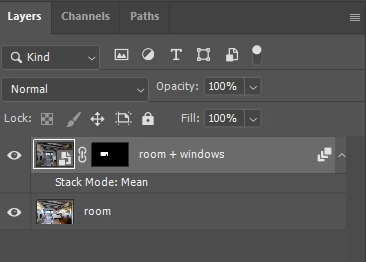
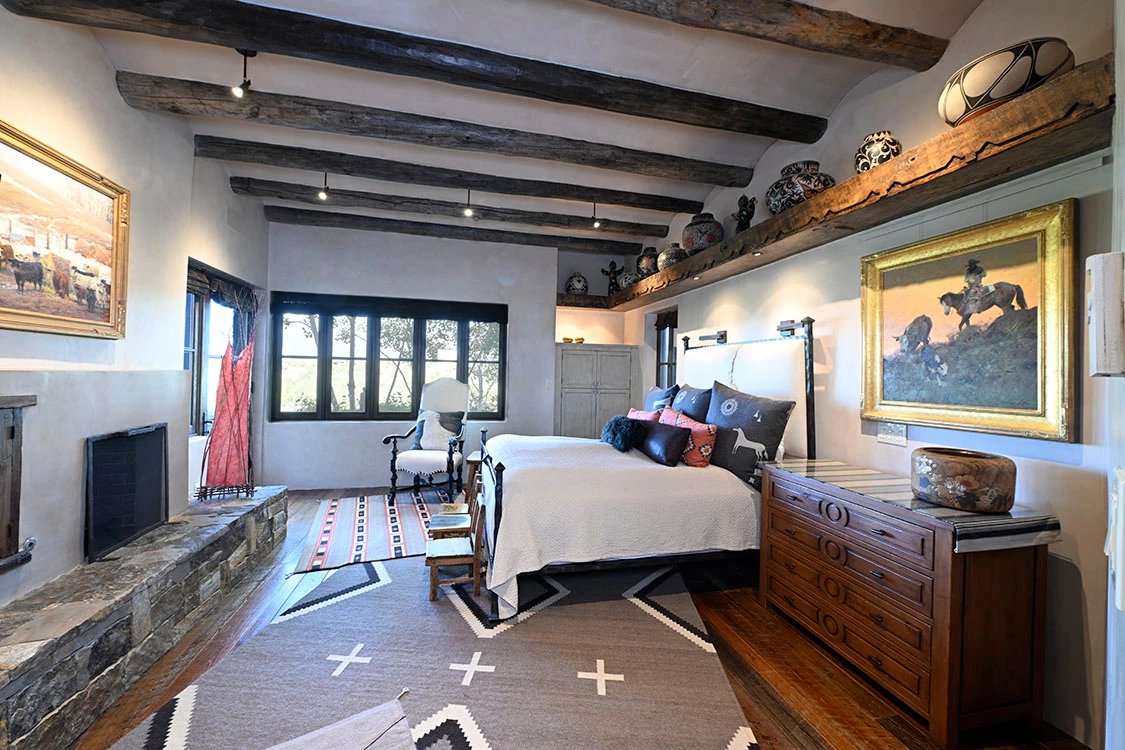
Hi,  I'm trying to find a way to quickly, thru Generative Ai or other, in PhotoShop, replace a blown out interior window, with a properly exposed window; basically the same two shots on a tripod with no movement, only one shot is well exposed for the interior of the room, and therefore the window is overexposed, and the other shot is underexposed for the interior of the room, but the window is properly exposed. In the past, I would manyually layer the good window in place of the poor one, but I assume Ai has a quicker solution?  I see Imogen has a solution, but it seems not to be very well done yet, at this point.  Please advise...

Correct answer Stephen Marsh

Yet another option, load both exposures into a stack of two layers in one file...


* Dupe the layer exposed for the room.


* Select the layer exposed for the window and the layer exposed for the room.


* Convert to a smart object.


* Layer > Smart Object > Stack Mode > Mean


* OPTIONAL: Use the (AI) object selection tool to select the windows. Add a layer mask.


* You can make whatever tonal or blending edits you like to the smart object (shadow/highlight, curves, etc).


Easy to put into a batch action or script.


6 replies

Conrad_C
Community Expert
Community Expert
November 14, 2025

Since I posted my answer, I learned about a technique called “flambient” photography that’s now popular in real estate photography. You should look into it because the example you posted uses a flash, and flash is part of the technique. (“Flambient” = flash + ambient light). The video below shows you how to do it quickly in Photoshop. He has created a Photoshop “action” (macro) that can do most of it in one click.


Also, although you asked about generative AI in the beginning, it just isn’t needed here. Generative AI is about “generating” new content that didn’t exist before. In your photos, you already have all the content you need, you just need to blend it.

D Fosse
Community Expert
Community Expert
November 15, 2025

I was just going to say "use bounce flash for the room and expose for the windows". That's how photographers have always done this.


Even if you can't use several flash units for a fully balanced interior, an on-camera flash goes a long way. Just direct it upwards and a little back. With on-camera flash it will probably need a little refinement - but you can do it on a single file, you normally don't need multiple exposures.


And I can promise - it's a lot faster than trying to merge separate exposures. It will usually also look better around the windows. Instead of a sharp contrast between outside and window sill/frame, you get natural light on it.

Stephen Marsh
Community Expert
Stephen MarshCommunity ExpertCorrect answer
Community Expert
November 3, 2025

Yet another option, load both exposures into a stack of two layers in one file...


* Dupe the layer exposed for the room.


* Select the layer exposed for the window and the layer exposed for the room.


* Convert to a smart object.


* Layer > Smart Object > Stack Mode > Mean


* OPTIONAL: Use the (AI) object selection tool to select the windows. Add a layer mask.


* You can make whatever tonal or blending edits you like to the smart object (shadow/highlight, curves, etc).


Easy to put into a batch action or script.


pranajaiAuthor
Participating Frequently
November 3, 2025

Thanks, much appreciated...

Conrad_C
Community Expert
Community Expert
November 3, 2025

AI might make this easier in the future, but there are already good tools for this because this is an extremely common task in real estate photography. The example below is done in Adobe software, and for many this is all they need. Some very busy real estate photographers may use Photomatix (paid software) because it has advanced batch processing features for this workflow that are not available in Adobe software; see their gallery to see why this workflow is popular for this specific task. (There is some limited batch processing of HDR merge in Adobe Lightroom Classic, such as processing multiple merges in the background.)


What is shown in the pictures below is HDR Merge in Adobe Camera Raw (or Lightroom). It works best if you shoot in raw and bracket properly in camera. It can look great, the quality of my attempt below is not that great for two reasons. One is that the picture exposed for the outside window should have been darker. Another reason is that it looks like the interior was lit with an on-camera flash. You can make it look OK with a lot of manual work, as you did, but my point is that this balancing of interior and exterior was done in only a few very quick steps in Adobe Camera Raw (or Lightroom):

1. Select the bracketed exposures. 

2. Apply Merge to HDR. The resulting single frame should now contain interior and exterior tonal detail. It will look best if you have customized your default raw settings, and that default appearance may be improved further by setting Adaptive Color as the profile in those defaults.

3. Adjust overall tone and color, especially Shadows and Highlights to balance interior and exterior.

4. If needed, fine-tune with masks. My window mask is not a hand-drawn cut-out. Instead I used the Select Objects mask, which is an AI mask so it can select the window areas in seconds.


When you use this type of HDR merge in Adobe Camera Raw or Lightroom, or Photomatix, the images are automatically aligned, their tonal ranges automatically merged, and 90% of the image looking good after just making overall corrections, before you create any masks or layers. This is why this technique is so popular with real estate photographers. And we haven’t even opened Photoshop, I opened the two images into Adobe Camera Raw from Adobe Bridge. (Although Photoshop has its own similar Merge to HDR Pro feature, it’s older and is much more difficult to use.)


quote

…I'm referring to stitching the two together, which is easy but time consuming manually, and doing it in a faster manner thru Ai.. That's my question, if anyone knows a quicker way using new Ai tools... Here's the finished shot of those two I earlier posted, all good and balanced in the end, but quite a bit of time to do manually, and I do many of these per shoot...So looking for a quicker solution to save time, and thought there's an Ai tool to do so, or an Ai worl-around....

By @pranajai


AI was mentioned many times in that paragraph. Today it is popular to ask for AI solutions for everything before looking at the tools we already have. Thousands of real estate photographers are already doing this work without needing AI, because existing technology has already provided solutions such as the one-click HDR merge shown here, which (with experience) takes only takes a minute or two for all necessary adjustments. The only AI that I used was to create the window mask without manually cutting it out.

pranajaiAuthor
Participating Frequently
November 3, 2025

thank you...

Trevor.Dennis
Community Expert
Community Expert
November 3, 2025

Just a thought, but did you try Photomerge?

You can do it manually by selecting the layers and using Edit > Auto Align layers, followed by Edit > Auto Blend Layers  with Seamless Tones and Colors checked.  I tried it with your images, and it gave me:


I separated the layers and put some red behind them, so we can see exactly what area of each layer was used.

This used to be used a lot years ago when HDR was a thing, and considering how new Nano Banana is to Photoshop, Photomerge would probably have been the smart move prior to NB.  Crazy times, and lots more to come I am sure.


I have a couple of posts currently at the end of this thread that might help with Ai use.


pranajaiAuthor
Participating Frequently
November 3, 2025

Much appreciated...

Trevor.Dennis
Community Expert
Community Expert
November 3, 2025

There is no option top use a reference image with Nano Banana so you need to place everything on the same layer like this.

Then Select All, and in the Contextual Task Bar or Edit > Generative Fill, select the Gemini 2.5 model, and use a prompt along the lines of:

'Replace the over exposed window with the properly exposed window.'

Which produced this:


I expect you know that the resolution is limited to 1024 x 1024 and will be stretched if the canvas or selected area is more than that size.  To overcome that:

Reduce the image to 1024 pizxels on its longest size

Use Nano Banana

Then use Edit > Generitive Upscale to to raise the image to a suitable size for print (if that is required).

Note 4X is the most you you can upscale.

pranajaiAuthor
Participating Frequently
November 3, 2025

Thanks for the input, very helpful.  Just trying to eliminte doing alot of steps to achieve the same result as I achieve manually...

Peru Bob
Community Expert
Community Expert
November 3, 2025

You might be able to fix the underexposed image with Camera RAW.

pranajaiAuthor
Participating Frequently
November 3, 2025

That's not relly what I'm refering to. Obviously I can edit any image in Camera Raw or other programs, which I already use to do so.  I'm referring to cutting out the window with good exposure and putting it in the other image with the good room exposure. I'm referring to stitching the two together, which is easy but time consuming manually, and doing it in a faster manner thru Ai.. That's my question, if anyone knows a quicker way using new Ai tools... Here's the finished shot of those two I earlier posted, all good and balanced in the end, but quite a bit of time to do manually, and I do many of these per shoot...So looking for a quicker solution to save time, and thought there's an Ai tool to do so, or an Ai worl-around....