Participating Frequently
July 7, 2021
Answered

Background Removal

  • July 7, 2021
  • 5 replies
  • 3366 views

I have a business card that has an image

and two lines of text, when I select Remove Background,  it removes all of the text.  Anyway to prevent that, I need to keep the text as well?

This topic has been closed for replies.
Correct answer JJMack
I keep trying but I am unsuccessful. I feel like I am missing a piece to
the puzzle. My results when I try to do the shape layers do not match the
example screenshots provided. Are you using the clone tool or the shape
tool to capture parts of the shapes/image?

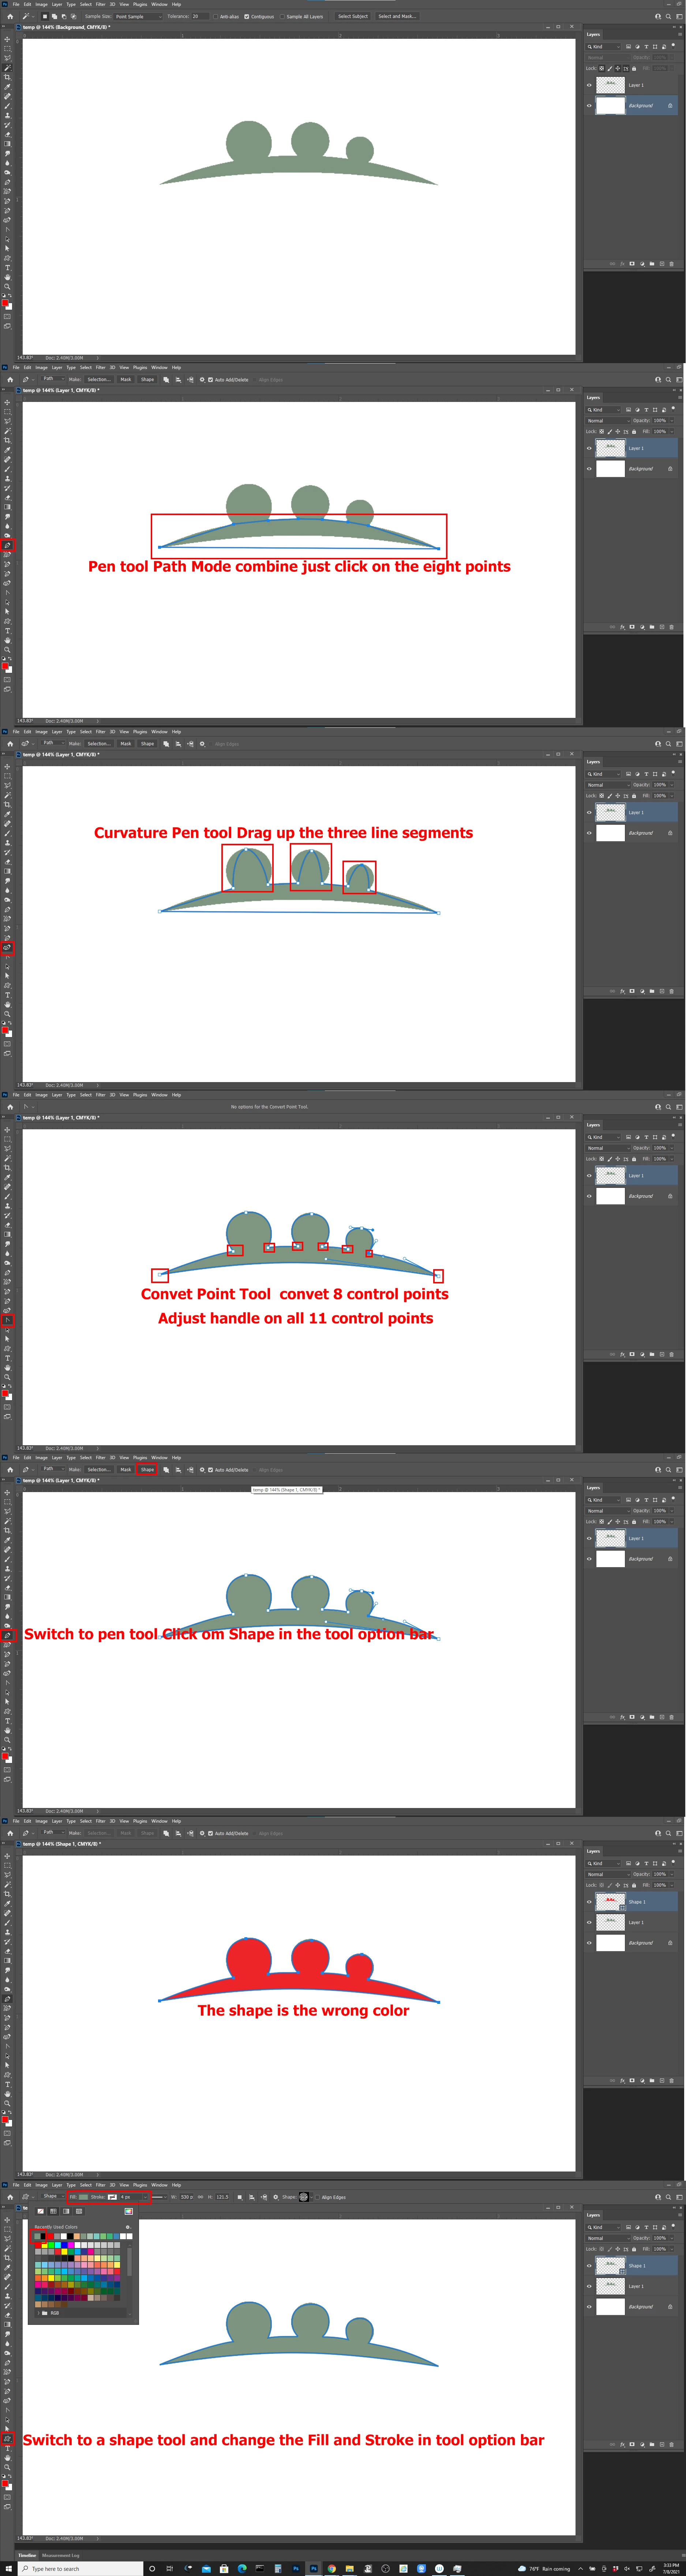
You need to use the Pen and other vector tools to creats the Shapes Paths then creats the shape layers using the Paths you made with Photoshop vector tools. Like my Screen captures show. You should see the steps I used to create shape 1 the top shape layer.  I used the same steps to creats the bottom shape layer.


Here with more details

5 replies

Participant
February 6, 2024

Okay


Trevor.Dennis
Community Expert
Community Expert
July 15, 2021

There is absolutely no question that you should rebuild the graphic and then add the text as type layers keeping the whole thing as a vector that will scale and print perfectly. Where I might question though, is in how to rebuild the graphic.  Rather than try to trace around the original with a single workpath (or one for the dark green and one for the lighter green), I would use the shape tools set to Path, and make each subsection separately and combine them.


Holding down the Shift key to force a perfect circle, which easy for the three smaller circles, but a bit trickier for the crescent.  The trick there is to get it close, then use Free Transform and Alt (opt) drag a corner handle to maintain the perfect circle.  You can see from my screen shot the bottom of the crescent is not round, as it matches most of the circumference but has a dip in the centre.


I always have to think about this.  We need to remove the large radius from the smaller radius to leave the cresent, so we select and copy the large radius. (It's important to do this the right way round) Then select and paste onto the small radius, and choose Subtract Front Shape from Path Operations.


Then click on Merge Shape Components and we are left with the crescent

The last bit is super easy. Note: I have renamed the paths for the sake of clarity.

I selected and copied the cresent path (I'm just using Ctrl c to copy and Ctrl v to paste) and paste it onto the Three Circles path.


Make sure Combine Shapes is selected in Path Operations and click on Merge. and you have a graphic that even a OCD pedent would be happy with.

I was hoping that the light green graphic could be a simple case of flipping the dark green one and making it larger, but it didn't quite work out.


It will be easy to make it using the existing paths, although it would have been easier still if I'd used a copy of the three circles path.  I got a good match with the crescent using these settings, but note that the aspect ratio is not quite the same.


The rest is super easy. Does anyone know what the fonts are?

That is a clever idea fro the Three Generations graphic btw.  Did the thread starter design it?

Inspiring
July 7, 2021

It seems like the text has a similar color as the background. So try to play around with the toleranz value.

MarekMularczyk
Community Expert
Community Expert
July 7, 2021

What exactly do you want to remove?


Adobe Community ExpertAdobe Certified Professional
Participating Frequently
July 7, 2021

I want to only remove the white background.

Inspiring
July 7, 2021

https://www.dummies.com/software/adobe/photoshop/how-to-set-the-tolerance-of-the-magic-wand-tool-in-photoshop-cs6/
Maybe this can be helpfull. If the colors are pretty similar you have to play around with the tolerance.

JJMack
Community Expert
Community Expert
July 7, 2021

Select all you want to keep and add the selection as a layer mask.

JJMack