typical_joker
Participant
April 27, 2026
Answered

Best workflow for consistent product image backgrounds and lighting in Photoshop?

  • April 27, 2026
  • 3 replies
  • 112 views

Hi everyone,

I’m currently working on improving product images for an e-commerce-style website and trying to build a consistent visual style using Adobe Photoshop.

Project context:

  • Website: [Link removed by moderator]
  • Type: Product listings with images from different sources
  • Issue: Inconsistent backgrounds, lighting, and overall presentation

What I’m trying to achieve:

  • Clean, uniform backgrounds (preferably white or light neutral)
  • Consistent lighting and color balance across all products
  • Professional look without spending too much time per image

Current workflow:

  • Using Select Subject + Remove Background
  • Adjusting brightness/contrast manually
  • Applying basic color correction
  • Exporting for web

Problems I’m facing:

  • Edges sometimes look rough or unnatural after background removal
  • Lighting differs significantly between images
  • Colors don’t always match the real product
  • Time-consuming to manually fix each image

Questions:

  1. What’s the most efficient workflow in Photoshop for batch-processing product images?
  2. Are there better tools/techniques for clean background removal (especially for complex edges)?
  3. How can I standardize lighting and color across images taken in different conditions?
  4. Any recommended presets, actions, or automation methods to speed this up?

Would really appreciate any practical tips or workflows from those handling e-commerce images regularly.
    Correct answer D Fosse

    You do not do this in Photoshop. You do it with the lighting setup when shooting.


    Do not select or mask as a base workflow, except in an emergency when you have no other option. Masking is for touchups and usually subtle/soft.


    Trying to do this entirely in Photoshop might in some cases be possible, but it will take a disproportionate and unrealistic amount of time. If you attempt to do this with AI, I can promise you it won’t look natural, and with a high likelihood of artifacts.


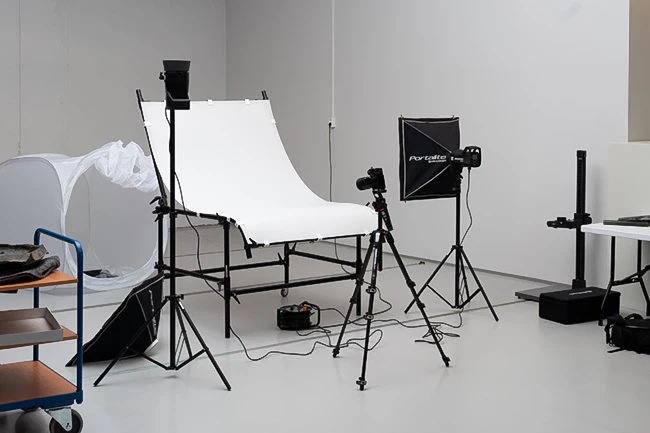
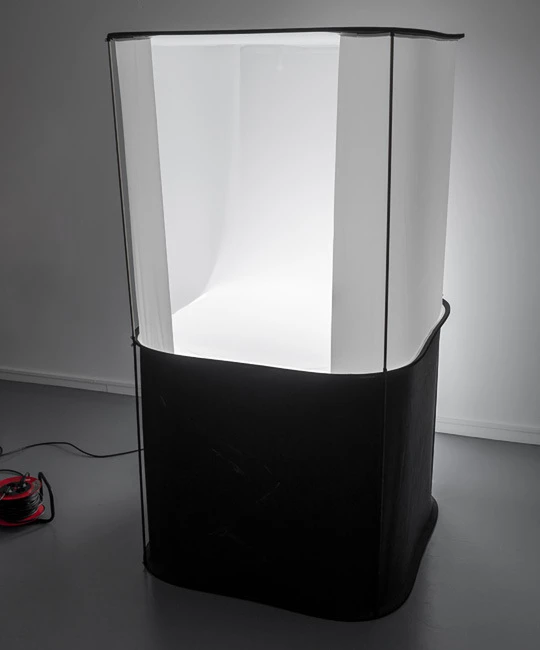
    You need a uniform background, optionally backlit to eliminate or reduce shadows, and you need a variety of diffused light sources. This is typically done with studio flash units fitted with large soft-boxes, or a light tent. A cheap and effective way is to bounce a flash off a ceiling or white wall (see illustration below).


    Most of the product photos you see are actually done by skilled and professional photographers. Photoshop is a part of that workflow, but only at the end when doing the final finishing touches.


    Here’s a couple of random shots from my own working studio, just to point you in a direction. Yes, some of this equipment is expensive, especially if you add it all together - but with a little consideration you can get much of the same result with simple means and perhaps a camera flash.


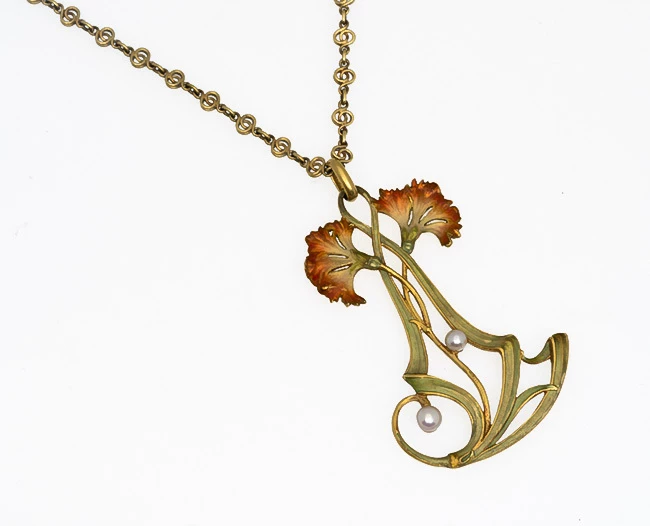
    This is straight out of the camera, no masking:


    3 replies

    Participant
    October 1, 2026

    For an e-commerce catalog, I would separate consistency into two parts: the photography setup and the Photoshop workflow.

    First, keep the camera position, distance, angle, background and lighting as consistent as possible. Using the same white-balance setting can also help prevent products from looking different from one image to another.

    For Photoshop, I would create a master PSD with a fixed canvas size, product placement, background, adjustment layers and output settings. Photoshop Actions can then automate repetitive tasks such as resizing, canvas preparation, sharpening and exporting.

    For images photographed under the same lighting conditions, Camera Raw synchronization can also save time. I would avoid applying identical brightness or color corrections blindly to every image because individual exposures can still vary.

    Automatic background removal is useful as a starting point, but irregular edges should be checked manually, especially with products that have fine details.

    Finally, compare the finished images side by side before publishing. Differences in exposure, white balance, crop and product scale are much easier to spot when the images are viewed together.

    A controlled photography setup combined with Camera Raw adjustments, Photoshop templates and a final manual check can make a large product catalog much more consistent.

    Ventinots — Genuine Cowhide Rugs & Handcrafted Leather Goods
    Legend
    April 27, 2026

    I work as a product photographer for an automotive supplier, and use a light tent with CFLs and multiple mounted cameras. You light from underneath to get a white background, and I use disposable cut sheet restaurant paper to protect the light tent. I just have to do cleanup (auto parts are dirty and the paper gets oil stains and such) and dust spotting. I have my lighting profiled with a color checker and a custom profile in Camera RAW. Much of my production is automated in Bridge and Photoshop with custom scripts which really speed things up.

    Trying to “fix it in post” is a bad idea. Get it all right in camera and you’ll be most of the way there.

    D Fosse
    Community Expert
    D FosseCommunity ExpertCorrect answer
    Community Expert
    April 27, 2026

    You do not do this in Photoshop. You do it with the lighting setup when shooting.


    Do not select or mask as a base workflow, except in an emergency when you have no other option. Masking is for touchups and usually subtle/soft.


    Trying to do this entirely in Photoshop might in some cases be possible, but it will take a disproportionate and unrealistic amount of time. If you attempt to do this with AI, I can promise you it won’t look natural, and with a high likelihood of artifacts.


    You need a uniform background, optionally backlit to eliminate or reduce shadows, and you need a variety of diffused light sources. This is typically done with studio flash units fitted with large soft-boxes, or a light tent. A cheap and effective way is to bounce a flash off a ceiling or white wall (see illustration below).


    Most of the product photos you see are actually done by skilled and professional photographers. Photoshop is a part of that workflow, but only at the end when doing the final finishing touches.


    Here’s a couple of random shots from my own working studio, just to point you in a direction. Yes, some of this equipment is expensive, especially if you add it all together - but with a little consideration you can get much of the same result with simple means and perhaps a camera flash.


    This is straight out of the camera, no masking: