Answered
change logo on an image - to som ethign different
how for the below image do i change the logo a different logo while keeping the colour of the bag and keeping the shaoe and slant of the current logo style - to look natural?


how for the below image do i change the logo a different logo while keeping the colour of the bag and keeping the shaoe and slant of the current logo style - to look natural?
I have a bit more time now, so I'll run you through my approach. For a start, I like to work with everything square and perpendicular which I'll do with Perspective Warp
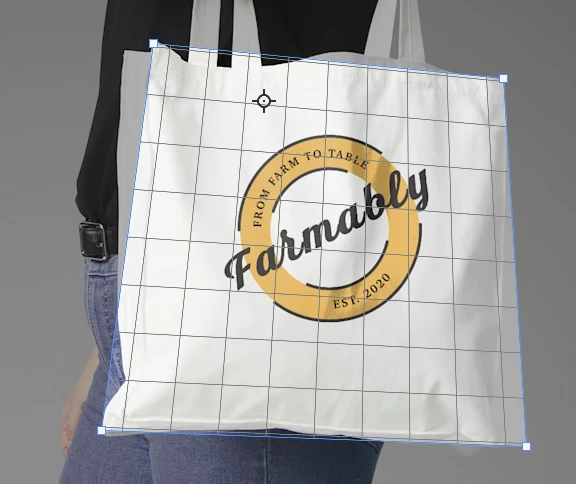
I've used Image Size to make the height the same as the width, and FT > Warp to to nudge those gaps out of frame.
Note: we'll use this same warped image of the bag to make the Map for Displacement, so it will all line up later.
Next make a fairly tight selection of the old logo, and use Content Aware Fill to remove the logo.
CAF will make a new layer with the fix, so merge that back to one layer.
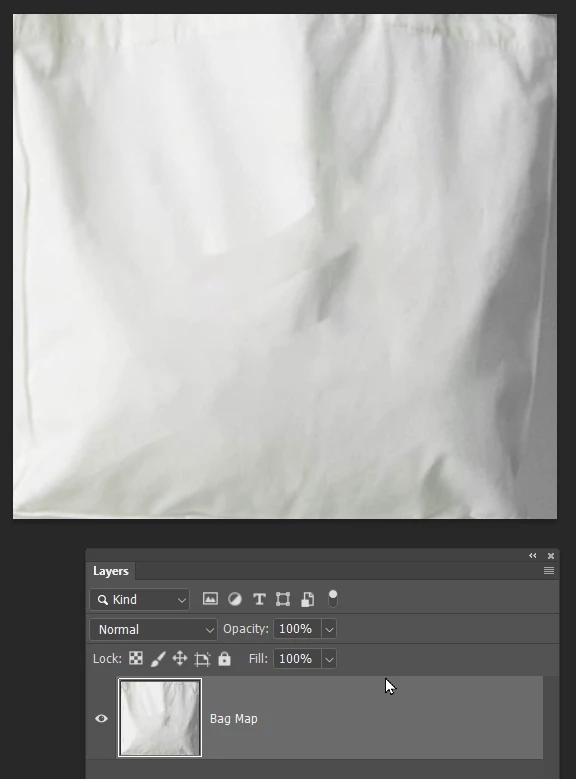
Right click thew layer and choose Duplicate. Then use the drop down and choose New.
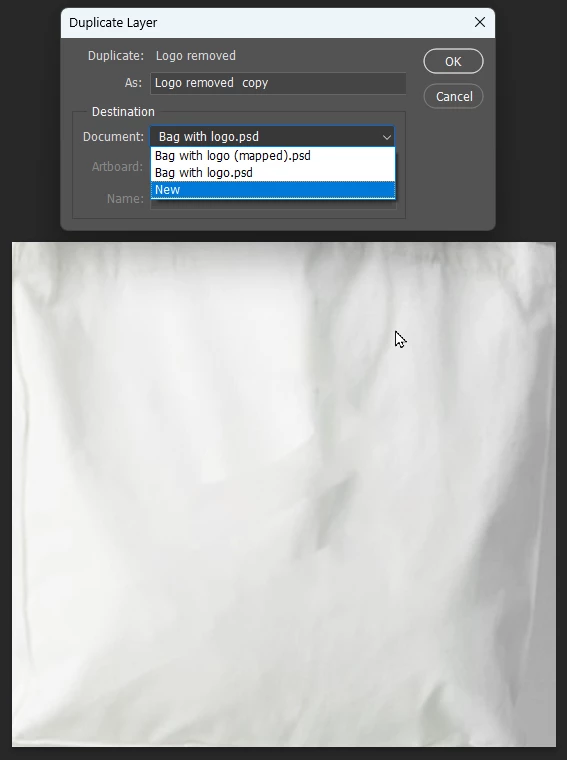
This new document is going to be our map, so increase contrast with curves or levels, and save it as a PSD file and call it Bag Map.psd Note: Photoshop has a wee gotcha with Displacement maps. Backward Compatability HAS to be set to Always in Preferences > File Handling, or it just won't work. I spent ages tracking down that problem some years ago, and got the answer from this fourm.
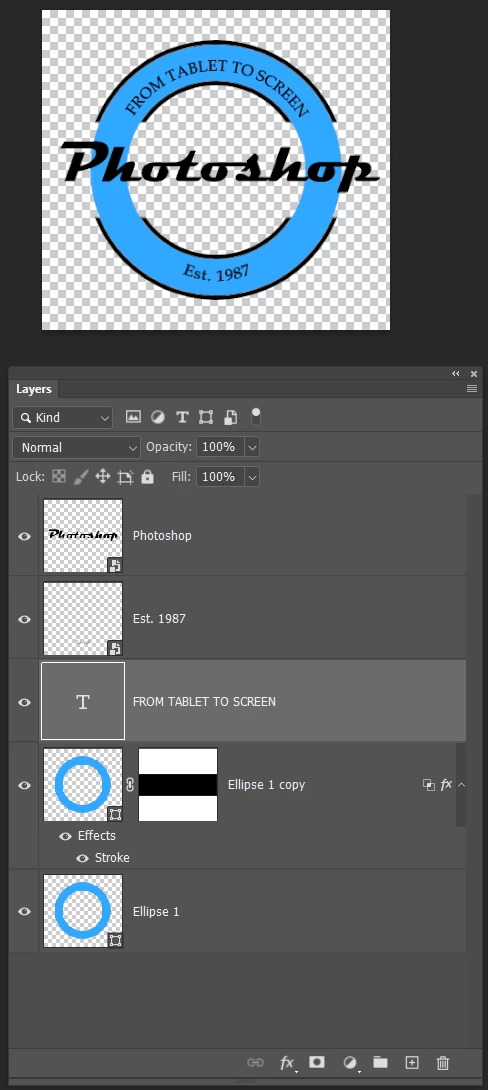
I'll assume you already have or will make the new logo. Remember it's much easier to build keeping everythis square.
When constructed, select all layers and make them a Smart Object.
Note I have two blue circle layers. The top one has Fill Opacity set to zero, and a black stroke which is managed with a Layer Mask You need to check Layer Mask hides effect in Layer Styles for this to work
 .
.
Move the Smart Object logo to the bag document. Position and rotate (if required) and go Filter > Distort > Displace
I started with 5 and 5.
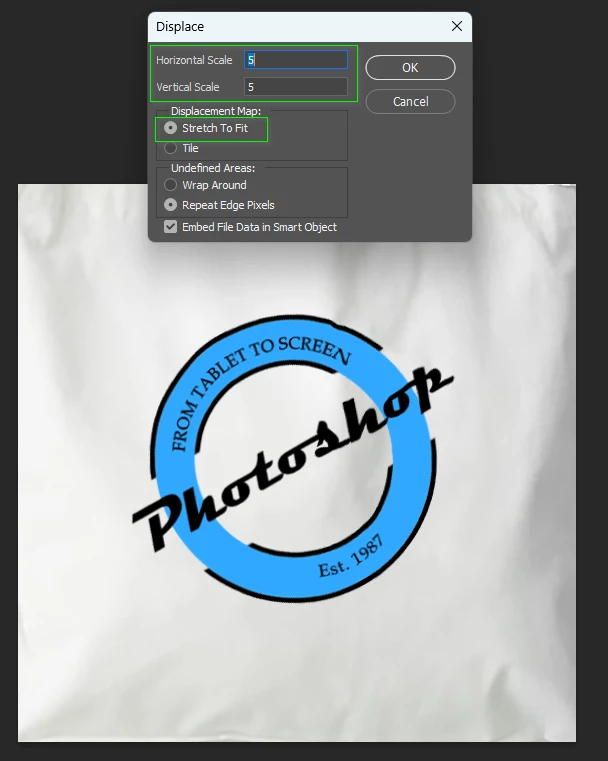
When you OK this it will ask for the Map file, so navigate to the Bag Map.psd file and OK it.
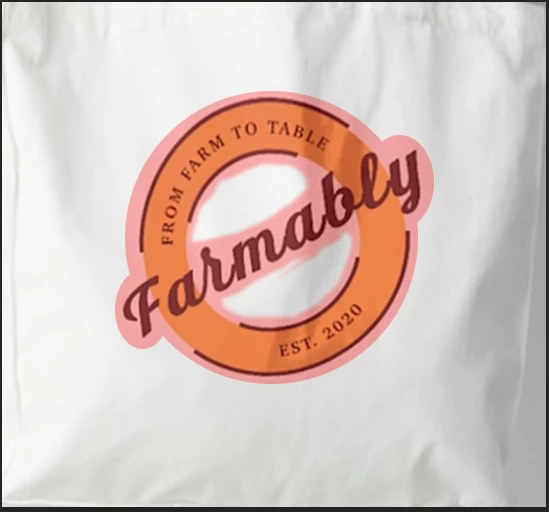
I ended up doing it again with values of 10 and 10 which gave me this. It's distorted, but has no shading, so scroll down to see how to fix this.
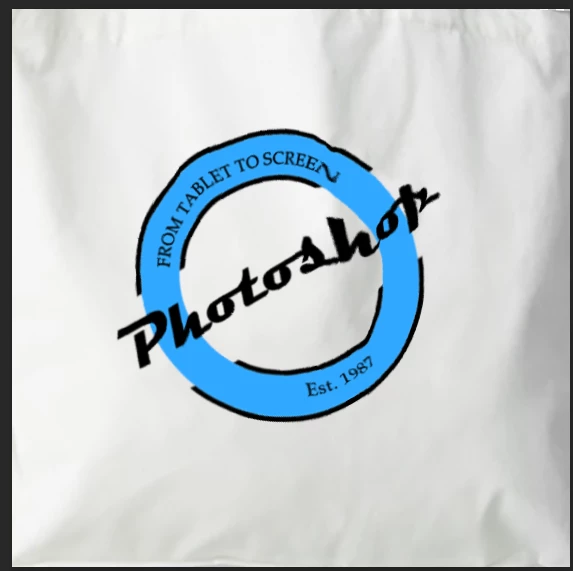
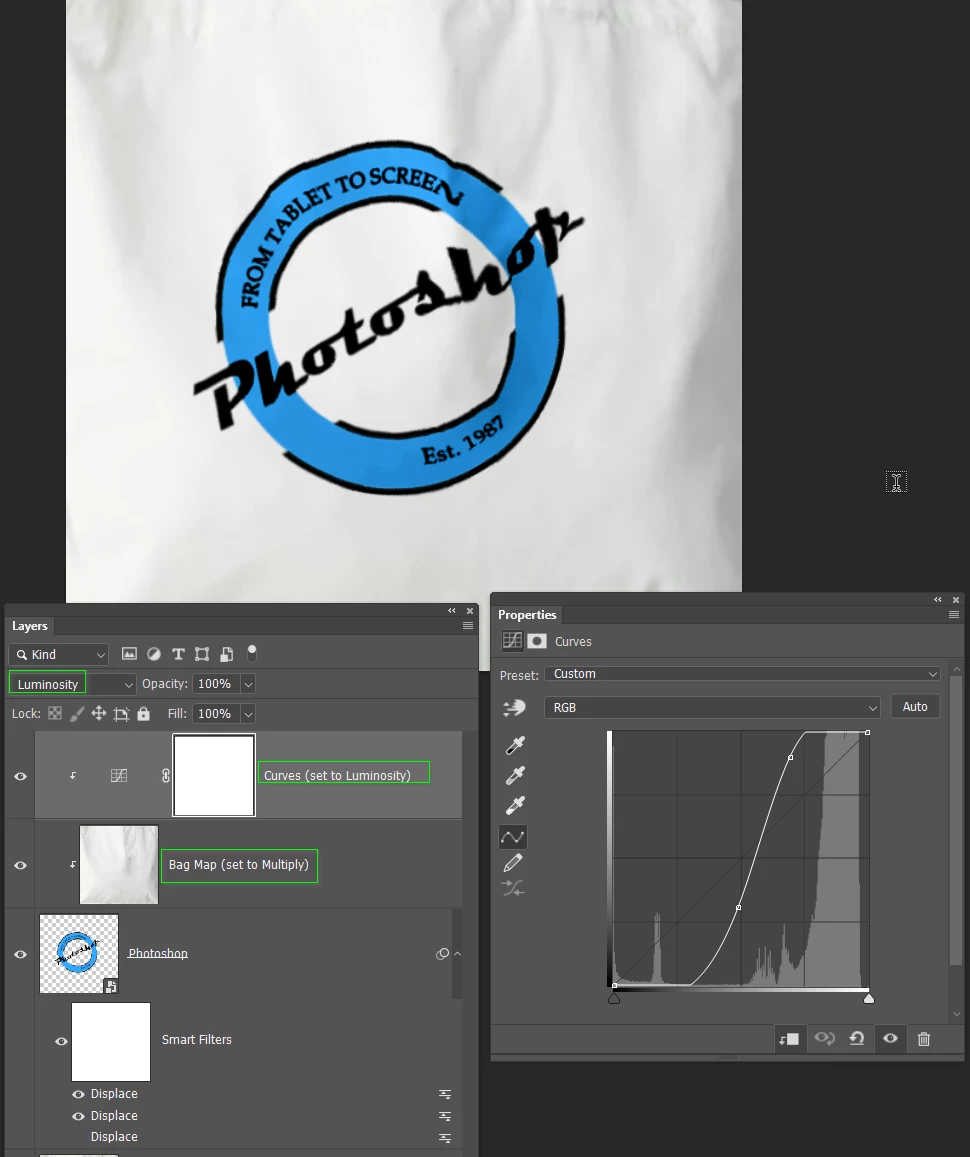
What I nearly always do with displacement maps is to add the map layer above the distorted layer, and set it to Multiply. This will add shading to the logo. It was not strong enough in this instance, so I used a fairly steep curves layer clipped to the map layer. That was set to Luminosity to prevent it affecting the colours. The map is clipped to the logo, so only the logo has the shading effect.
With this done, select all of those layers, and make them into a Smart Object.
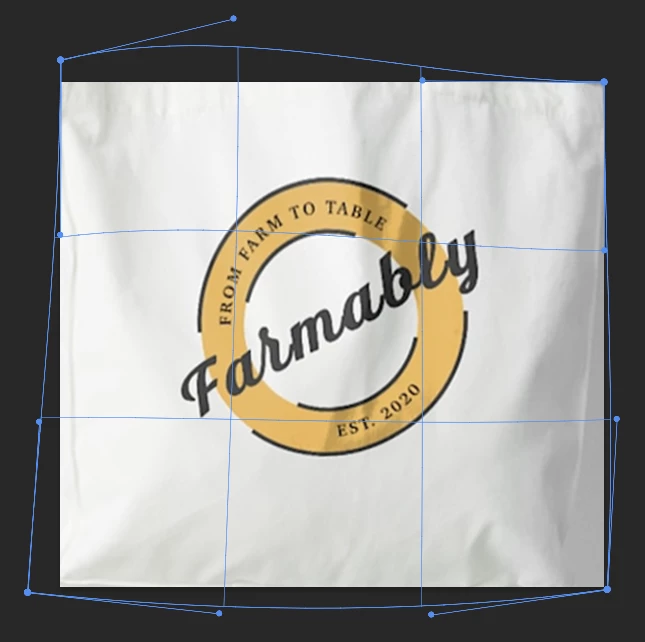
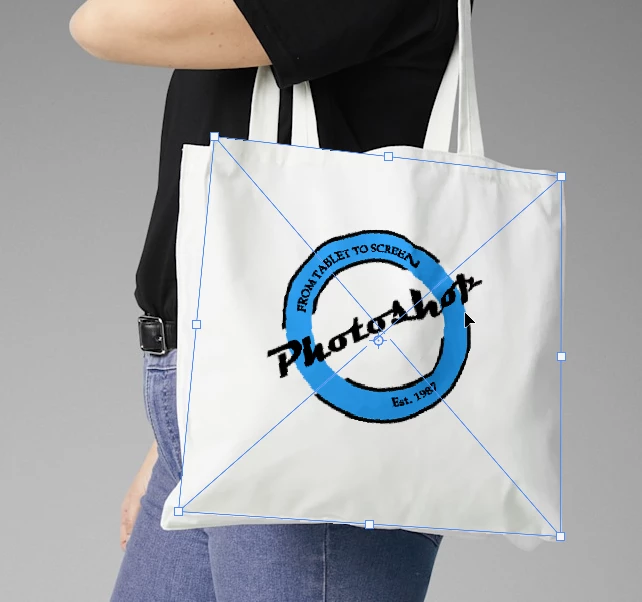
This is where working square really pays off, because when we move the new Smart Object to the original image we can transform to match the shape of the bag. Hold down Ctrl (Cmd) and drage the corners to fit the bag, and perspective, shape and shading will automatically fit the original.
I think that is about it. I used a layer mask and soft brush to blend the outer edges of the bag overlay, and a curves layer to darken it a wee bit to match the original.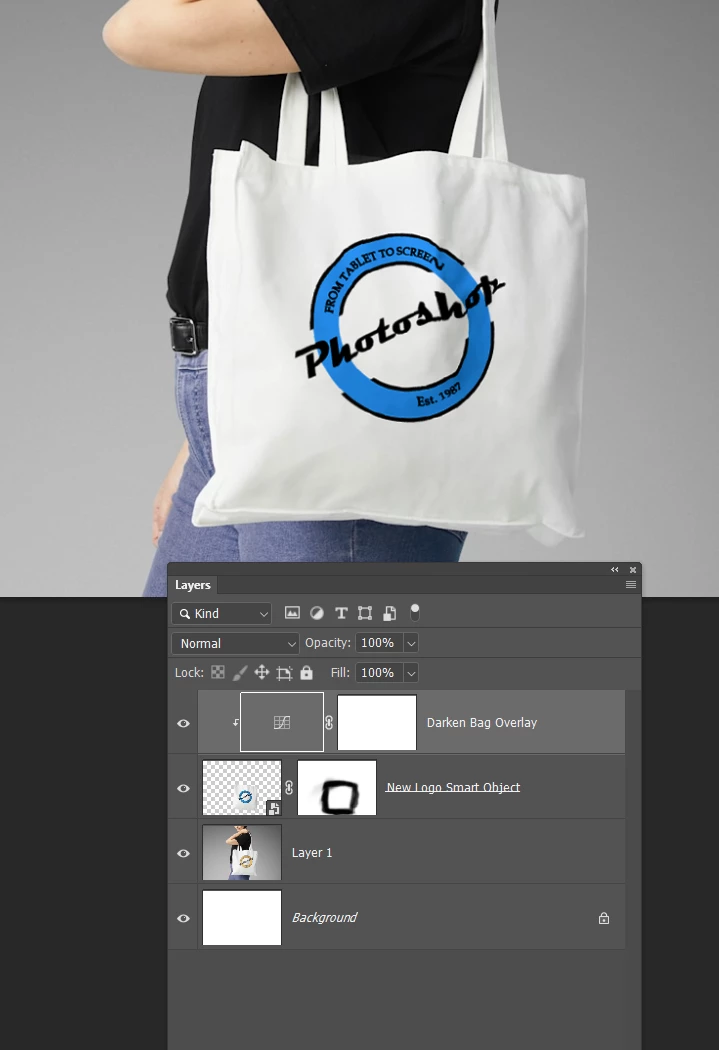
You can double click the SO any time to edit it and it will open in a new window with everything square again making edits nice and easy.
Already have an account? Login
Enter your E-mail address. We'll send you an e-mail with instructions to reset your password.