A traditional method for this is to drop color samplers by Shift-clicking the Eyedropper tool on each region of interest, then see what the Info panel says about the color value at each sampler. You can change the color model of each Info panel sampler readout, by clicking the readout # and choosing the color model from the menu that appears.
As you make edits, the sampler readouts update, so for example you could edit a Curves adjustment layer until the sampler reports that the value is within the correct range.
In my example, Sampler #1 is set to Grayscale (K) and reads 5% (5% black ink). But for some reason, your test is asking for “white” as 92–94%. This is possible only in a color model where white is defined as 100%. The only info panel readout that displays that way is HSB (Hue/Saturation/Brightness), so the sampler #2 readout is set to HSB and is reporting 96%, which in your test would be within spec.
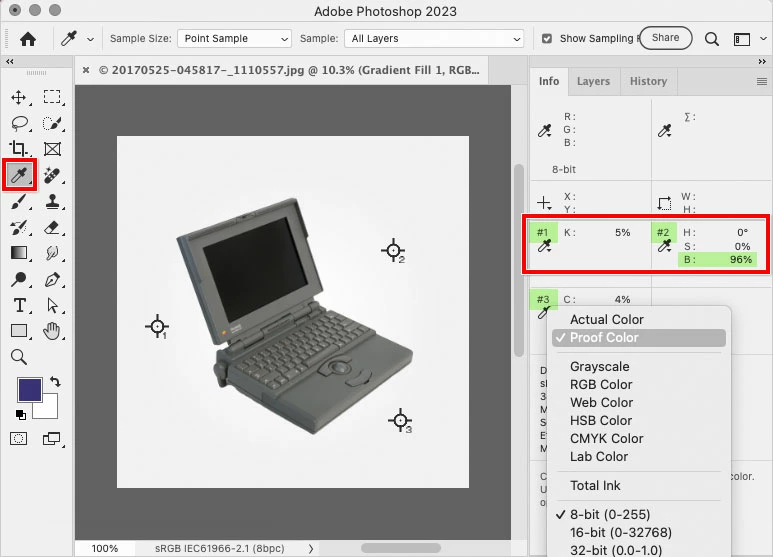
For sampler #3, the menu is shown open just to show how to change the readout. The fact that I am selecting Proof Color is not important, although it’s very useful if you have set up View > Proof Setup > Custom to show you what the values will be on the final delivery conditions (such as the color profile for the printer, ink, and paper).
