Charles91
Known Participant
March 20, 2026
Answered

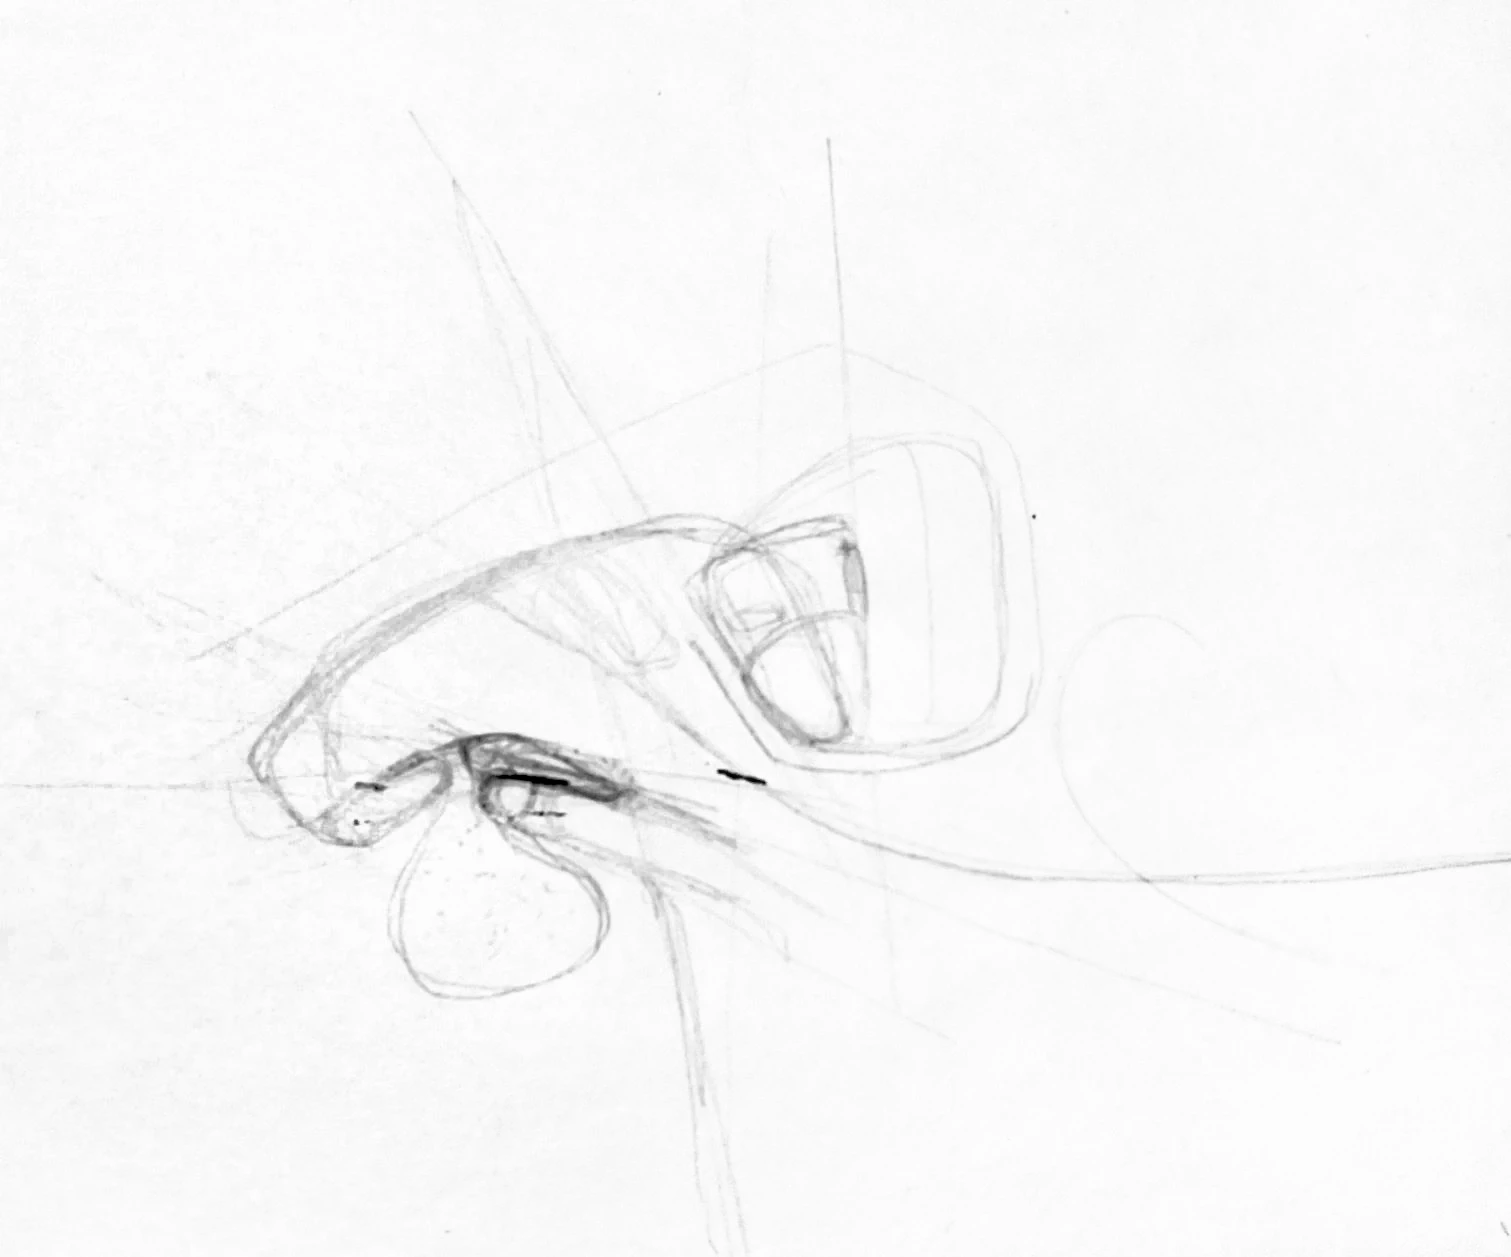
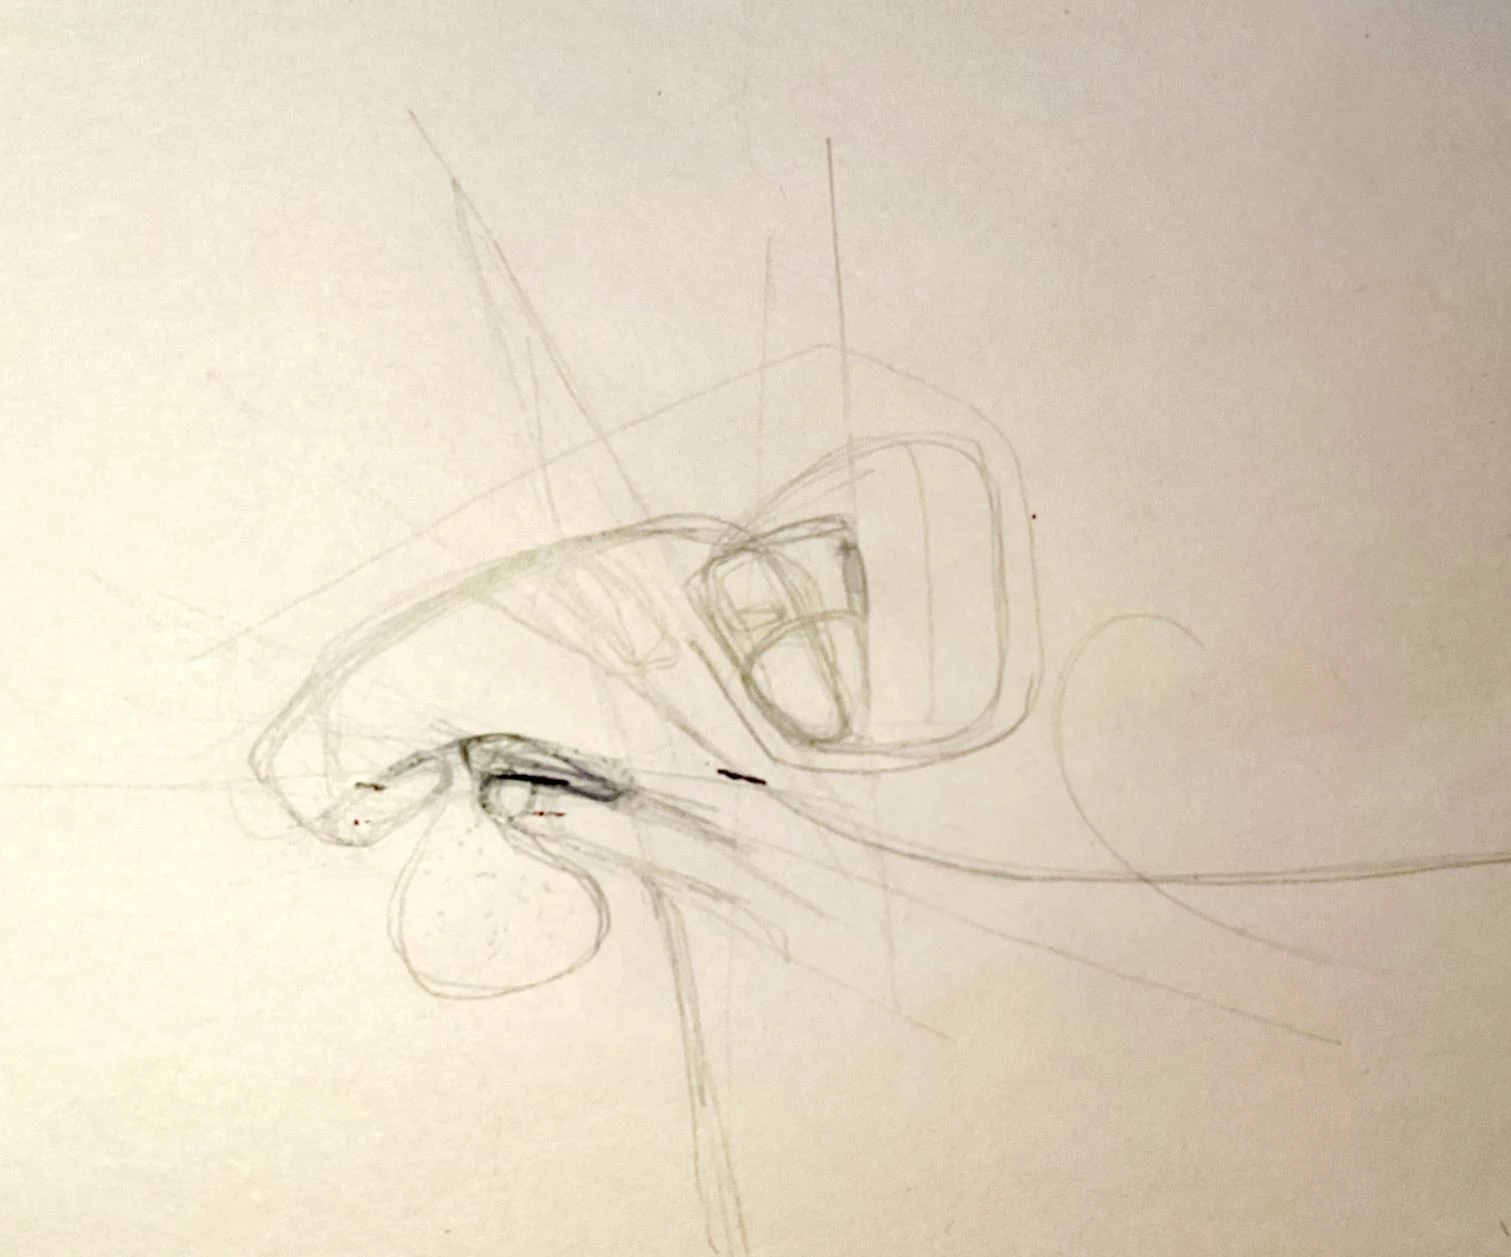
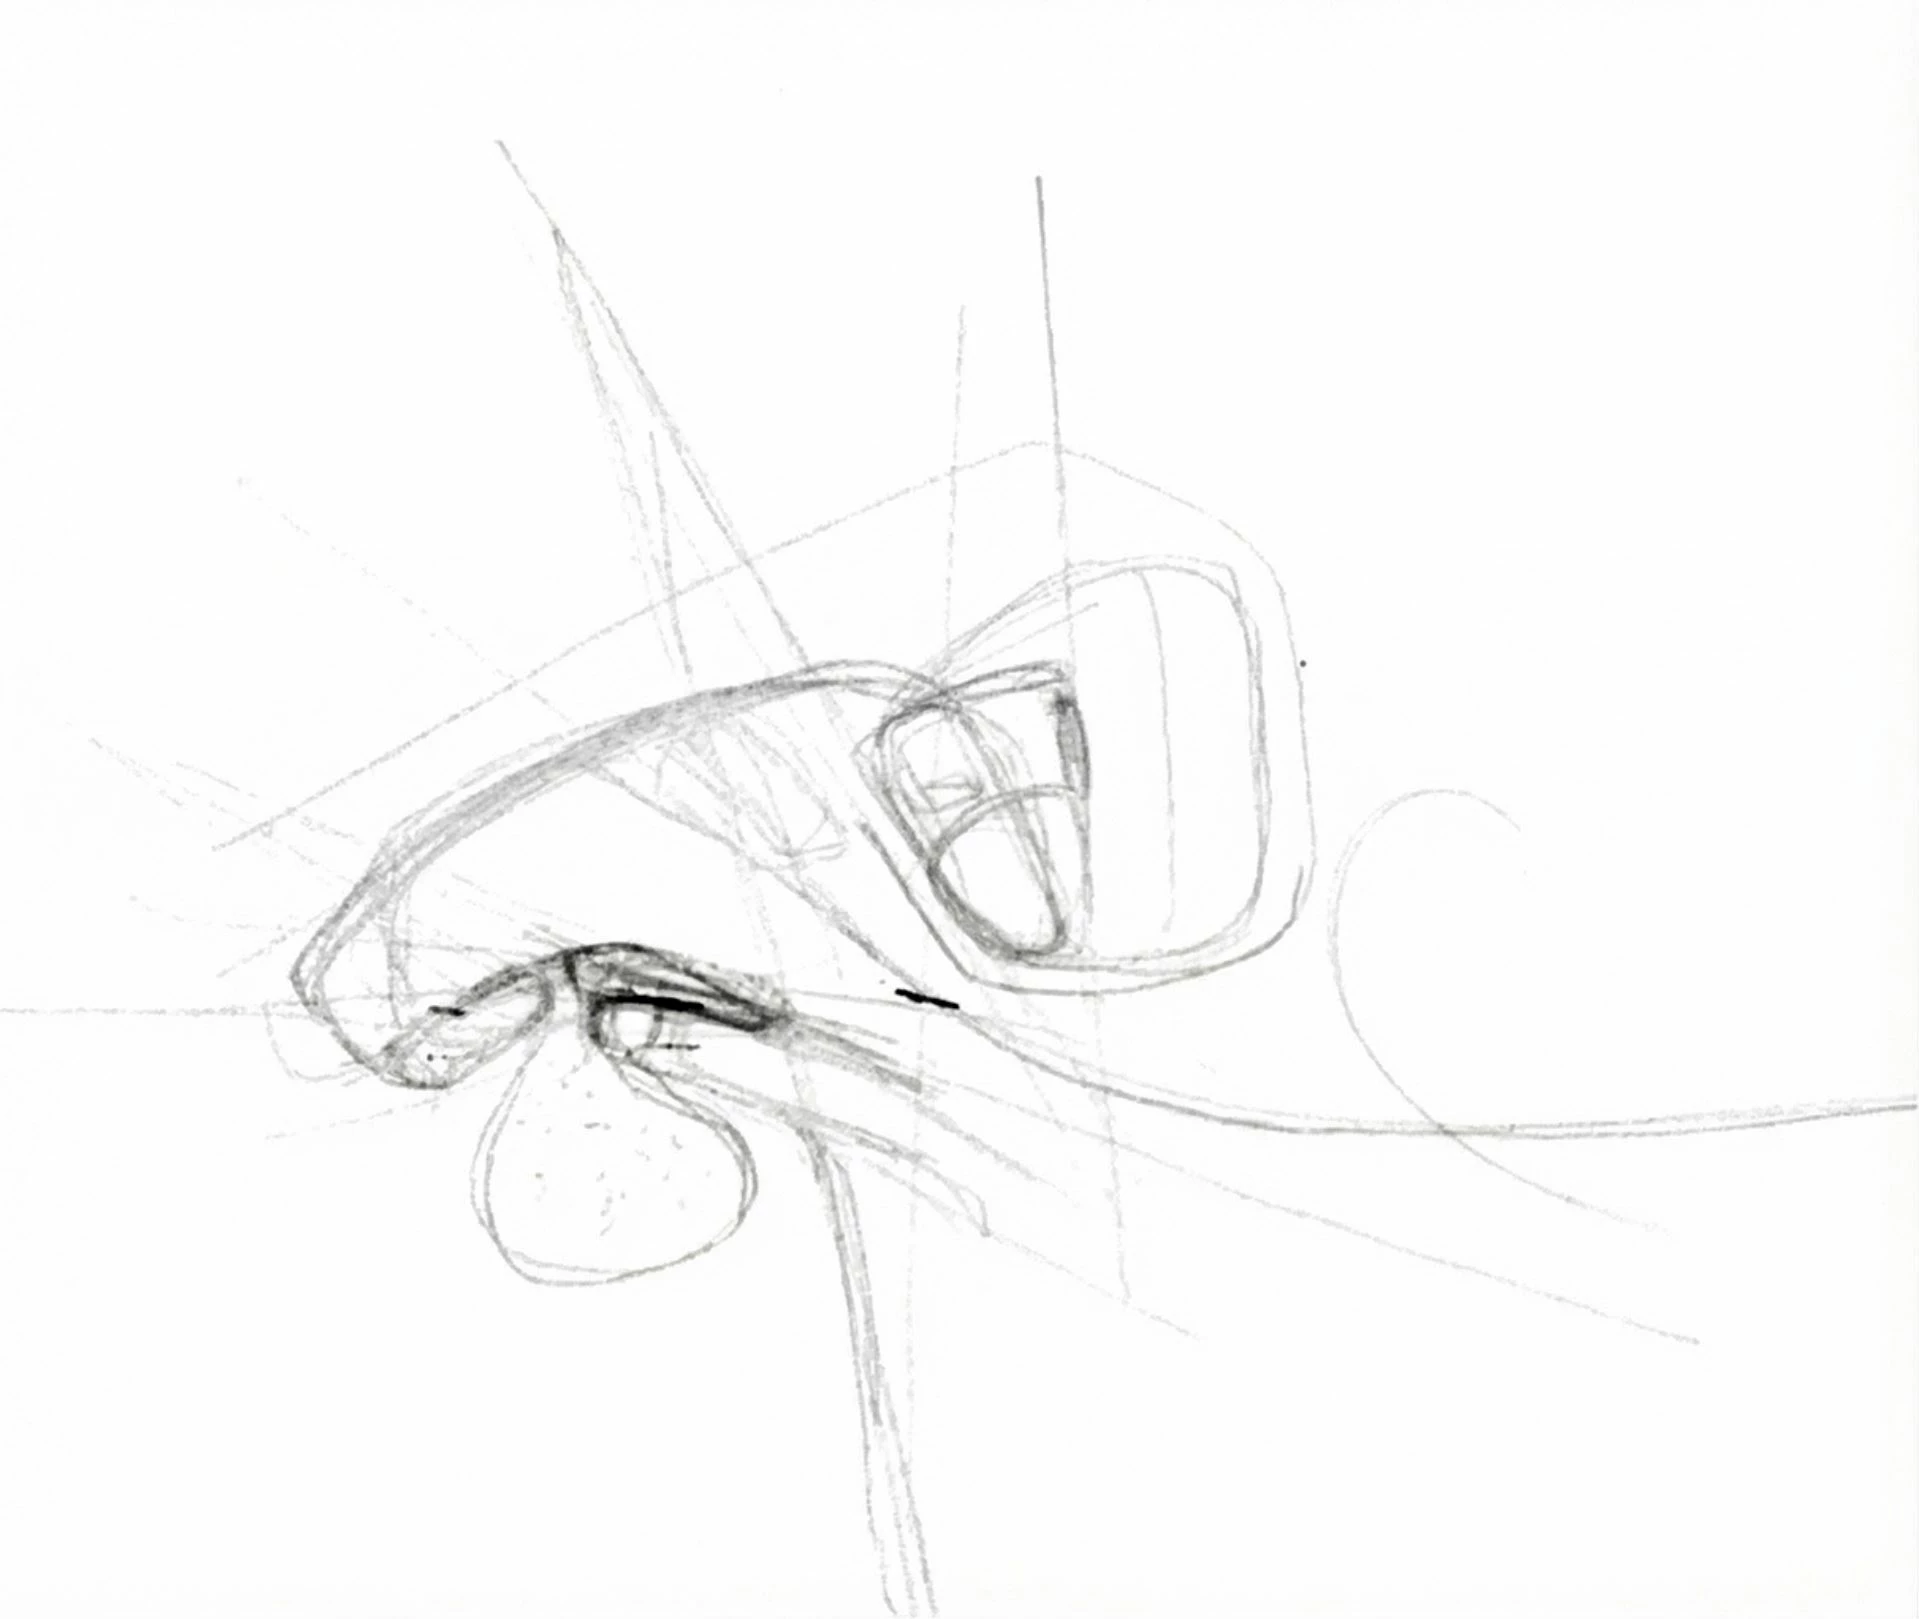
How could I perfectly extract thin pencil line drawing from a uneven greyed background

  • March 20, 2026
  • 7 replies
  • 203 views


Hi community, 

quite advanced photoshop user looking for ideas in order to solve the following selection problem:

  • Selecting perfectly (to capture the graphic expression) thin pale pencil lines from their uneven grey background.
  • Also, in a second part, as I have tones of these kind of sketches to extract these lines, I’m looking for something quick… a script.. maybe AI could help ?

Because of the weak and uneven contrast it become difficult to apply a “one step operation”… I already tried a simple “level” and “color range” selection but I always have manual tweak to do, and I’m most of the time unsatisfied of the result…

this is the best I can get but lines are sord of pixelated…. Anyone could push it further ? :)


Thanks

CC.

    Correct answer D Fosse

    @Charles91 

    You don’t need to select anything. Selecting is never a good idea in cases like this.


    First fix the uneven lighting and desaturate to get rid of the yellow color cast.

    Then lift the white point with Curves.


    This is from the original, with no selection. If you need to darken the fainter lines, use Curves.


    7 replies

    Charles91
    Charles91Author
    Known Participant
    March 23, 2026

    Definitly I learned with techniques you guys came up with! I will try to pop a quick action from this and post it here.

    Now the dam AI came in… to set it to a new level.

    Here is what you can expect from nanobanana… and ofc its cheating, as slightly modifing the initial image. Especially with the second pass upscaler that bring new details in order to add a fluide look to these thin lines..


    Original: 


    First NanobanaPro pass : 

    prompt : 
    from this provided sketch remove the uneven greyish background leaving only the thin pencil lines drawing with the greatest fidelity possible in order to capture the smallest line details. Place the final drawing on a white background.!-->

    Second NanoBanana pass : 

    res: 2k
    prompt : execute the exacte same command with the image but try to 
    keep lines fluide and less pixelated. (also didn’t good results merging these 2 prompts in one..)!-->

    To me the final result is a new drawing and blur the line with the exact author… 

    Tell me what you think.

    Best 

    Charles collin


    barbara_a7746676
    Community Expert
    Community Expert
    March 21, 2026

    If you want perfection, redraw it using vector tools. Time consuming but accurate.

    Charles91
    Charles91Author
    Known Participant
    March 23, 2026

    Thanks Barbara. In this case,  I’m afraid I’ll have to switch my whole drawing process to numeric in order to be efficient… and still, after 4 years having an Ipad and try to “love” sketching on it, I just can’t… Always back to a simple blank sheet and pen or pencil.

    cheers

    CC

    Trevor.Dennis
    Community Expert
    Community Expert
    March 21, 2026

    Do you know what the sketch represents?  It’s highly ambiguous AFAICT which makes it difficult to judge which lines to ink and which to ignore.  I wonder what the Ai tools would make of it?

    Once upon a time I would have tried Topaz Simplify.  I am away from home right now so can’t try it though. I would still be inclined to ask NB Gemini to take a stab at it. 

    Conrad_C
    Community Expert
    Community Expert
    March 20, 2026

    In the other thread you linked to, some of the ideas involve manually tracing with the vector tools. You said you have “tones of these kind of sketches to extract these lines.” You may find it too time-consuming to do the manual work across tons of sketches.


    There is a background removal technique that comes from video editing, which uses layer blending modes. That technique is applied in step 1 of the demo below, combined with other adjustment layers to refine the sketch. These were the steps used:

    1. Because the background is uneven, neutralize it using a linear Gradient Fill layer. At each end of the linear gradient, set the gradient stop colors by doing a one-click sample of the background color at that stop. Then apply the Divide layer blending mode. This will remove those exact colors, and the gradient creates a transition across the image. I had to add a third stop to match the middle exactly. (This technique usually uses a Solid Color Fill layer, but Gradient Fill had to be used here because of the uneven background color.)
    2. (optional) Remove any remaining color using a Color and Vibrance adjustment layer with Saturation set to -100.
    3. (optional) The sketch is a little light, so add a Curves adjustment layer to make it more visible. 
    4. The top and bottom of the background were still a little darker than the middle, so I added one more Curves adjustment layer that blows out the white point. To contain the adjustment to the top and bottom, apply a linear gradient to the mask as needed. 

    The point of doing it this way is to be easily able to adapt to how each sketch is slightly different, without having to start from scratch each time. 

    You can reuse the stack of added layers with other sketches by simply dragging and dropping them to the other documents. Simply adjust the layer settings to match how each sketch background is different. I recommend grouping the layers so that there’s only one thing to drag to the other documents.


    To avoid most of this work, go back to the artist and tell them to digitize them on a scanner — no handheld phone pictures. That would make the backgrounds uniform and the sketch lines sharp, not blurry/pixelated. 


    You also talked about “extracting” the lines. In the thread you linked to, this is where you were advised to use the vector drawing tools like the Line and Pen. Using those tools means you will always have to draw every line yourself by hand…a lot of manual work per sketch. Depending on why you need those lines, it might help to use the Image Trace feature in Adobe Illustrator (shown below) to automate this process. But if Image Trace does not do what you want, then you might be back to a time-consuming all-manual drawing process in Photoshop or Illustrator. Again, you should be more specific about why you need “extracted” lines and what it is you want to do with them, then maybe we can think of an easier way.


    In the demo below I set Image Trace to Black and White, but you could set it to Grayscale if that gets you the line quality you want.


    Charles91
    Charles91Author
    Known Participant
    March 23, 2026

    I love this carefull Bg removal ​@Conrad_C . Never thought about this gradient fill removal. I’ve learn something here!

    D Fosse
    Community Expert
    D FosseCommunity ExpertCorrect answer
    Community Expert
    March 20, 2026

    @Charles91 

    You don’t need to select anything. Selecting is never a good idea in cases like this.


    First fix the uneven lighting and desaturate to get rid of the yellow color cast.

    Then lift the white point with Curves.


    This is from the original, with no selection. If you need to darken the fainter lines, use Curves.


    Charles91
    Charles91Author
    Known Participant
    March 23, 2026

    Quite impressive. the result is really great. I wonder how you fix that uneven lighting ? The same way ​@Conrad_C does ? I’m interested because maybe with your technique I could automate something without manual steps. A “simple” script..

    Charles91
    Charles91Author
    Known Participant
    March 27, 2026

    Can you please elaborate on your process to get there ? thank you

    Legend
    March 20, 2026

    The image may be pixelated, but I’m not sure anyone could expect better results from 1) pencil drawing (not illustration apps) 2) scanning (what dpi/ppi?) 3) adjusting the base paper color.


    I took your second image, pushed the black slider to 1.0, midtone/gamma slider to 200+.


    Larry
    Legend
    March 21, 2026

    Watching all the heavy tools attempting to edit such a unique image makes me happy that I stick to old basics. Two sliders, done. “Don’t force it, use a bigger hammer”? Nice exercise, good to see alternate ways to accomodate.

    Larry
    Charles91
    Charles91Author
    Known Participant
    March 20, 2026