Answered
How do I feather an image in photoshop?
How do I feather or airbrush an image in photoshop?

How do I feather or airbrush an image in photoshop?
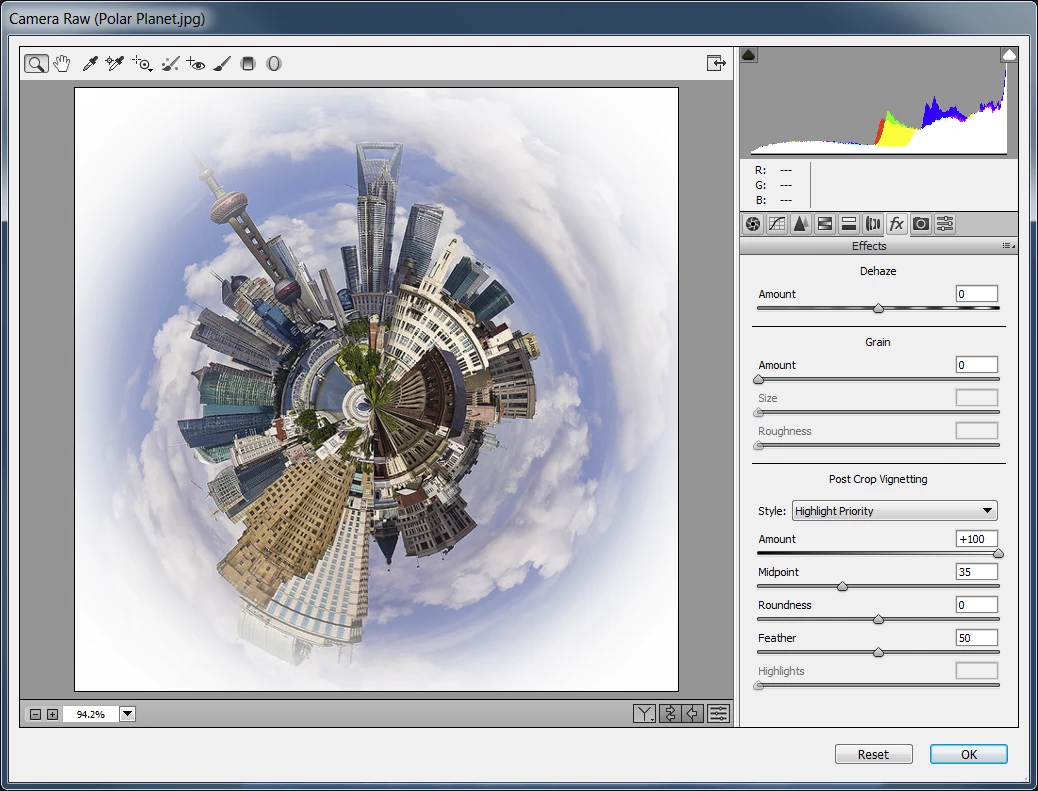
Norman has an excellent suggestion as always, but I really like the Camera RAW tools for doing this. You also have two options with the Camera RAW filter
The first is to use Post Crop Vignetting, but move the Amount slider to the right. Note that you have further control with sliders after Amount.
The other is the Radial filter (J) Set the Effect to Outside, and adjust Exposure for amount. You have to drag an ellipse over the image initially, but you can resize by dragging the handles.
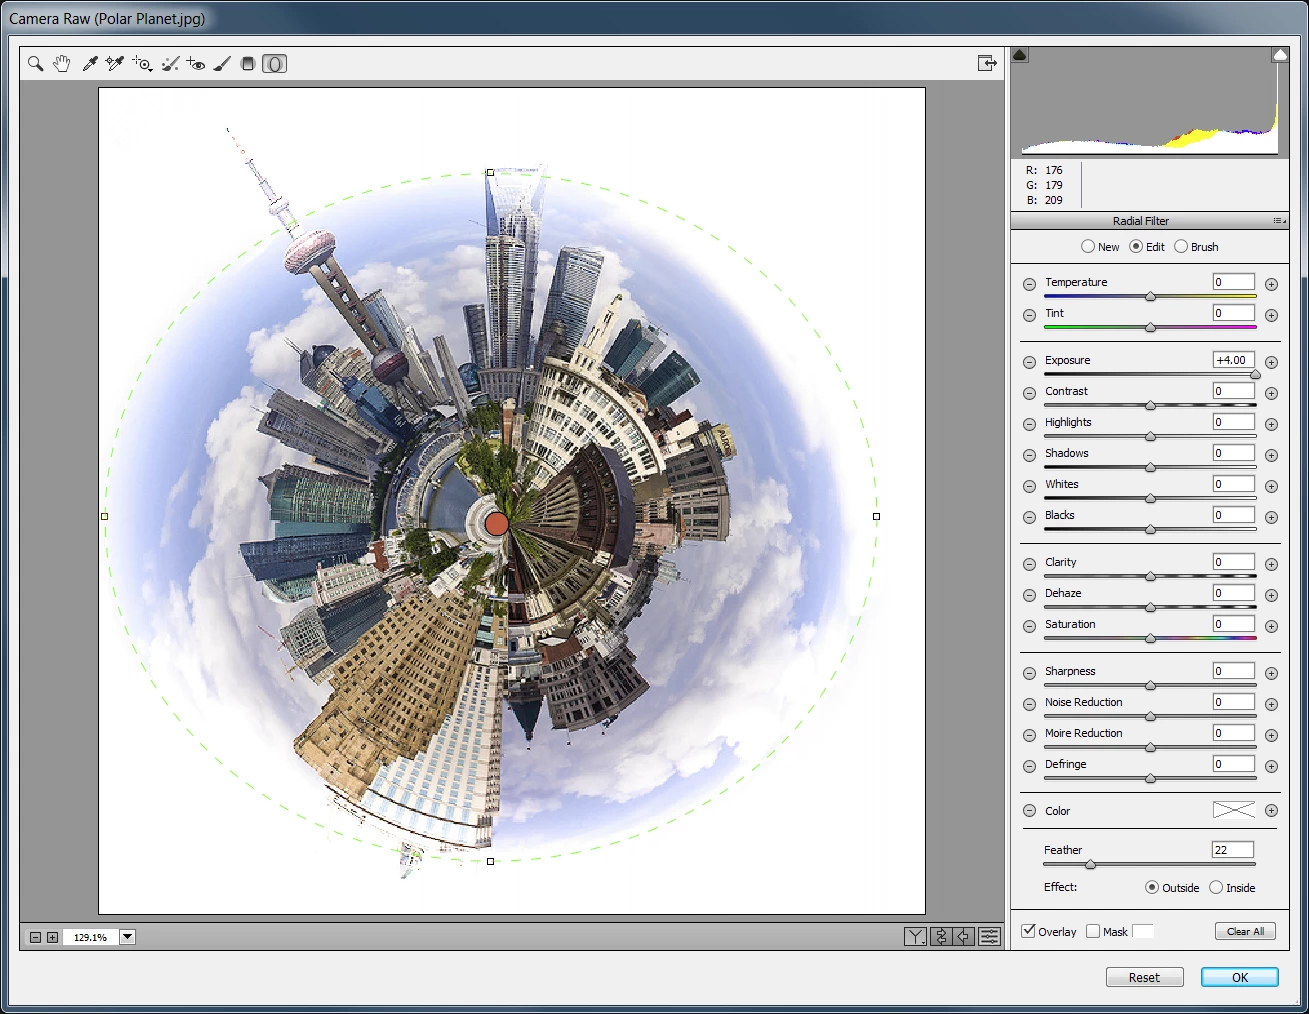
The examples above are a fair representation of how well they work. Vignetting is the more controllable method IMO, and gives a lovely soft effect. Norman's method is non destructive. To have a same advantage using Camera RAW filter you need to make the layer a Smart Object.
Already have an account? Login
Enter your E-mail address. We'll send you an e-mail with instructions to reset your password.