Participating Frequently
January 29, 2026
Answered

How to automatically detect separate white shapes in a single raster layer and add point text at each shape using scripts

  • January 29, 2026
  • 6 replies
  • 748 views

Hi everyone, thank you for taking you time to consinder my problem.

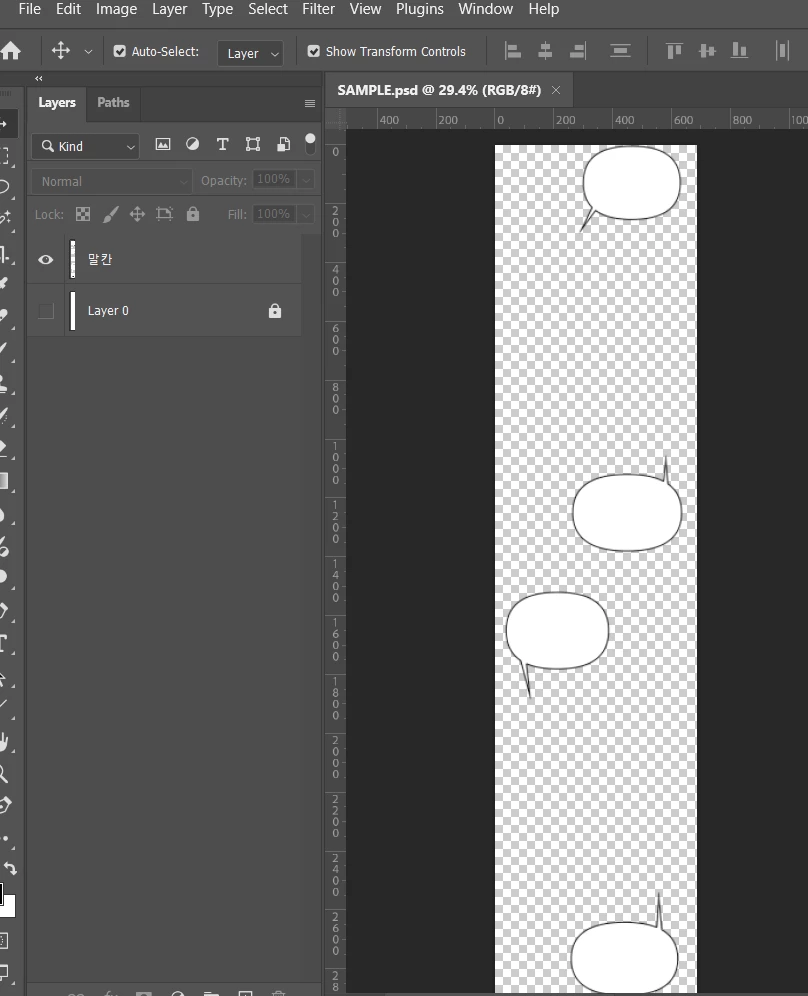
I have a single raster layer in Photoshop with a transparent background that contains multiple separate white shapes (not touching each other).
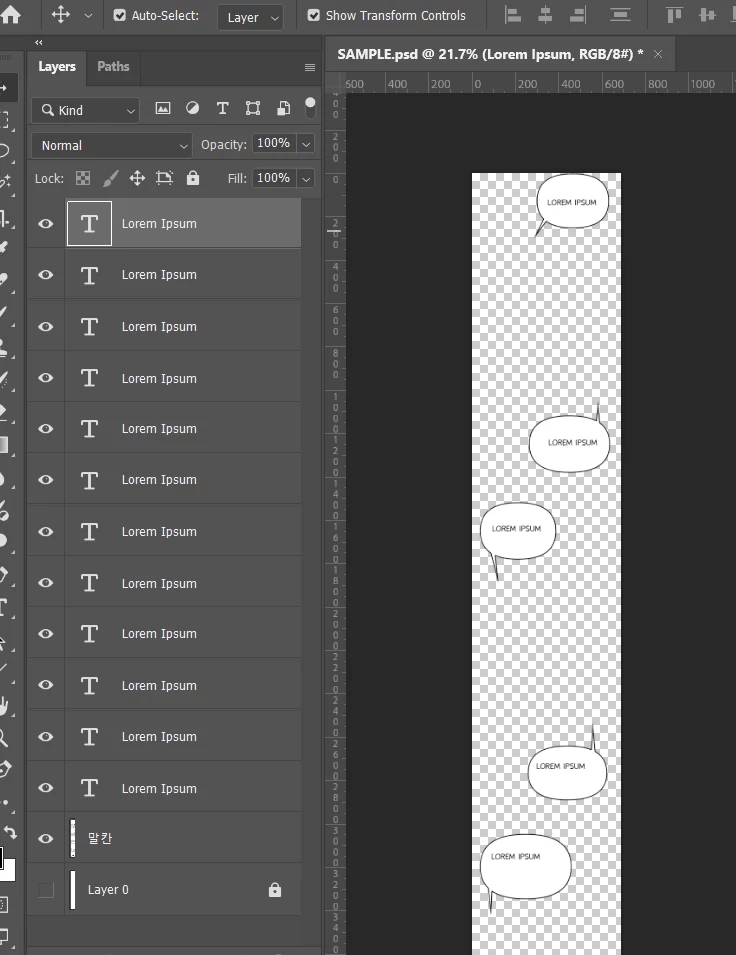
Is it possible to use ExtendScript to automatically detect each individual shape and create a point text layer (e.g. “Lorem Ipsum”) at the each shape? 

Before 
After


Correct answer Imaginerie

I stand corrected, you can find it there, and use the link mentionned in the original post…


Once done, maybe you can reverse engineer it to add the text option (or run two scripts separately)


6 replies

Jiimmiey
Participant
February 12, 2026

Yes, it’s possible with ExtendScript, but Photoshop doesn’t natively “see” separate shapes inside a raster the way it does with vector paths, so the script has to first identify pixel clusters. The usual approach is: select white pixels → convert to a selection → use color range or threshold → then iterate through contiguous areas (each shape), calculate their bounds/centroid, and place a point text layer at those coordinates.

The tricky part is separating each shape from a single selection; you’ll need to run a loop that isolates each connected region (e.g., via selection contraction/expansion or temporary channel masks), store its position, then generate a text layer for each. It’s doable, but performance depends on image size and how clean the white shapes are (anti-aliasing can complicate detection).

ethankhyl180
Participant
February 5, 2026

Cool workflow with separation script then text layers! Reminds me how I scripted quick batch stuff for menu images like Dairy Queen Blizzards, burgers, prices and deals listings. Anyone added auto text centering based on shape bounds yet?

Festive_athlete7648
Participant
February 5, 2026

This is a really clear breakdown of the different approaches. I especially like the idea of separating elements using transparency and then either scripting the text placement or using actions for repeated positions. It makes sense to handle different bubble types separately and ensures the text aligns correctly.

On my own site, MinecroftMod, I’ve been experimenting with similar Photoshop scripting workflows for automating repetitive tasks. Combining “script to layers” with small actions really speeds up the process. Thanks for sharing these steps — very practical for projects like this!

Genius
January 29, 2026

Once you get the specific coordinates figured out, here is a sample script to add a text layer. You can change the constants as needed for your desired formatting, and you can set the textItem contents to whatever string you want.


/*
Utility PS Scripts created by David M. Converse ©2018-24

This script creates a new text layer

Last modified 4/23/2024

Licensed under the Apache License, Version 2.0 (the "License");
you may not use this file except in compliance with the License.
You may obtain a copy of the License at

http://www.apache.org/licenses/LICENSE-2.0

Unless required by applicable law or agreed to in writing, software
distributed under the License is distributed on an "AS IS" BASIS,
WITHOUT WARRANTIES OR CONDITIONS OF ANY KIND, either express or implied.
See the License for the specific language governing permissions and
limitations under the License.
*/
#target photoshop

testText();

function testText(){
if(documents.length > 0){
var originalDialogMode = app.displayDialogs;
app.displayDialogs = DialogModes.ERROR;
var originalRulerUnits = preferences.rulerUnits;
preferences.rulerUnits = Units.PIXELS;
const Sz = 42;
const Ld = 42;
const Fnt = 'Calibri-Bold'
const Jst = Justification.CENTER
try{
var docRef = activeDocument;
var LayerRef = docRef.artLayers.add();
LayerRef.kind = LayerKind.TEXT;
var TextRef = LayerRef.textItem;
TextRef.contents = '';
TextRef.position = new Array(500, 80);
preferences.rulerUnits = Units.POINTS;
TextRef.size = Sz;
TextRef.useAutoLeading = false;
TextRef.leading = Ld;
TextRef.font = Fnt;
TextRef.justification = Jst;
TextRef.autoKerning = AutoKernType.METRICS;
}
catch(e){
alert(e + e.line);
preferences.rulerUnits = originalRulerUnits;
app.displayDialogs = originalDialogMode;
return;
}
preferences.rulerUnits = originalRulerUnits;
app.displayDialogs = originalDialogMode;
}
else{
alert('You must have a document open to run this script.');
return;
}
return;
}


Imaginerie
Community Expert
Community Expert
January 29, 2026

I’ve been thinking about it regarding how to place the text. It seems that you have two shapes, the bubble speech with the pointer upwards, and one with the pointer downwards.

I would create an action , positionning the text for those upwards, and run the action, since they are all the same saize and positionning. And do the same for the other type. (Obviously, the text will have to be positionned according to the center of the bubble)


I am sure it can be scripted… But it can equally be done using a simple action, with a couple more steps.

The actions take cues from the X and Y numbers, so as long as the whole canvas size is the same (which looks like it is) there shouldn’t be an issue.

Genius
January 29, 2026

See my sample script for creating text, you can get the coordinates of the speech bubble and use that.

Imaginerie
Community Expert
Community Expert
January 29, 2026

Not sure about the “add text” option, but there was a script a long time ago that used to separate single elements from a unique layer, based on the amount of transparency around them. That bit could be change in the menu. The script ran, giving your a layer for each shape…

I think it disapeared, but you can still try to script a new one.
The script was called “script to layers” or something like that...


Imaginerie
Community Expert
ImaginerieCommunity ExpertCorrect answer
Community Expert
January 29, 2026

I stand corrected, you can find it there, and use the link mentionned in the original post…


Once done, maybe you can reverse engineer it to add the text option (or run two scripts separately)


Alice392Author
Participating Frequently
January 29, 2026

Yes, this post is perfect 😍. Thank you so much for your help! I’ll update the code later to add the text. Thank you once again!