Known Participant
April 21, 2021
Beantwortet

How to draw circular base Under the other layers

  • April 21, 2021
  • 1 Antwort
  • 712 Ansichten

Hello,

What is the best way to draw a base under the other layers,

Such as the attached picture ..


Draw a base and It has two golden lines in the middle (like the attached picture)


I would be grateful for any advice or suggestions...

Dieses Thema wurde für Antworten geschlossen.
Beste Antwort von Trevor.Dennis

OK, that's better.  I think you are asking how to draw the base under the bottle?


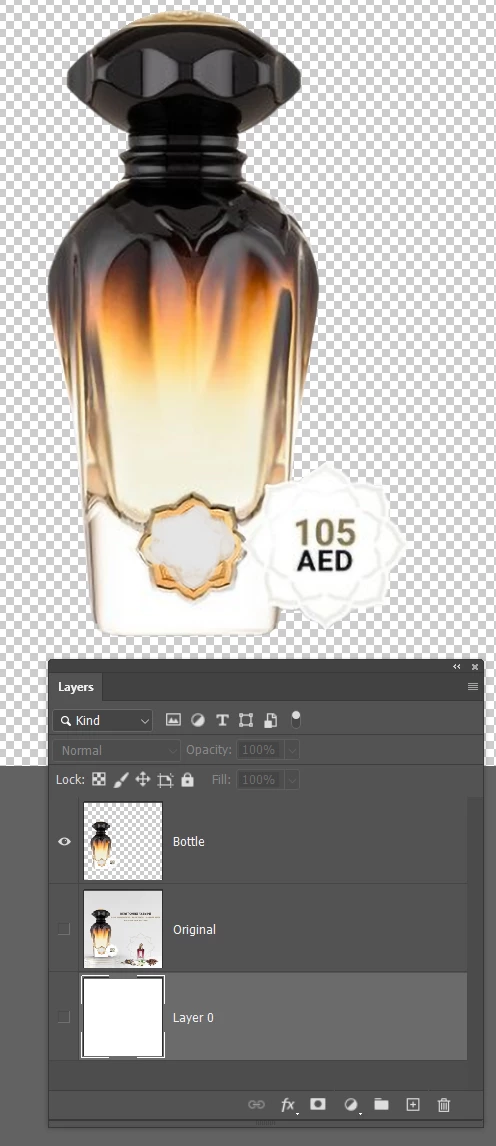
The first thing you need to do with almost any sort of composite using Photoshop is separate the image elements by selecting them, and copying to their own layer.  In this case it is just the bottle.


If I was doing this for real, I would use the Pen tool, but for the sake of demonstration I used Select Subject, which got me remarkably close, and I cleaned it up using Quick Mask.  About thirty seconds work!
 

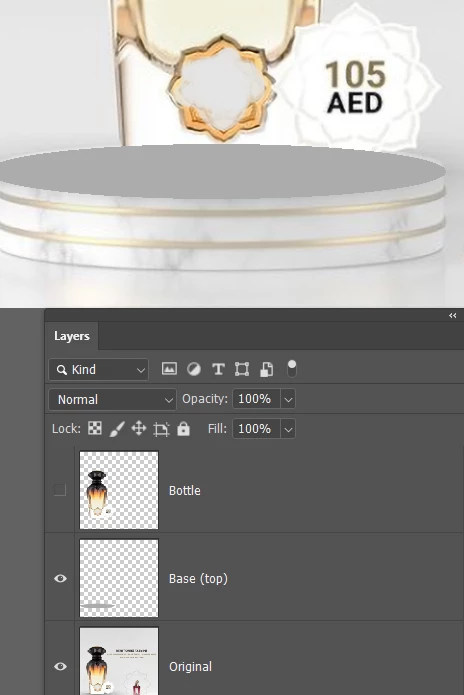
We need to brake the base into separate parts, so we'll start with the top. Use the Elliptical Marquee tool to make an elliptical selection and fill with any colour on a new layer — I usually use grey.  We just need this layer to give us a record of the shape. We are not worried about its colour at this stage.
 

Copy the base (top) layer, and call the copy Base (bottom). Move it below the Base (top) layer in the layer stack, and use the move tool to move it down to wherever you want the lowwer edge of the base to be


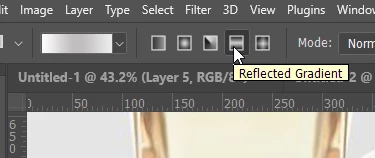
I'm going use Reflected for the base (bottom layer)
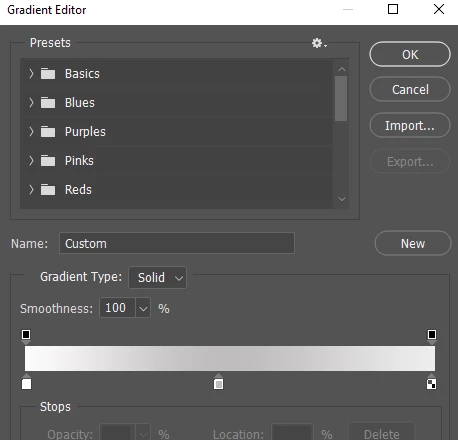
This can be a tiny bit confusing, so take your time.  Don't worry about the boxes above the gradient, Drag the left side lower box to the middle, and double click it which opens the colour selector. Chose a nice grey.

Click below the gradient on the left which opens a new colour box. Double click it and make it white.  If the right box is not allready white, make it so.  Ok that.
Drag from the center of the base to the outside.  Try it a few times to see what works best for you
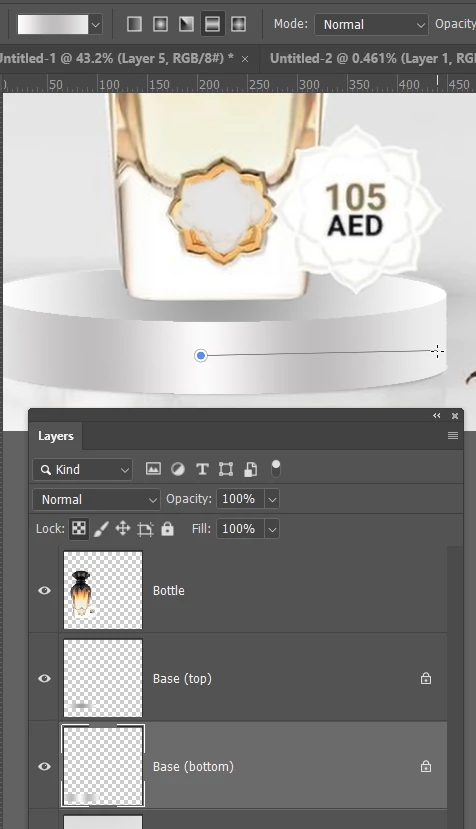
Make a new layer called Gold Band and place it above the base (top) layer

Ctrl click the base (top layer) which will load it as a selection.

Chose a nice bronze yellow as the forground colour, and go Edit > Stroke and make sure it is set to Outside
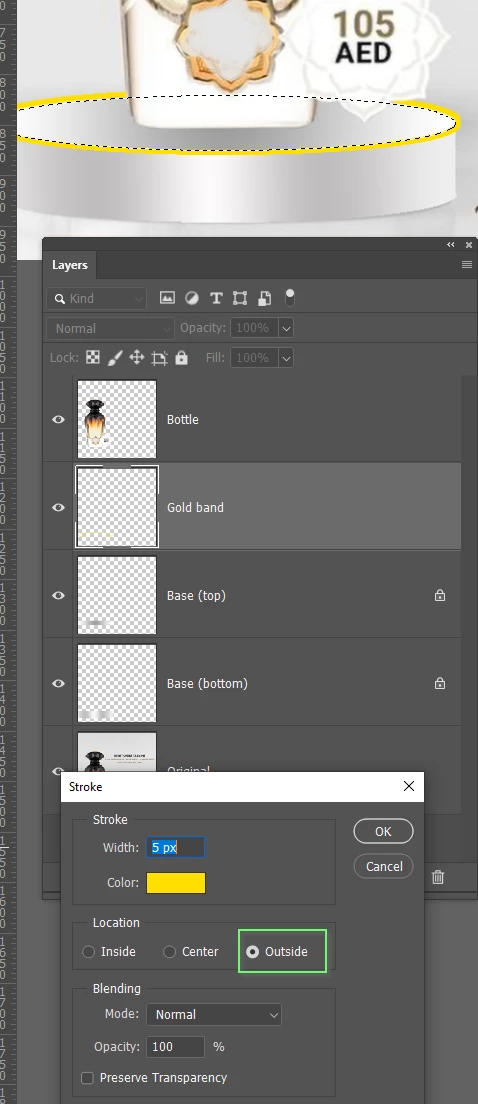
 

Ctrl click the base (bottom) layer to load as a selection. Invert the selection (Shift Ctrl i)

Delete the bit of gold band you don't want, and erase the top part of the band
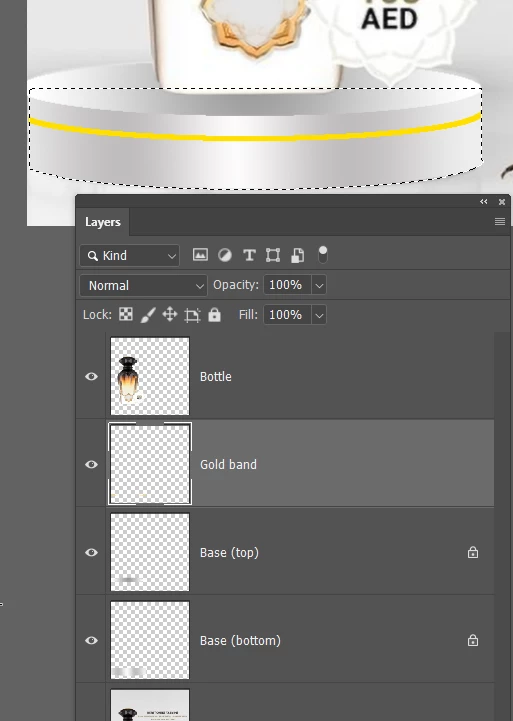
Copy the gold band and move into position

I have used Bevel and Embos to simulate a gold effect, but it is difficult with such fine lines and low res.  If you are working with higher pixel counts you'll get away with it
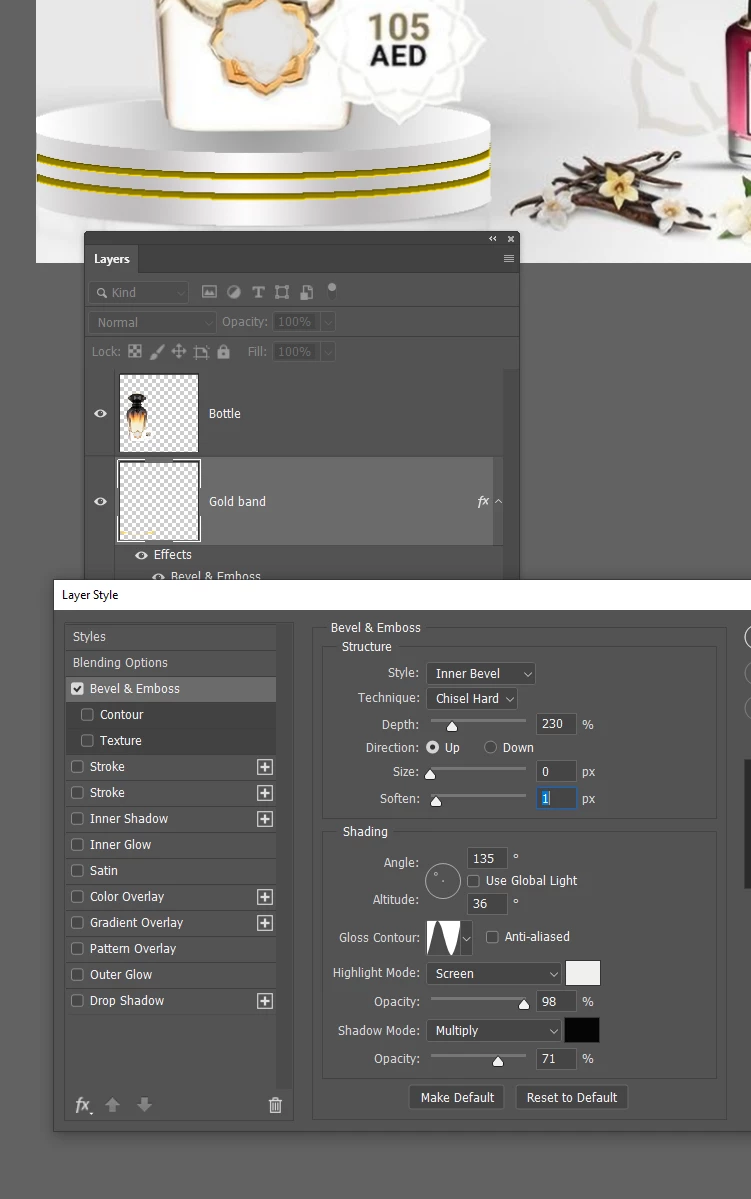
OK, I have been ast this for half an hour now, so please tell me you are going to try this. 

You can add highlights and shadows and reflections to finish it off, but that'll have to be for another time.

1 Antwort

Trevor.Dennis
Community Expert
Community Expert
April 21, 2021

The image you have uploade is too small to make sense of.  Can you provide the full res version, and leave some space around it so we can work out its context.  You first step is going to be to select the object in question, and copy it to a new layer.  Then you can create your base an a lower layer.

Known Participant
April 22, 2021

Thanks For Reply ,

I uploaded the whole image again.
I wonder if I can draw the perfume base using Photoshop, and what is the method that I should do (Using Path tool or something else) ..

Trevor.Dennis
Community Expert
Community Expert
April 22, 2021

OK, that's better.  I think you are asking how to draw the base under the bottle?


The first thing you need to do with almost any sort of composite using Photoshop is separate the image elements by selecting them, and copying to their own layer.  In this case it is just the bottle.


If I was doing this for real, I would use the Pen tool, but for the sake of demonstration I used Select Subject, which got me remarkably close, and I cleaned it up using Quick Mask.  About thirty seconds work!


We need to brake the base into separate parts, so we'll start with the top. Use the Elliptical Marquee tool to make an elliptical selection and fill with any colour on a new layer — I usually use grey.  We just need this layer to give us a record of the shape. We are not worried about its colour at this stage.


Copy the base (top) layer, and call the copy Base (bottom). Move it below the Base (top) layer in the layer stack, and use the move tool to move it down to wherever you want the lowwer edge of the base to be


I'm going use Reflected for the base (bottom layer)

This can be a tiny bit confusing, so take your time.  Don't worry about the boxes above the gradient, Drag the left side lower box to the middle, and double click it which opens the colour selector. Chose a nice grey.

Click below the gradient on the left which opens a new colour box. Double click it and make it white.  If the right box is not allready white, make it so.  Ok that.

Drag from the center of the base to the outside.  Try it a few times to see what works best for you

Make a new layer called Gold Band and place it above the base (top) layer

Ctrl click the base (top layer) which will load it as a selection.

Chose a nice bronze yellow as the forground colour, and go Edit > Stroke and make sure it is set to Outside


Ctrl click the base (bottom) layer to load as a selection. Invert the selection (Shift Ctrl i)

Delete the bit of gold band you don't want, and erase the top part of the band

Copy the gold band and move into position

I have used Bevel and Embos to simulate a gold effect, but it is difficult with such fine lines and low res.  If you are working with higher pixel counts you'll get away with it

OK, I have been ast this for half an hour now, so please tell me you are going to try this. 

You can add highlights and shadows and reflections to finish it off, but that'll have to be for another time.