Participating Frequently
May 14, 2018
解決済み

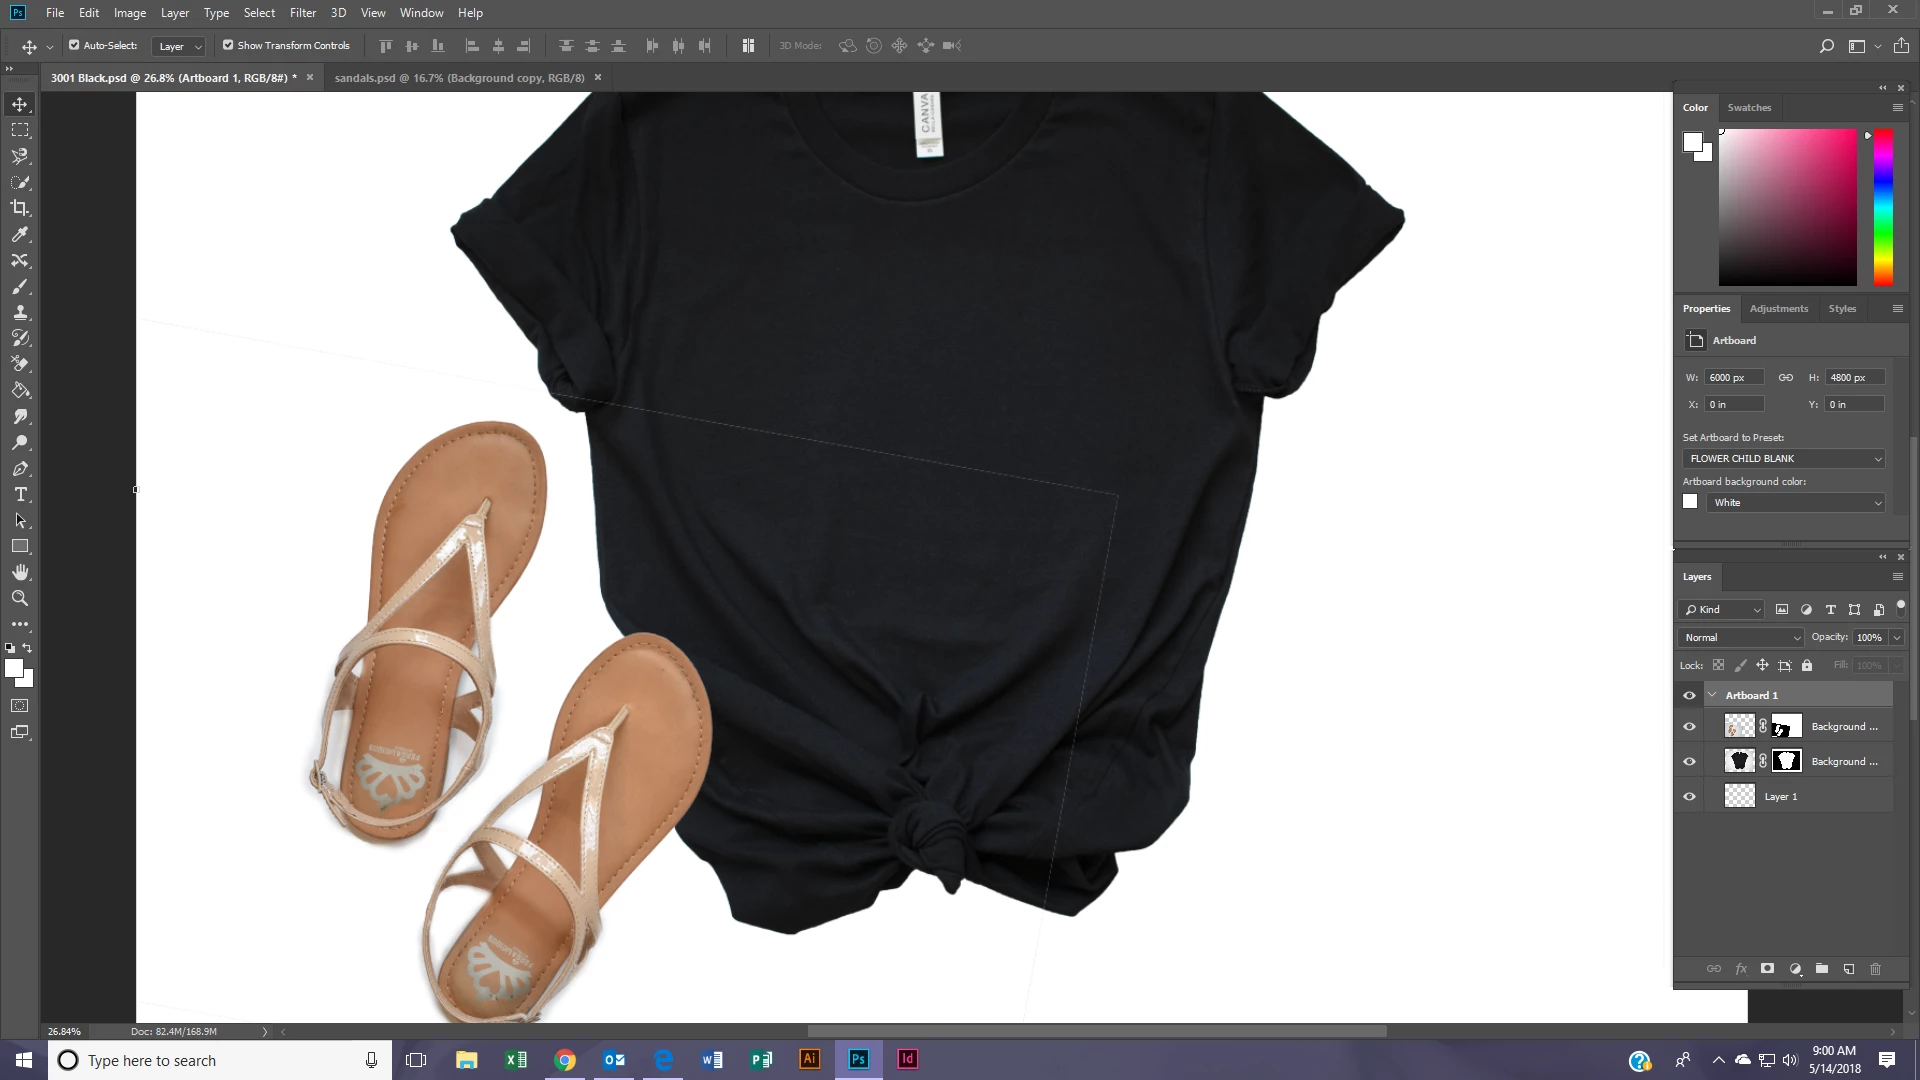
I can't seem to get rid of a faint gray line around my layers when I move them..

  • May 14, 2018
  • 返信数 3.
  • 5091 ビュー

..It is not the line that goes away by hitting CTRL + H either.  I saw a post from years ago saying you needed to download a plugin, tried that and the plug in wouldn't download.  Thank you in advance! If you look in the middle of the black shirt you can see the faint gray line going horizontally.

    このトピックへの返信は締め切られました。
    解決に役立った回答 melissapiccone

    Yes, I would love to know what I am doing wrong in the first place to avoid creating this line.  Your first sentence went totally over my head if that gives you any indication of how beginner I really am!

    Say I am starting from scratch.  I select the sandals, select and mask, erase the background...what output do I select? I just want to be ablel to move the sandals to different backgrounds without having the gray line follow it everywhere it goes.

    Does my question make sense?  I really appreciate your response:)


    Output to a new layer mask... that will give you a whole mask:

    返信数 3

    melissapiccone
    Community Expert
    Community Expert
    May 14, 2018

    fastest, easiest way is to grab a a black paint brush and fill in the mask with black

    Melissa Piccone | Adobe Trainer | Online Courses Author | Fine Artist
    c.pfaffenbichler
    Community Expert
    Community Expert
    May 14, 2018

    Alternatively one could make a rough Selection that includes the whole object but none of the Layer’s rectangular edges, intersect it with the Layer Mask, delete the Layer Mask and apply the Selection as a new Layer Mask.

    But all this can be avoided when one starts off by creating the Layer Mask in a more meaningful way.

    And I am not claiming that I always remember to do that …

    lobodakj作成者
    Participating Frequently
    May 14, 2018

    Yes, I would love to know what I am doing wrong in the first place to avoid creating this line.  Your first sentence went totally over my head if that gives you any indication of how beginner I really am!

    Say I am starting from scratch.  I select the sandals, select and mask, erase the background...what output do I select? I just want to be ablel to move the sandals to different backgrounds without having the gray line follow it everywhere it goes.

    Does my question make sense?  I really appreciate your response:)

    Norman Sanders
    Legend
    May 14, 2018

    In order to eliminate the fringe, the pen tool would offer the cleanest option in creating the mask. At this point, you may also consider the following:

    Choose the mask, and use the Magic Wand (set zero Tolerance) to click on the black area. Then Select > Modify > Expand ... and choose 1 pixel, for starters. Then Edit >. Fill with black. Repeat if necessary.  

    c.pfaffenbichler
    Community Expert
    Community Expert
    May 14, 2018

    In any case this is no Photoshop problem.

    Another way to avoid it might have been converting the masked Layers to Smart Objects before transforming them.

    c.pfaffenbichler
    Community Expert
    Community Expert
    May 14, 2018

    The line seems to be there because you created it, just look at the Layer Mask (edit: of the Layer with the image of the sandals) in the screenshot.

    It’s a fairly common mistake to create Layer Mask starting with »Reveal All« and filling with black when one should instead start with »Hide All« to ensure that on scaling or moving the Layer its newly revealed parts will be hidden.