Inspiring
February 28, 2024
Answered

Is it possible to add a vignette to a selection in Photoshop?

  • February 28, 2024
  • 3 replies
  • 2133 views

I have an area of a photo that is contained withing a selection.  I want to darken the deges of the selected area.  Is it possible to add a vignette to the selection?  If so how is that done?


This topic has been closed for replies.
Correct answer Semaphoric

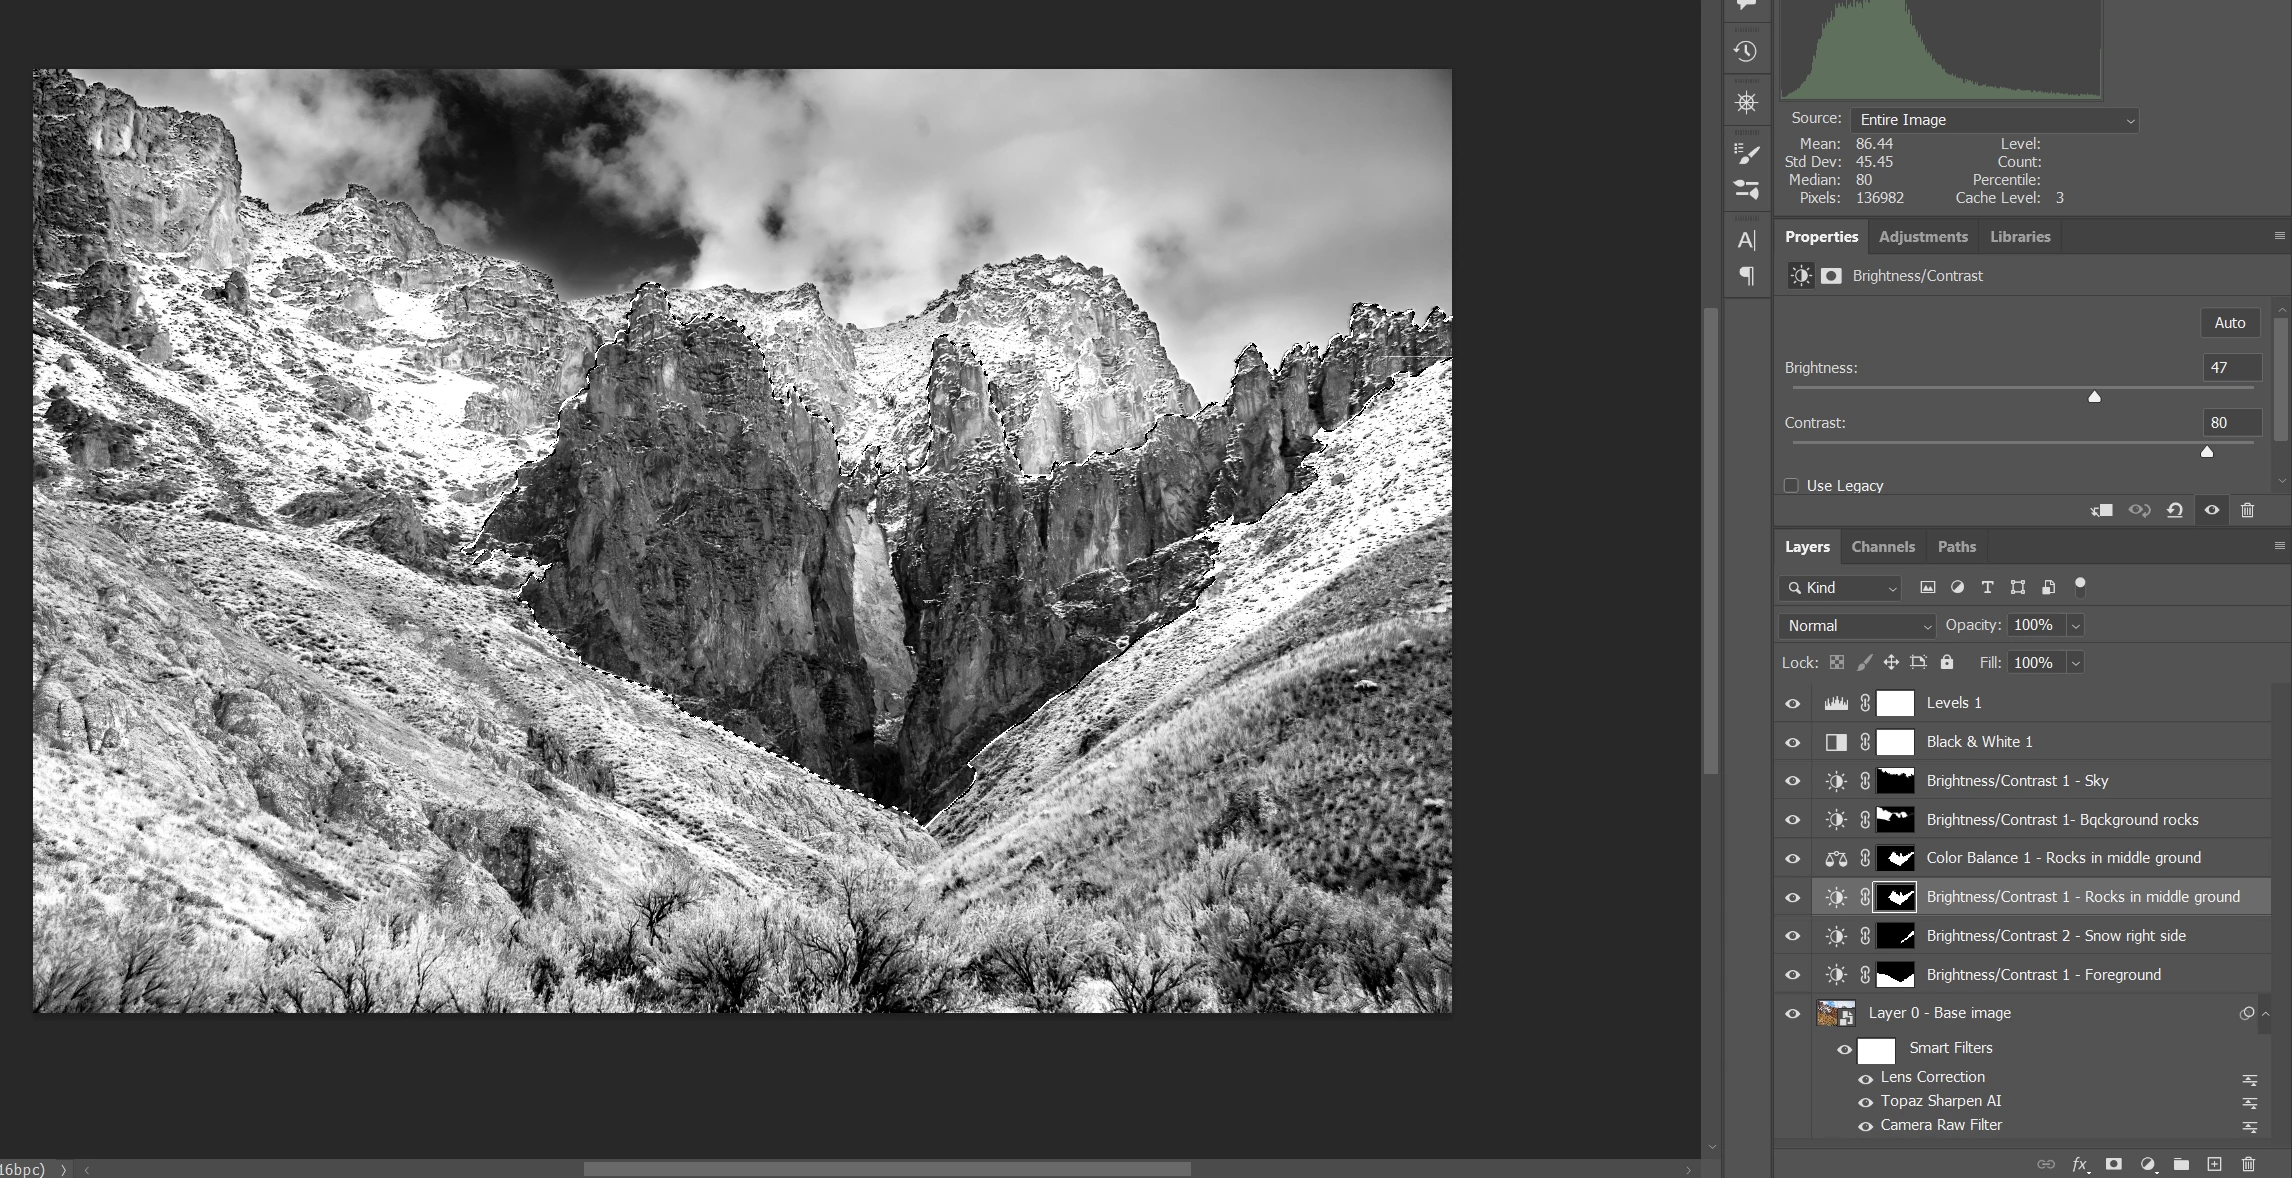
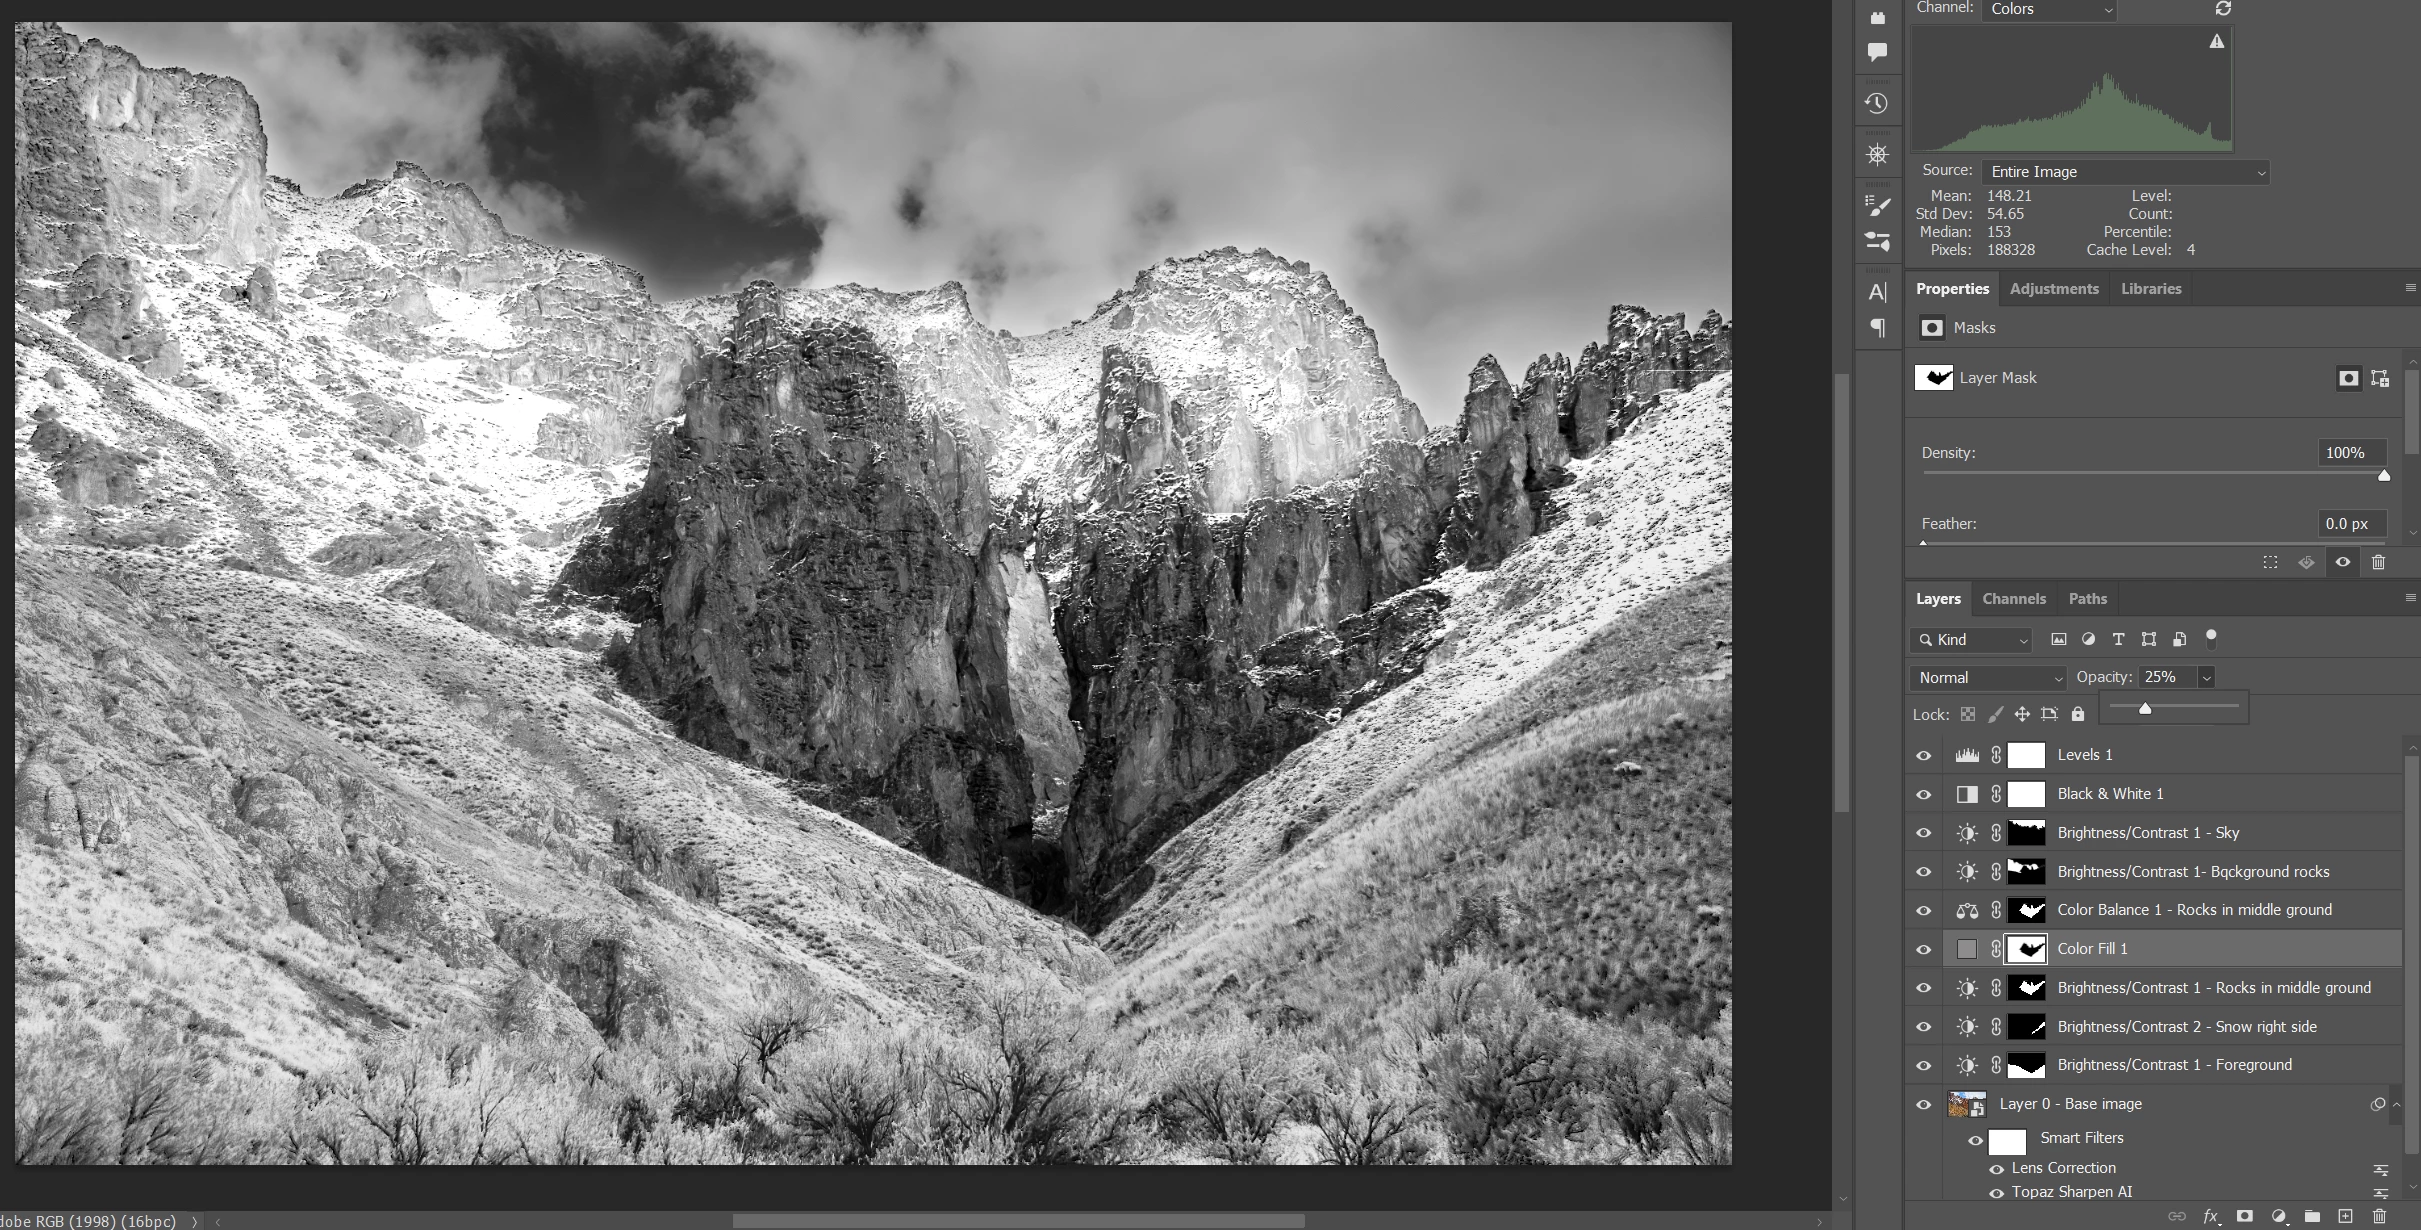
I believe that's what I did.  Here is a screen capture of the image and the layers panel.  The part that's selected is the darker colored rocks in the middle and leading off to the right edge of the frame.  What you see is an almost final version of the image.  At this point my interest has shifted to just seeing if there's another way to do this, like what you've suggested.

    Bill


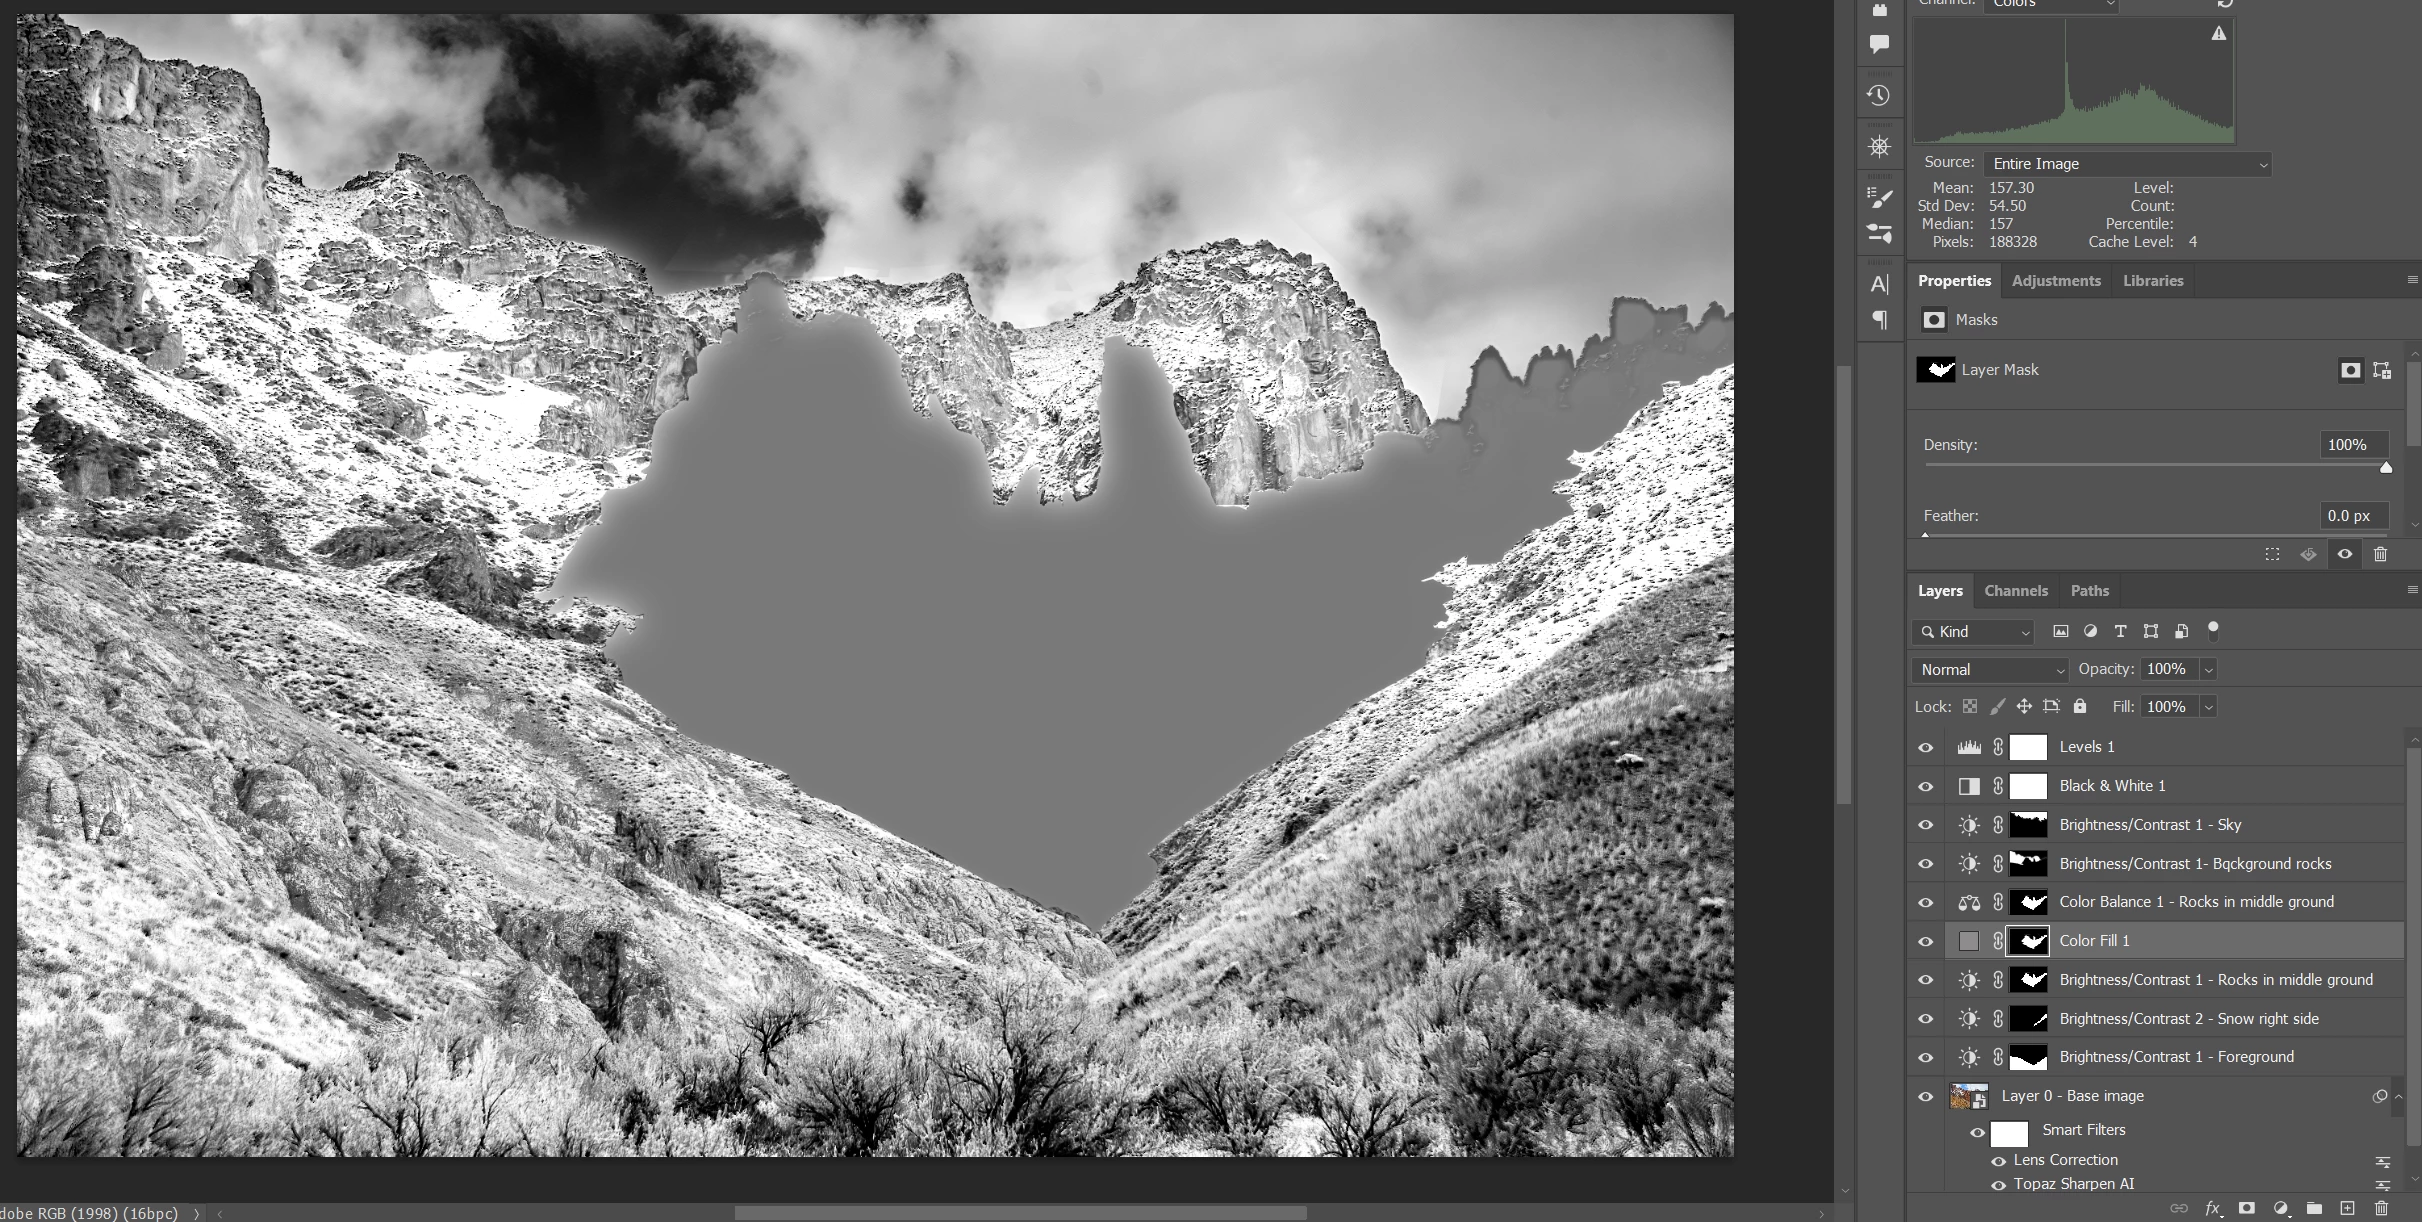
Here it is with the Color Fill layer:

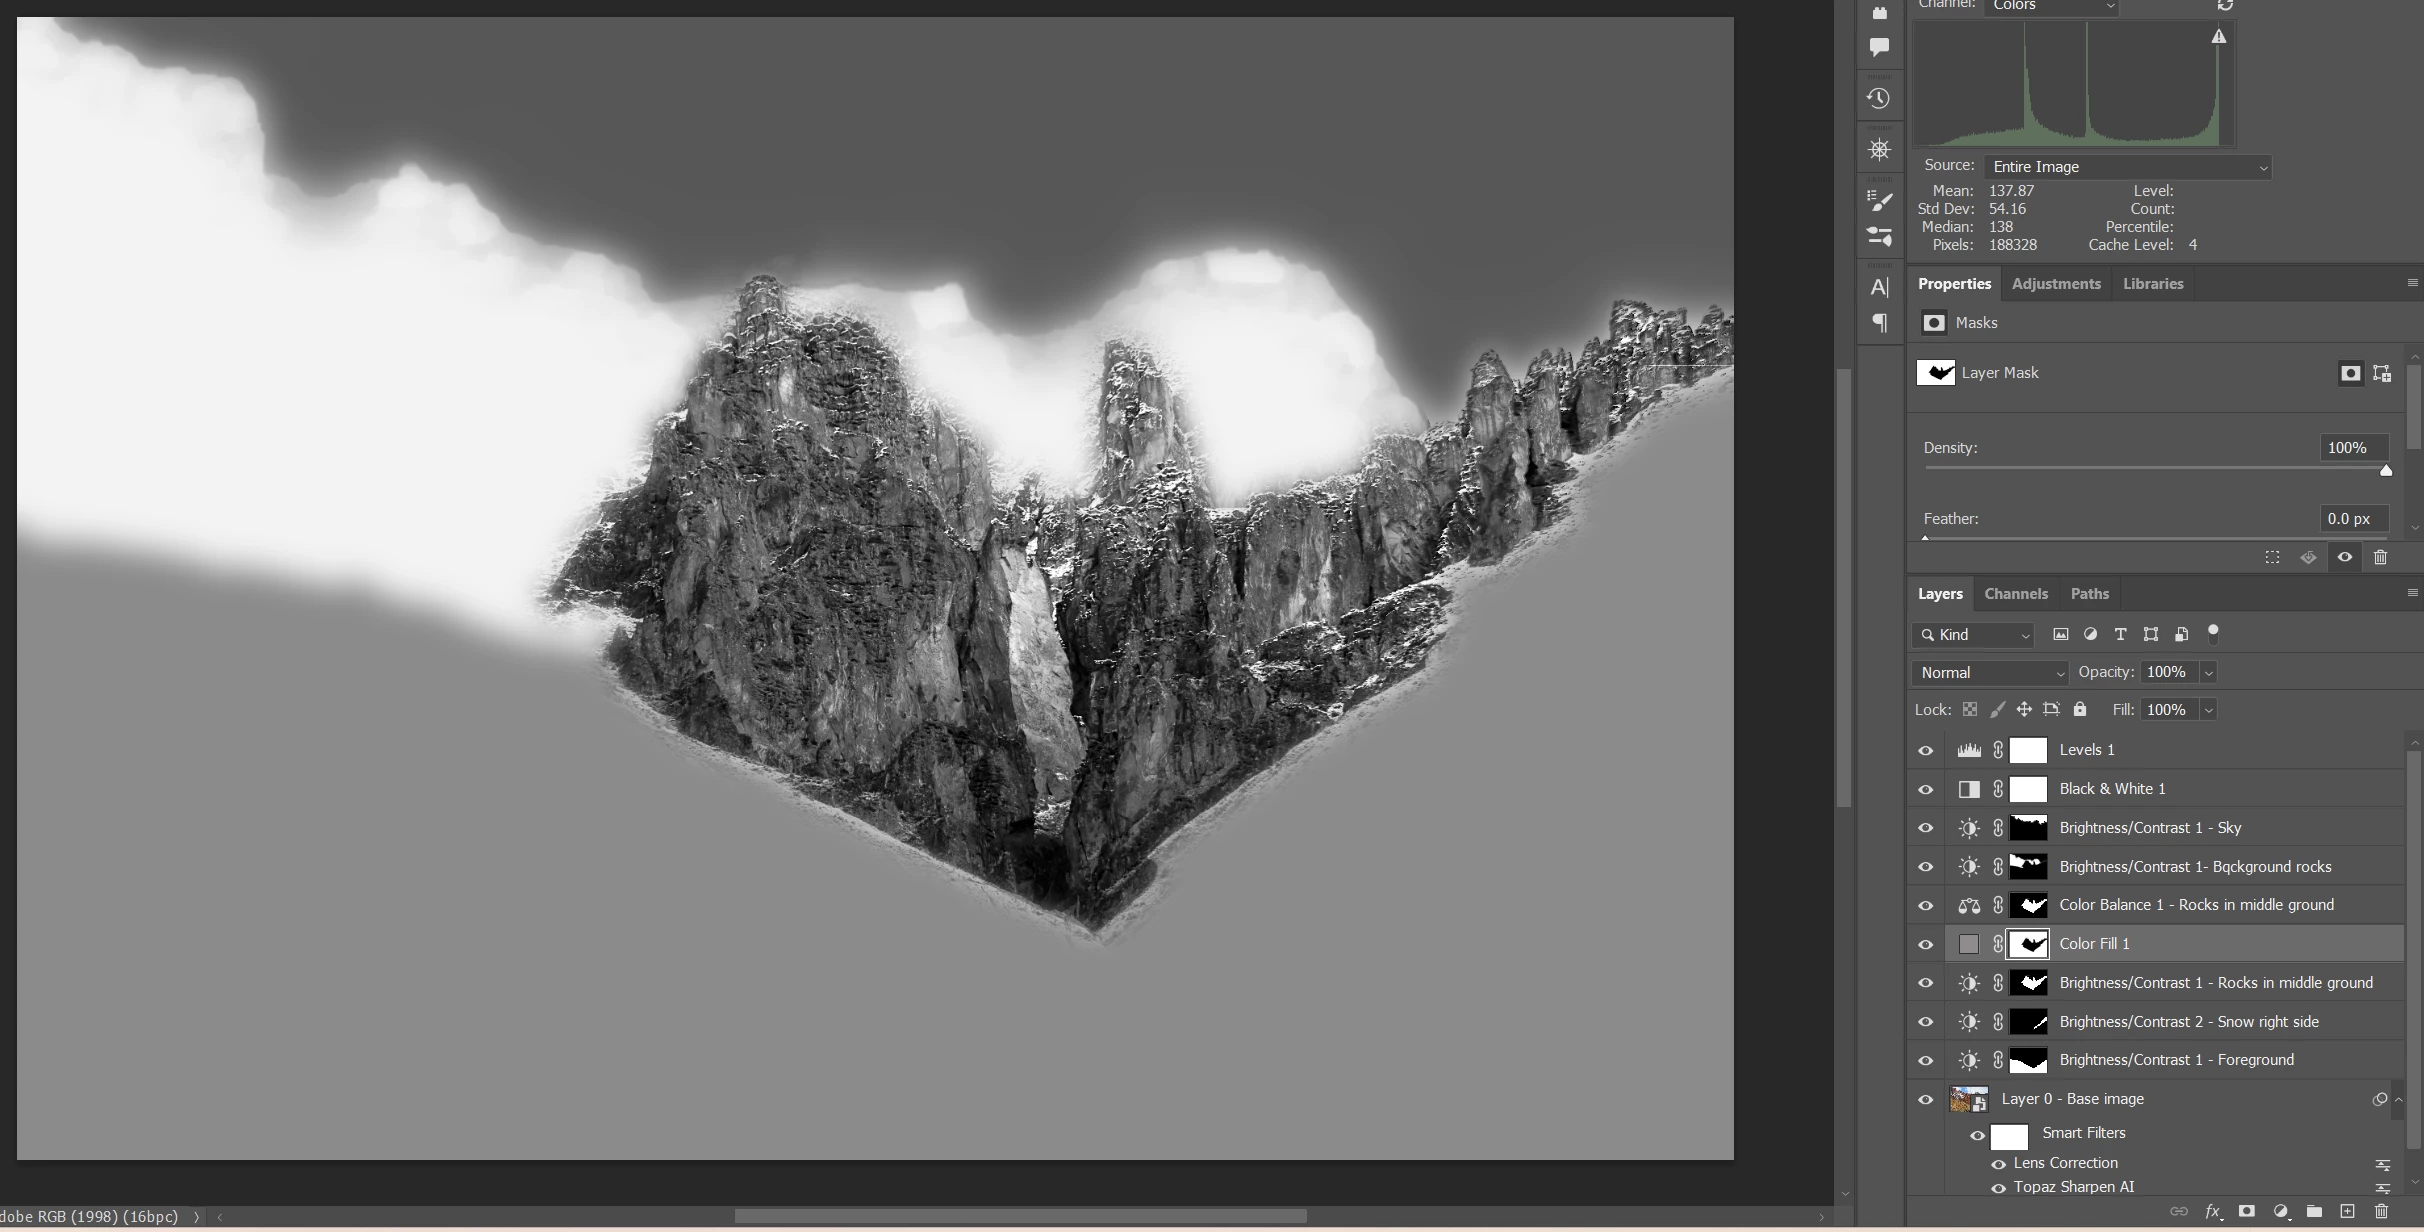
Here it is after the Image > Adjustment > Invert.  What concerns me is that the background are covered with a much lighter color of gray than others areas.  This area was not part of the initial selection, but seems to be acting like it was.  I expected it to be the same gray color as other areas.

After applying the Gausian Blur there's a small area outside the selected area that is now visible.

And now with opacity set at 25% here's what resulsts.  The background rocks / ridge  is now much lighter than it should be.

Hope this gives you some "diagnostic" information.

      Bill


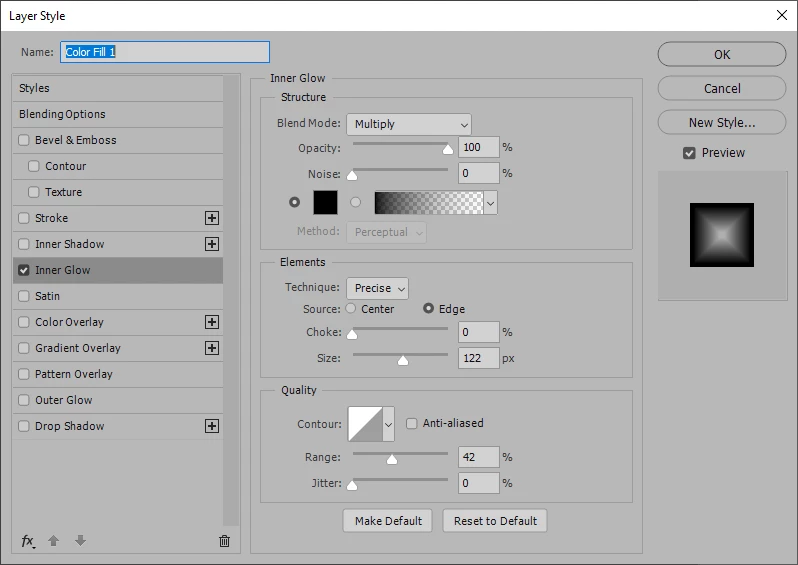
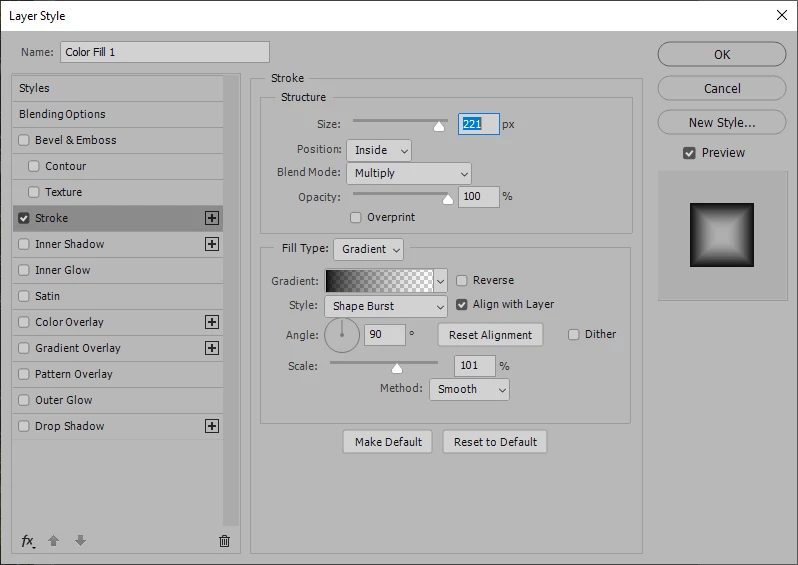
Here's another way you could do this using a Color Fill layer: With your selection active, make a new Color Fill layer. In Blending Options, set Fill Opacity to zero percent. Add a Stroke, with Position set to Inside, Fill Type set to Gradient, Style set to Shape Burst, and a Black to Transparent gradient.

[EDIT]

Better than a Stroke, use Inner Glow, with color set to black, Blend Mode set to Multiply, and Source set to Edge.


3 replies

Myra Ferguson
Community Expert
Community Expert
February 28, 2024

Here's one way to make what apppears to be a vignette using an irregular shape:

  1. Make the selection.
  2. At the bottom of the Layers panel, select the middle icon (for adjustment layers), and select Solid Color...
  3. Set the color from the Color Picker.
  4. In the Layers panel, select the layer mask thumbnail.
  5. Go to Image > Adjustments > Invert.
  6. Go to Filter > Blur > Gaussian Blur and set the radius as desired.
  7. Adjust Opacity and/or Blend mode settings in the Layers panel for that layer as desired.
Bill JunkAuthor
Inspiring
February 28, 2024

Myra,

I appreciate you taking the time to suggest a way for me to do the vignetting of an irregular selection.  I should have mentioned that I'm working with a color image that eventually has a Black&White layer applied.  I have tried doing your steps several times and what seems to happen is that the step where I go to Image > Adjustments > Inverse ends up applying a brightening adjustment outside of the selection, but I need the effect applied inside the selection and it needs to be one that darkens the area adjacent to and inside the selection.  There are places where I don't really have a good sense of how to set the parameters.  For the Solid Color I've been selecting various grays from white to black. It took me some time to figure out that the parameter for the Gaussian Blur affecs the width of the boundary area.  If I don't do the invert step then I get a darker area inside the selection with a gradual blending to the outer edge of the selection which reduces the distinction between the selected area and the surrounding areas and also reduces the brightness of everything outside the selection.  I decided to go back and remake much more precise selections for the 5 areas in the image and deal with them individually using Brightness/Contrast or Curves layers, or actually mess with the color of a selection so that I have better control in the Black&White layer.  Again thanks for your suggestion.

     Bill

Myra Ferguson
Community Expert
Community Expert
February 28, 2024

When you make the selection and then add a solid color fill layer, Photoshop converts that selection into layer mask on that fill layer. After the addition of the solid color fill layer which makes the conversion of the selection to a layer mask, there shouldn't be an active selection on the canvas.


It's the layer mask (the black & white thumbnail to the right of the solid color fill) where you should apply the Gaussian blur.


If I'm misunderstanding your setup, would you be able to add a screenshot that includes your canvas and your Layers panel?

Conrad_C
Community Expert
Community Expert
February 28, 2024

Does the demo below show what you mean? If this is what you want, you can see that with the updated Gradient tool, it was done in only a few seconds, and it can be edited at any time.


Bill JunkAuthor
Inspiring
February 28, 2024

Conrad,

Thanks very much for the suggestion.  Using the gradient tool worked somewhat in my situation, but the selection to which the vignette needed to be applied was an irregular section of a rock outcropping.  I really needed the vignette applied along the outer boundary of the selection.  The elipse created by the gradient tool doesn't conform very well to the irregular shape of the rocks.  Consequently I get the darkening on some of the rock edges and not others.  What I wanted to achieve was to create more definition between the edges of the rocks in the selection and the rocks that surrounded it.  In other words I was hoping that the vignette would conform to the boundary of the selection rather than an elipse drawn around it.  I might have to take the time to just burn the edge inside the selection.