Answered
Le pointeur du pinceau devient invisible.
Bonjour. Lorsque je fais du Dodge and burn le cercle du pinceau qui est parfois gris, parfois blanc devient par moment presque invisible. Existe t'il un réglage pour remédier à ce problème?

Bonjour. Lorsque je fais du Dodge and burn le cercle du pinceau qui est parfois gris, parfois blanc devient par moment presque invisible. Existe t'il un réglage pour remédier à ce problème?
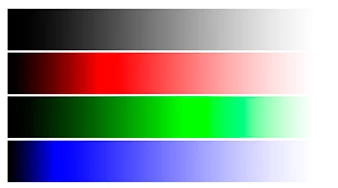
As a test, download this image and switch to Lab Color Mode. Then choose the Dodge tool.
As you float the curser horizontally across each bar (do not click and drag) and view the L channel in the Info panel you will see that the brush ring changes from black to white at 50% Luminosity. It is an abrupt change. At no time is it gray or almost invisible.
Repeat the test with the Burn tool. Same result.
Reset the Dodge and Burn tools by right-clicking on its symbol the top left of the Options bar above the tools.
Already have an account? Login
Enter your E-mail address. We'll send you an e-mail with instructions to reset your password.