Darren McLoughlin
Participating Frequently
October 25, 2020
Question

Photoshop - Sky Replacement

  • October 25, 2020
  • 3 replies
  • 3899 views

Photoshop's Sky Replacement, First Use


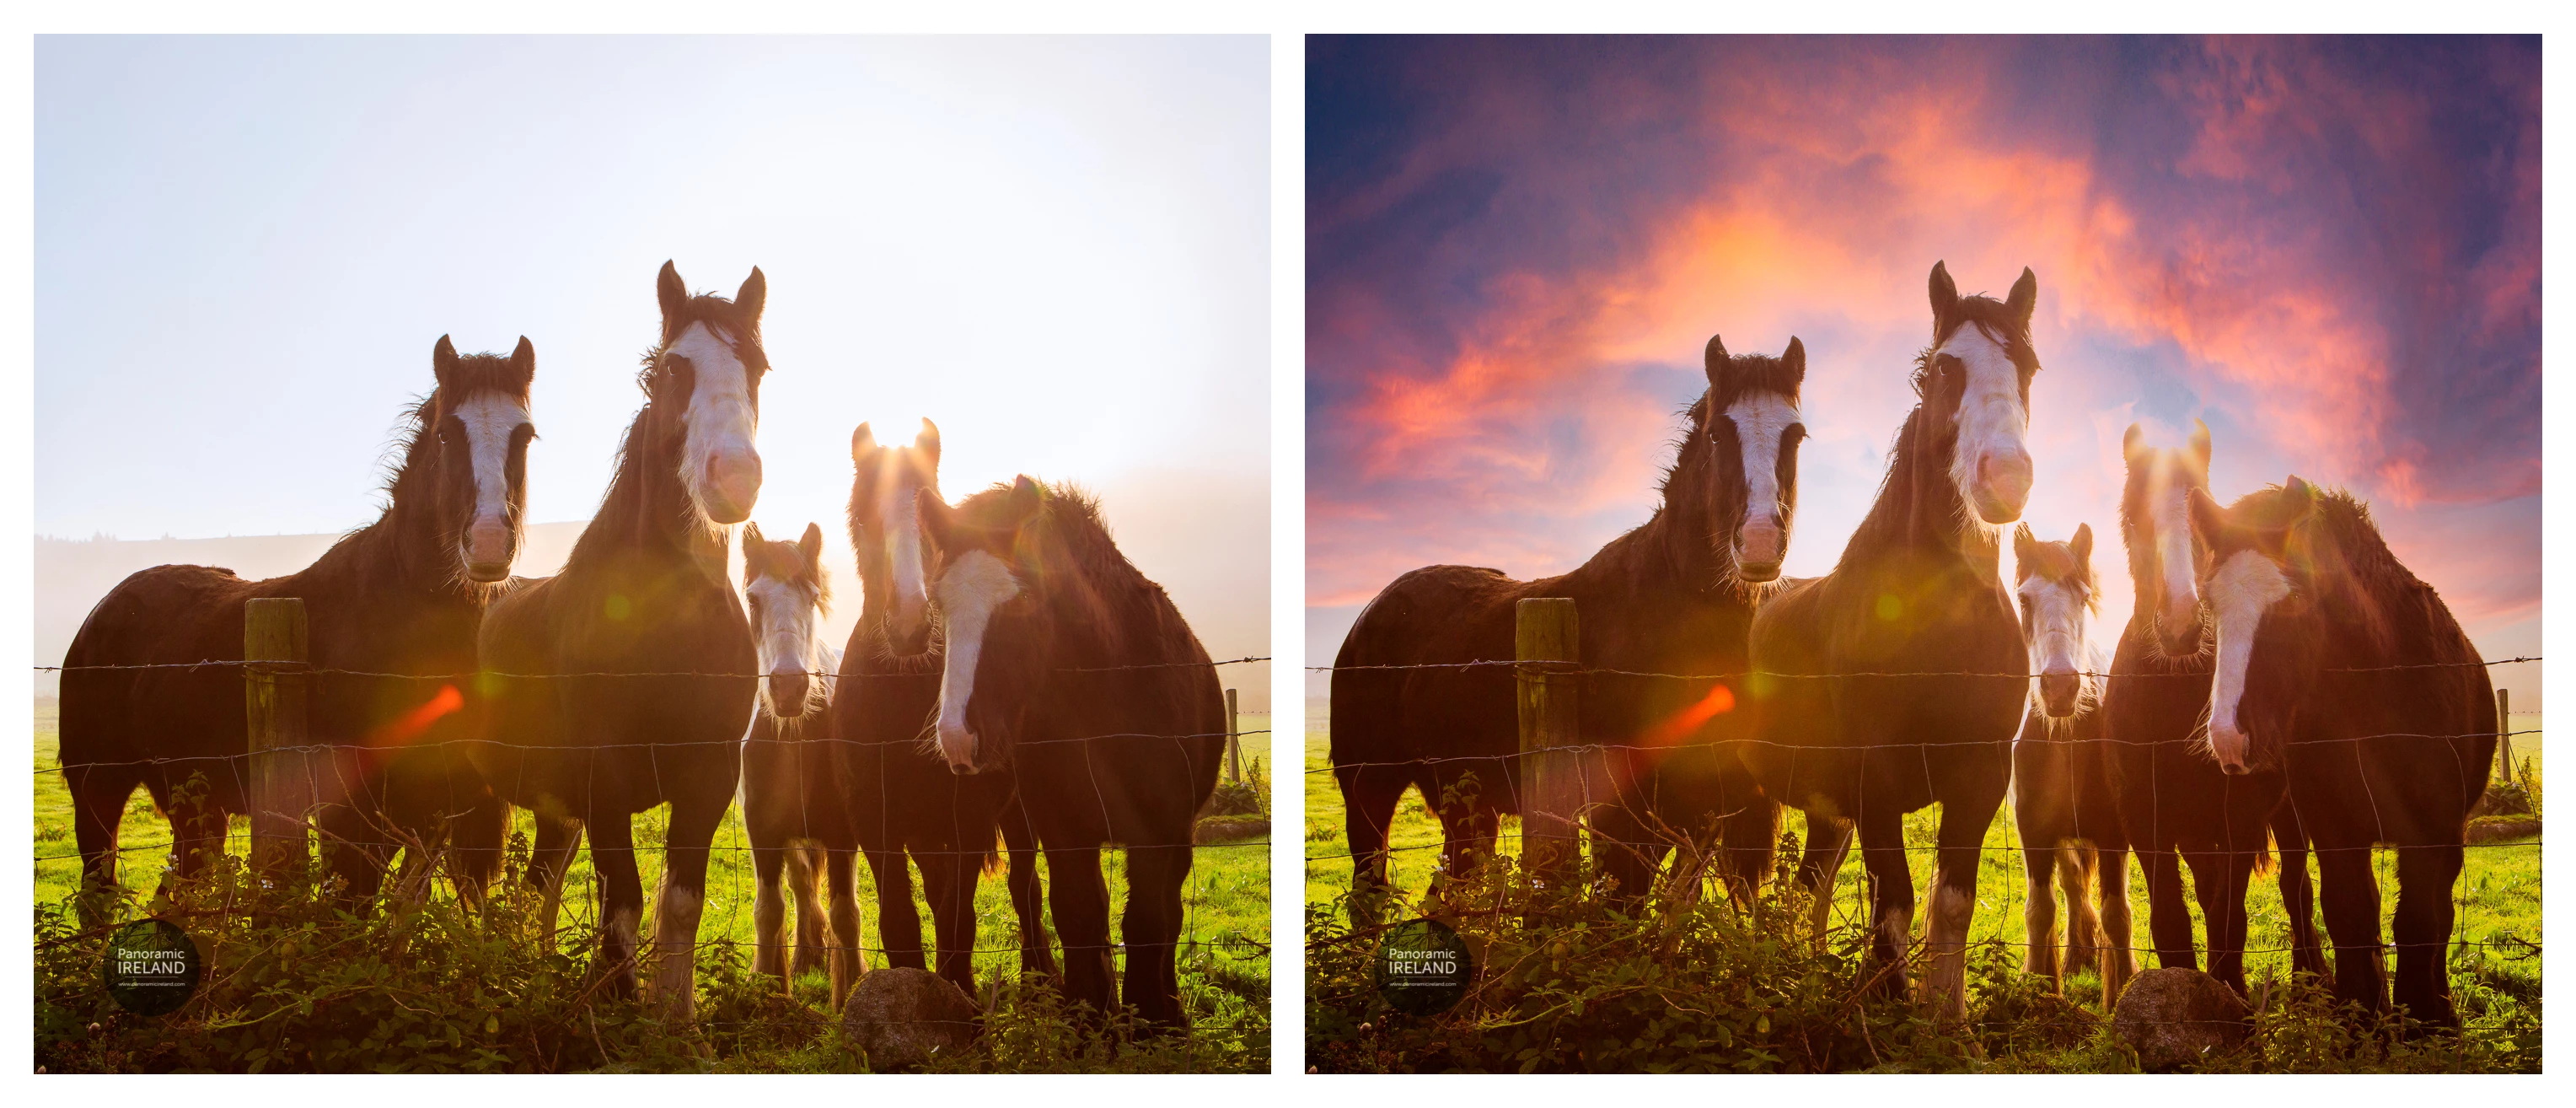
One of the most talked about features in Adobe’s recently updated Photoshop 2021 is Sky Replacement.


While it is always preferable is to capture the sky with good exposure and with bright, colourful clouds, sometimes this just isn't possible.


Here, traveling through the Irish countryside early in September I found a field full of horses, all eager to pose. Unfortunately, the sun was just coming up over the mountain ridge in the background and was strong enough to bleach the cloudless sky. 


In this case, even using a graduated filter or taking a bracketed exposure wouldn't have created much more than a light blue sky with a bright section.


I thought this was a good image to try out first, with difficult backlighting.


Here is the process that I used to create the final image.


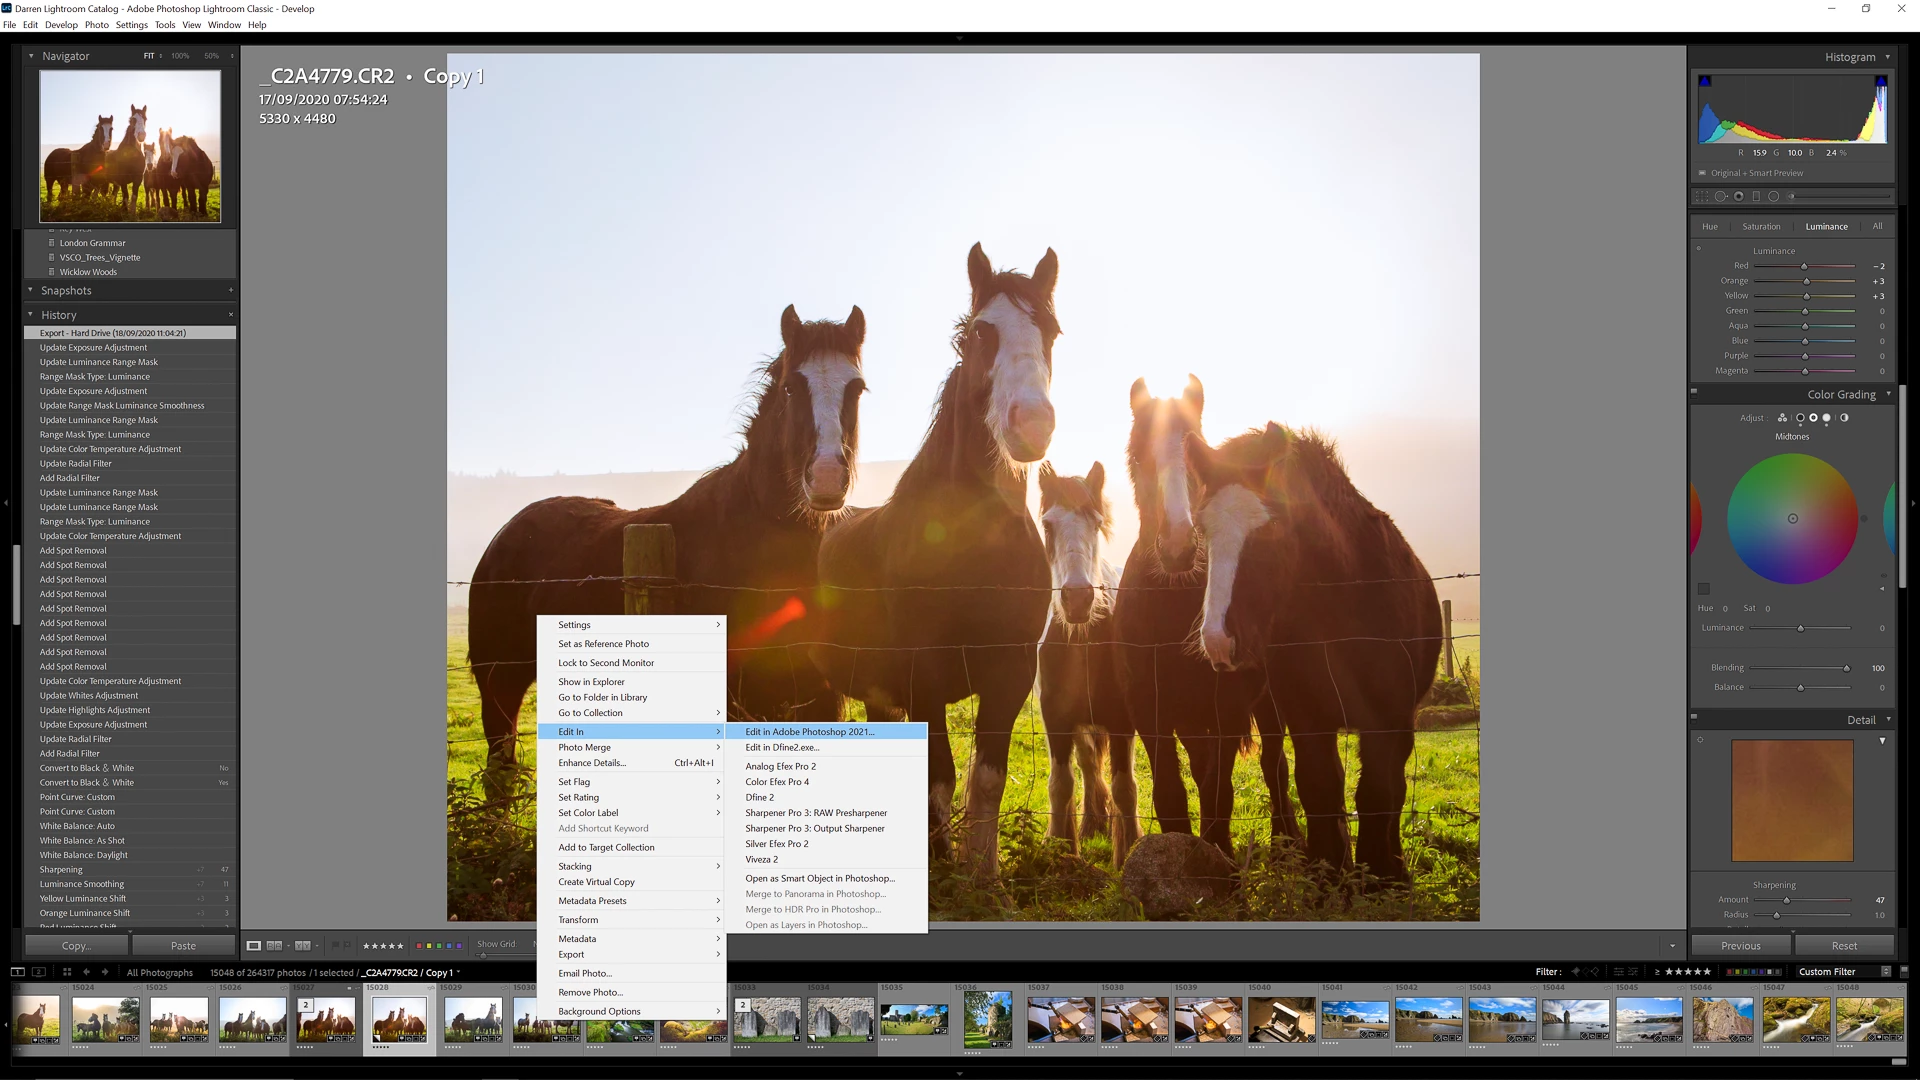
❶ Open Image in Photoshop

  • I started in Lightroom: right-click on the image and choose Edit In>Edit In Adobe Photoshop 2021...


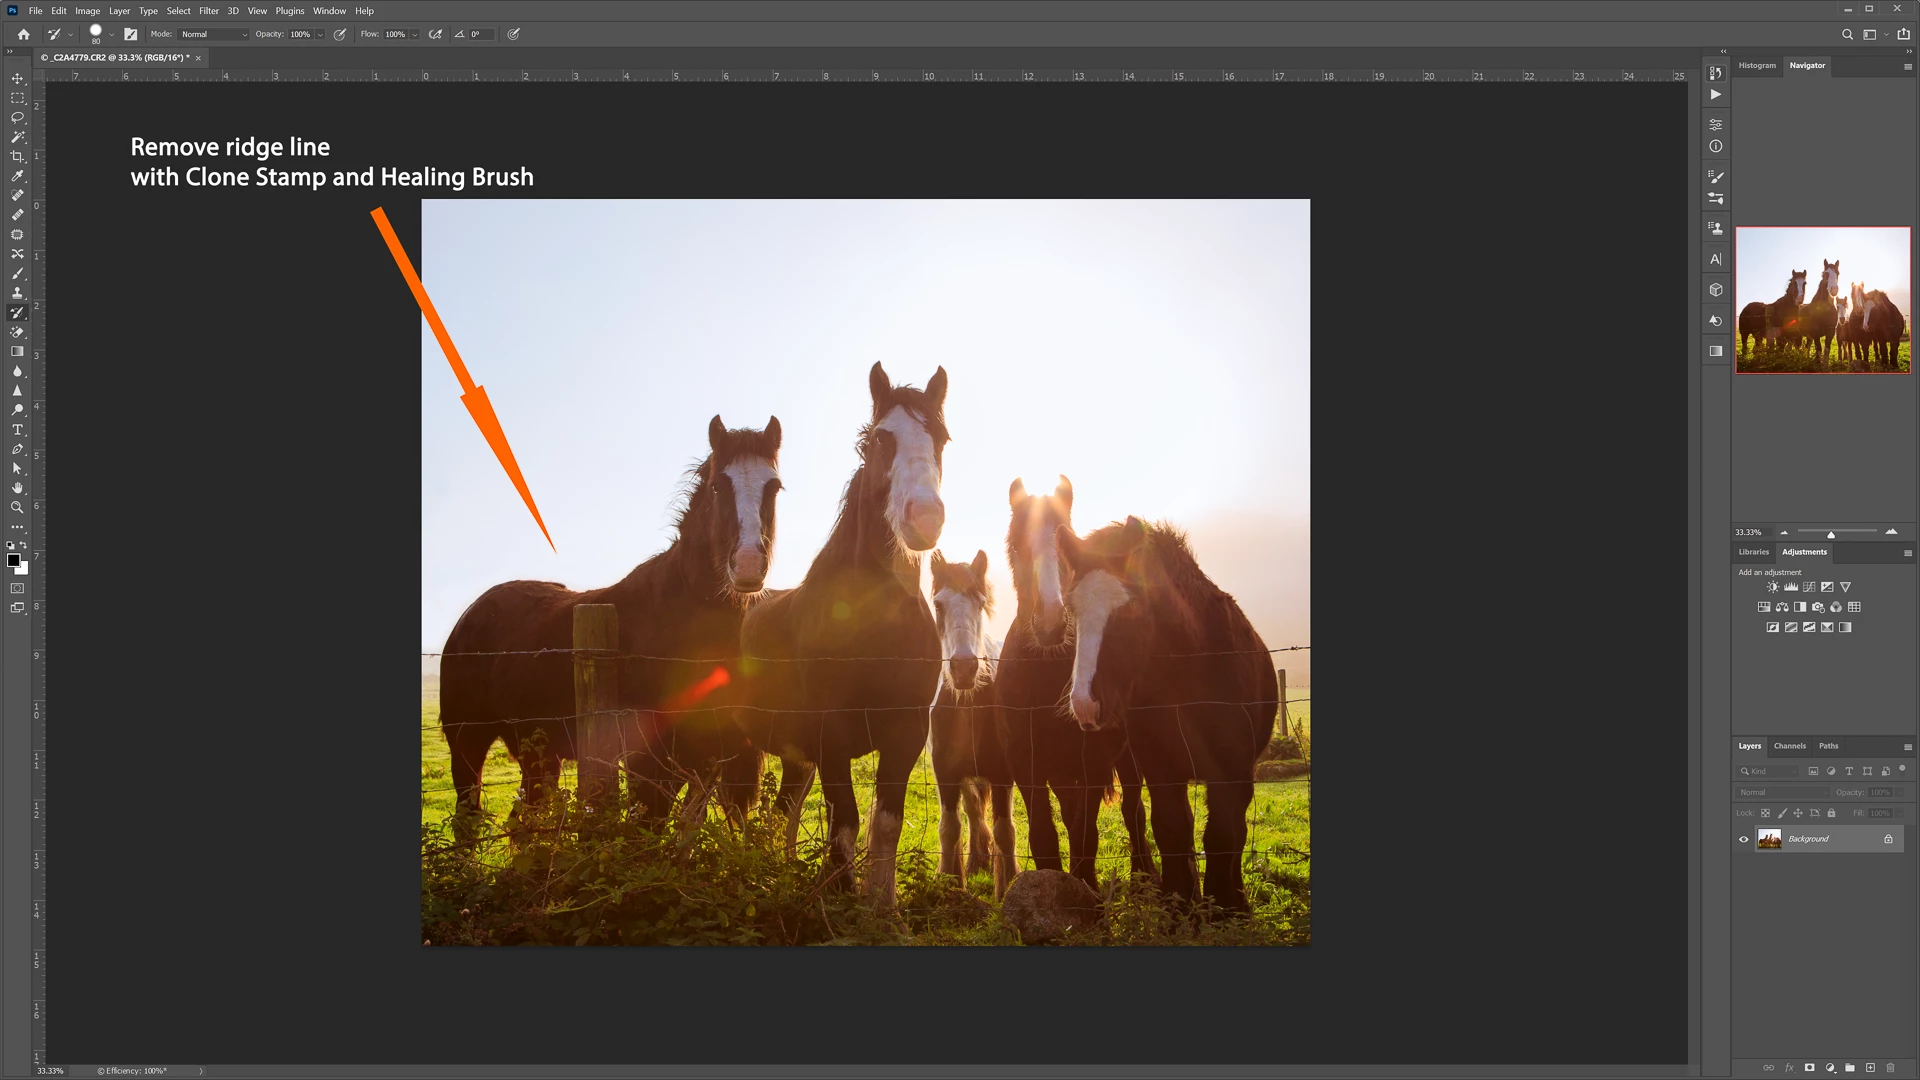
❷ Clean up the image

  • Remove any dust spots, or other elements. Here I removed the ridge line that ran across the left half of the image behind the horses using Clone Stamp and Healing Brush.
  • This allowed Photoshop to cover more of the image with the new sky.


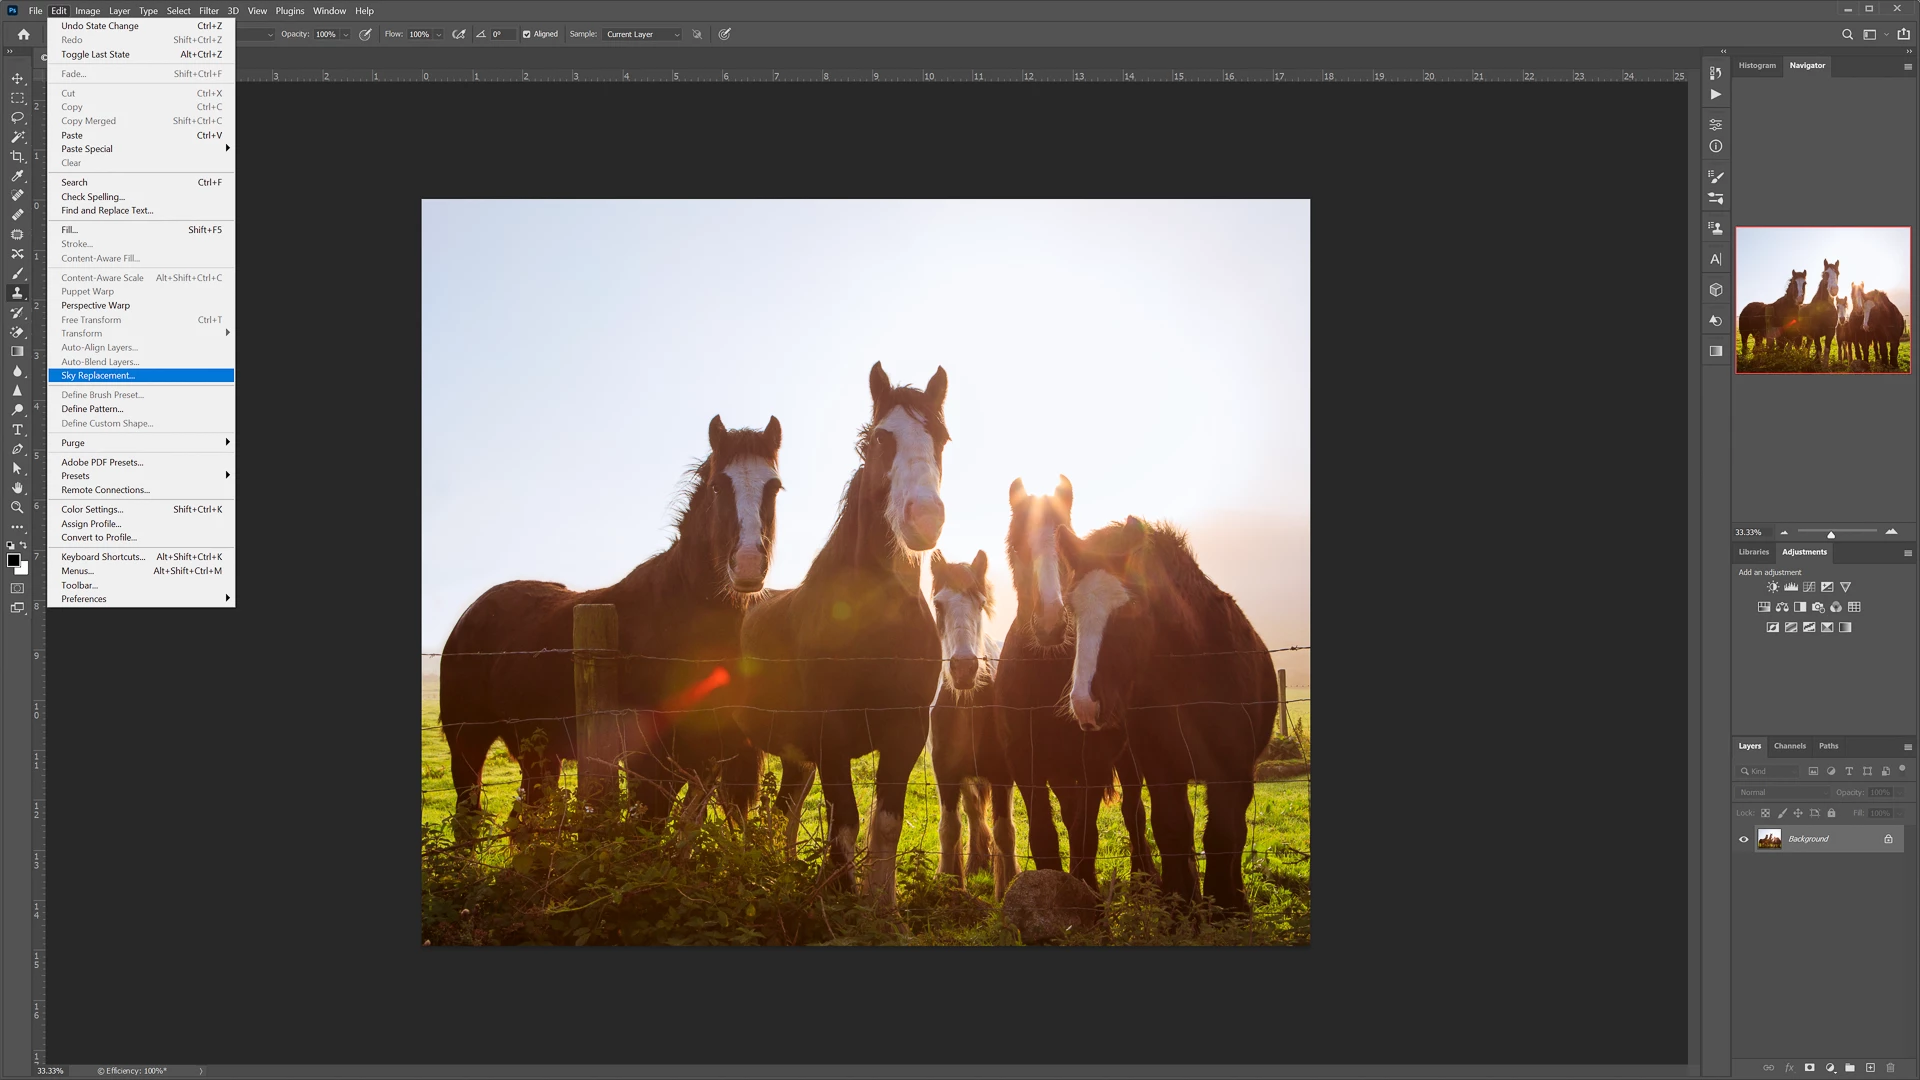
❸ Open the Sky replacement tool

  • Go to Edit>Sky Replacement...


  • In the panel (highlighted in orange) click on the Sky box to choose a sky, there are many options and you can import one of your own.


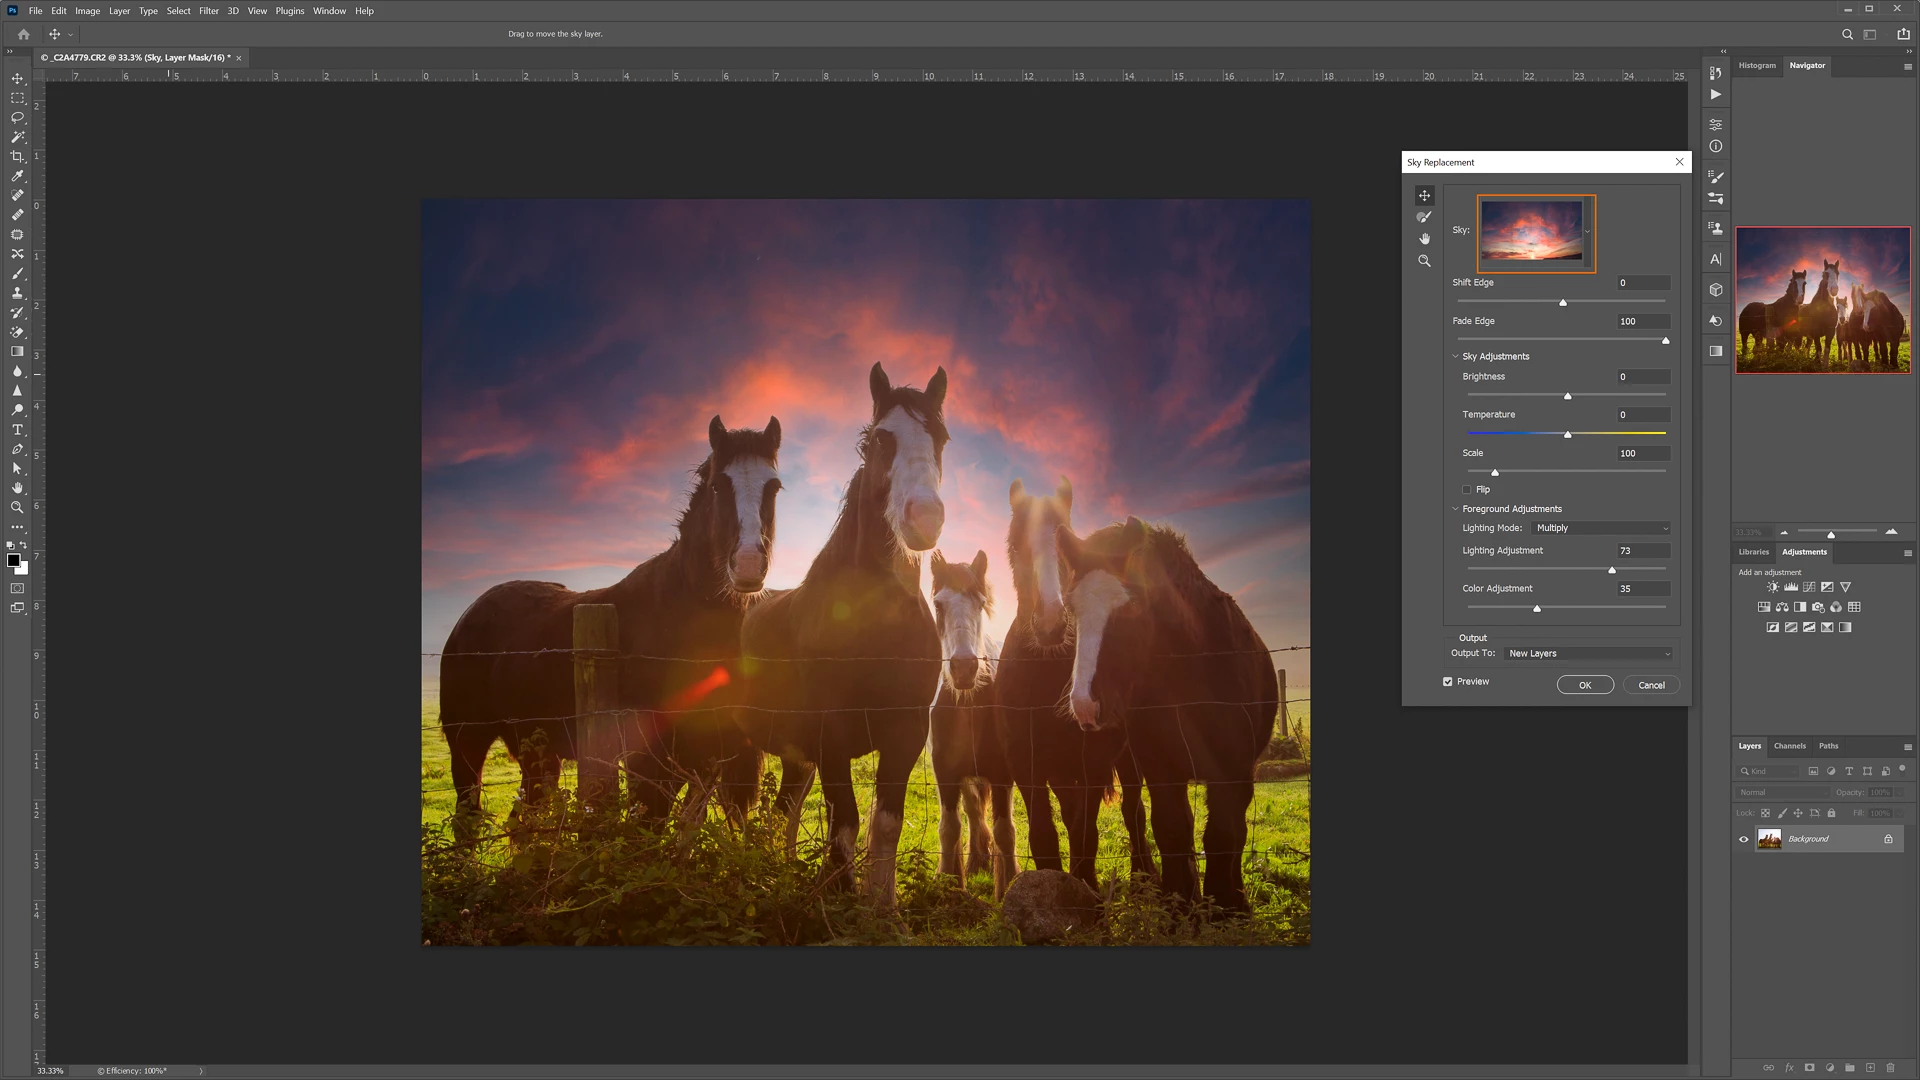
  • Here I have chosen Spectacular 004 by Russell Brown.
  • Modify the settings to suit, here I have adjusted the scale setting to bring that arc of cloud over the horses heads, added brightness, and changed the settings on the Foreground Adjustments.


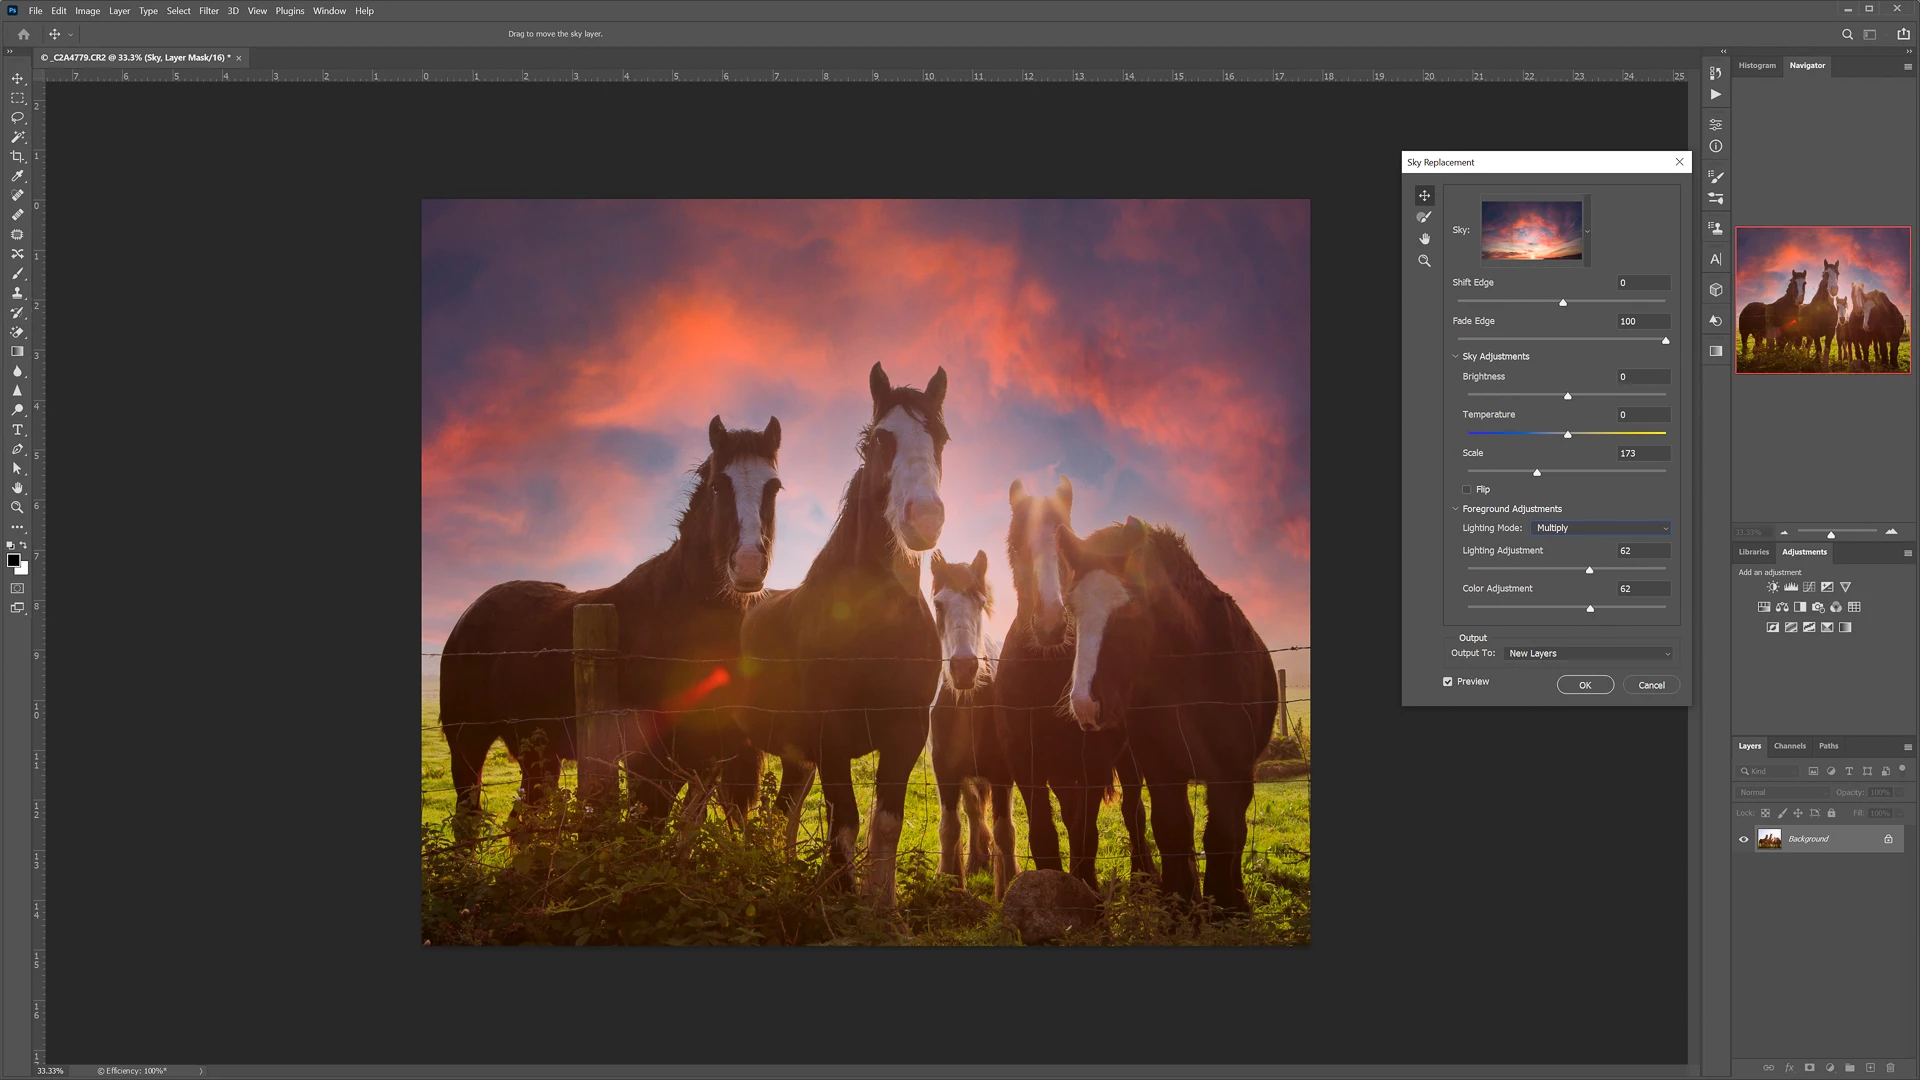
  • These adjustments will be individual to the image.
  • You can refine the edge here using the Sky Brush or after, in step 4 using edits to layer masks.
  • You can also move the sky left, right, up and down to find the correct position.
  • Click OK, if you have left Output To: New Layers selected then this will create a new layer group.


❹ Make adjustments to the layers


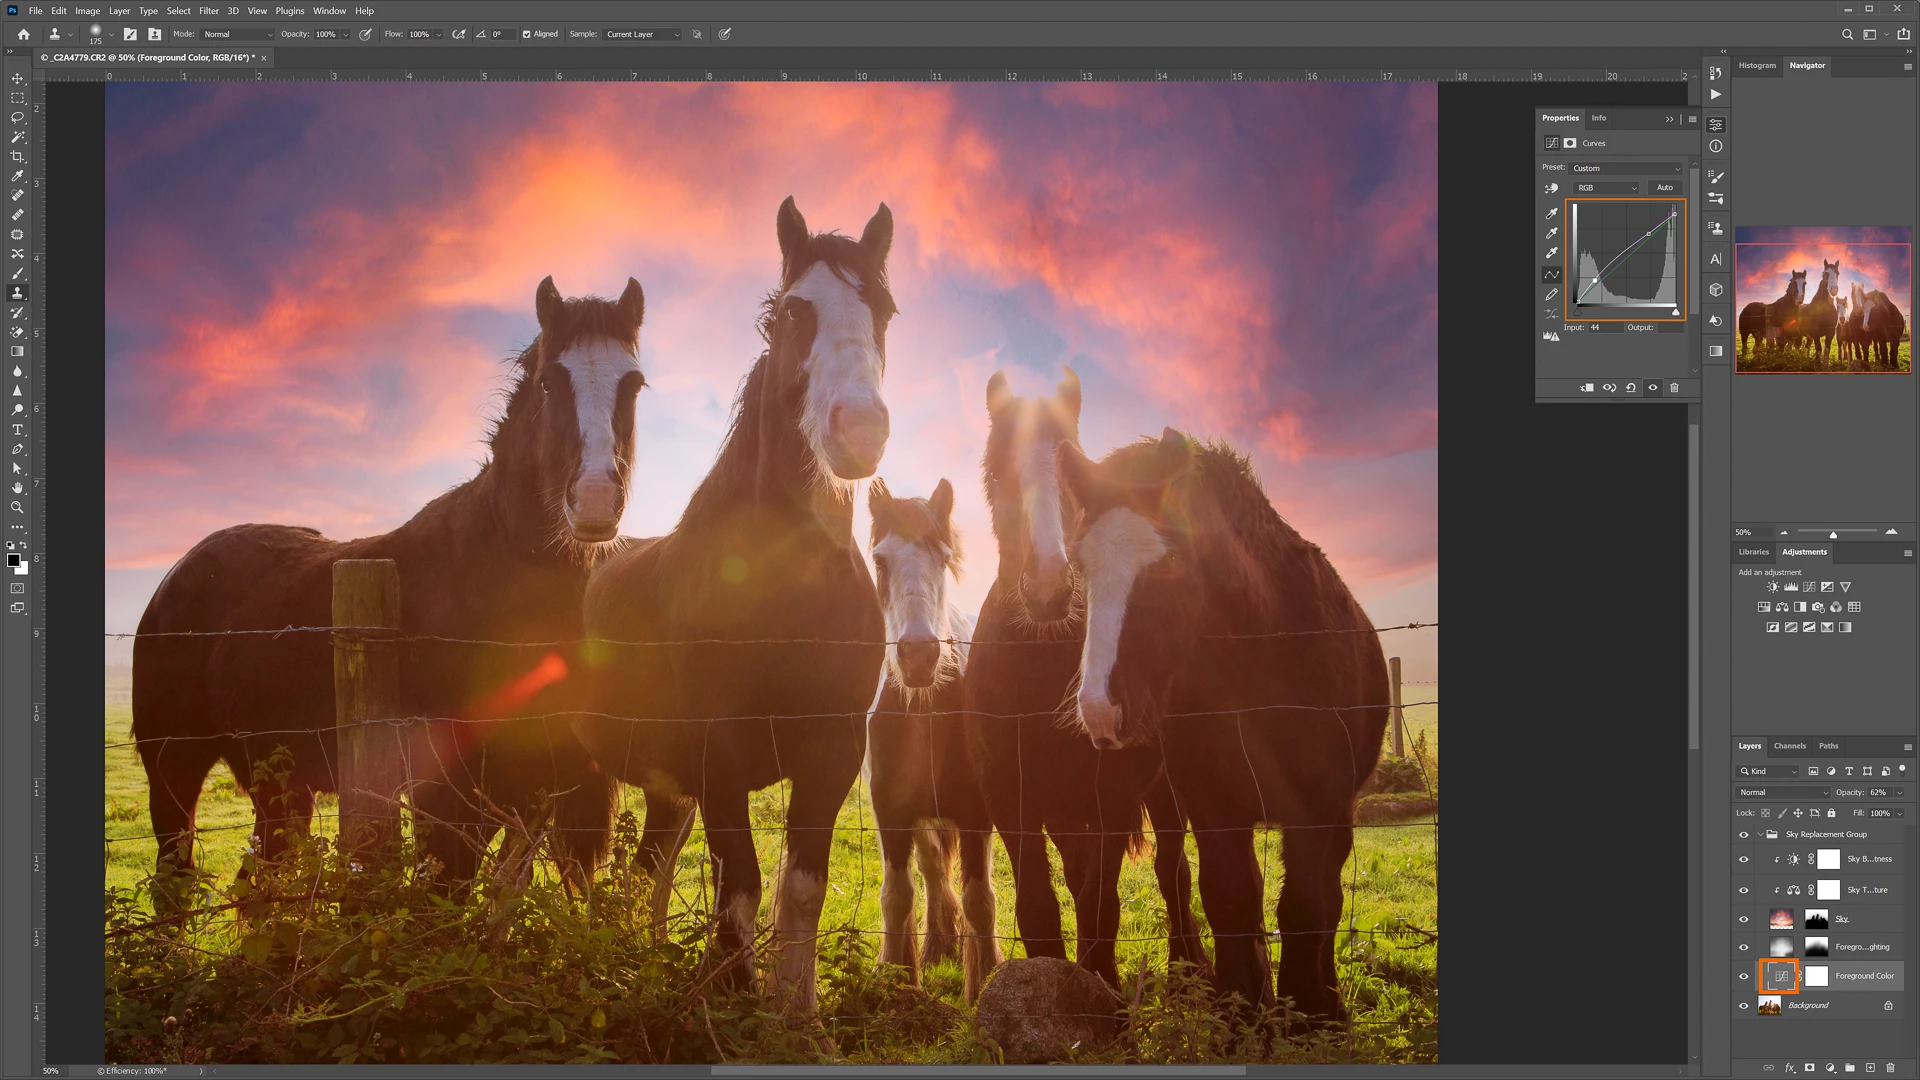
  • Double click on the individual layers to make adjustments to masks or, as seen here, curves.
  • You can also increse or reduce the opacity of these layers or delete them.
  • Save and continue editing in Lightroom if necessary.


I found the automatic selection to be accurate, even with the difficult, irregular outlines of the horses.


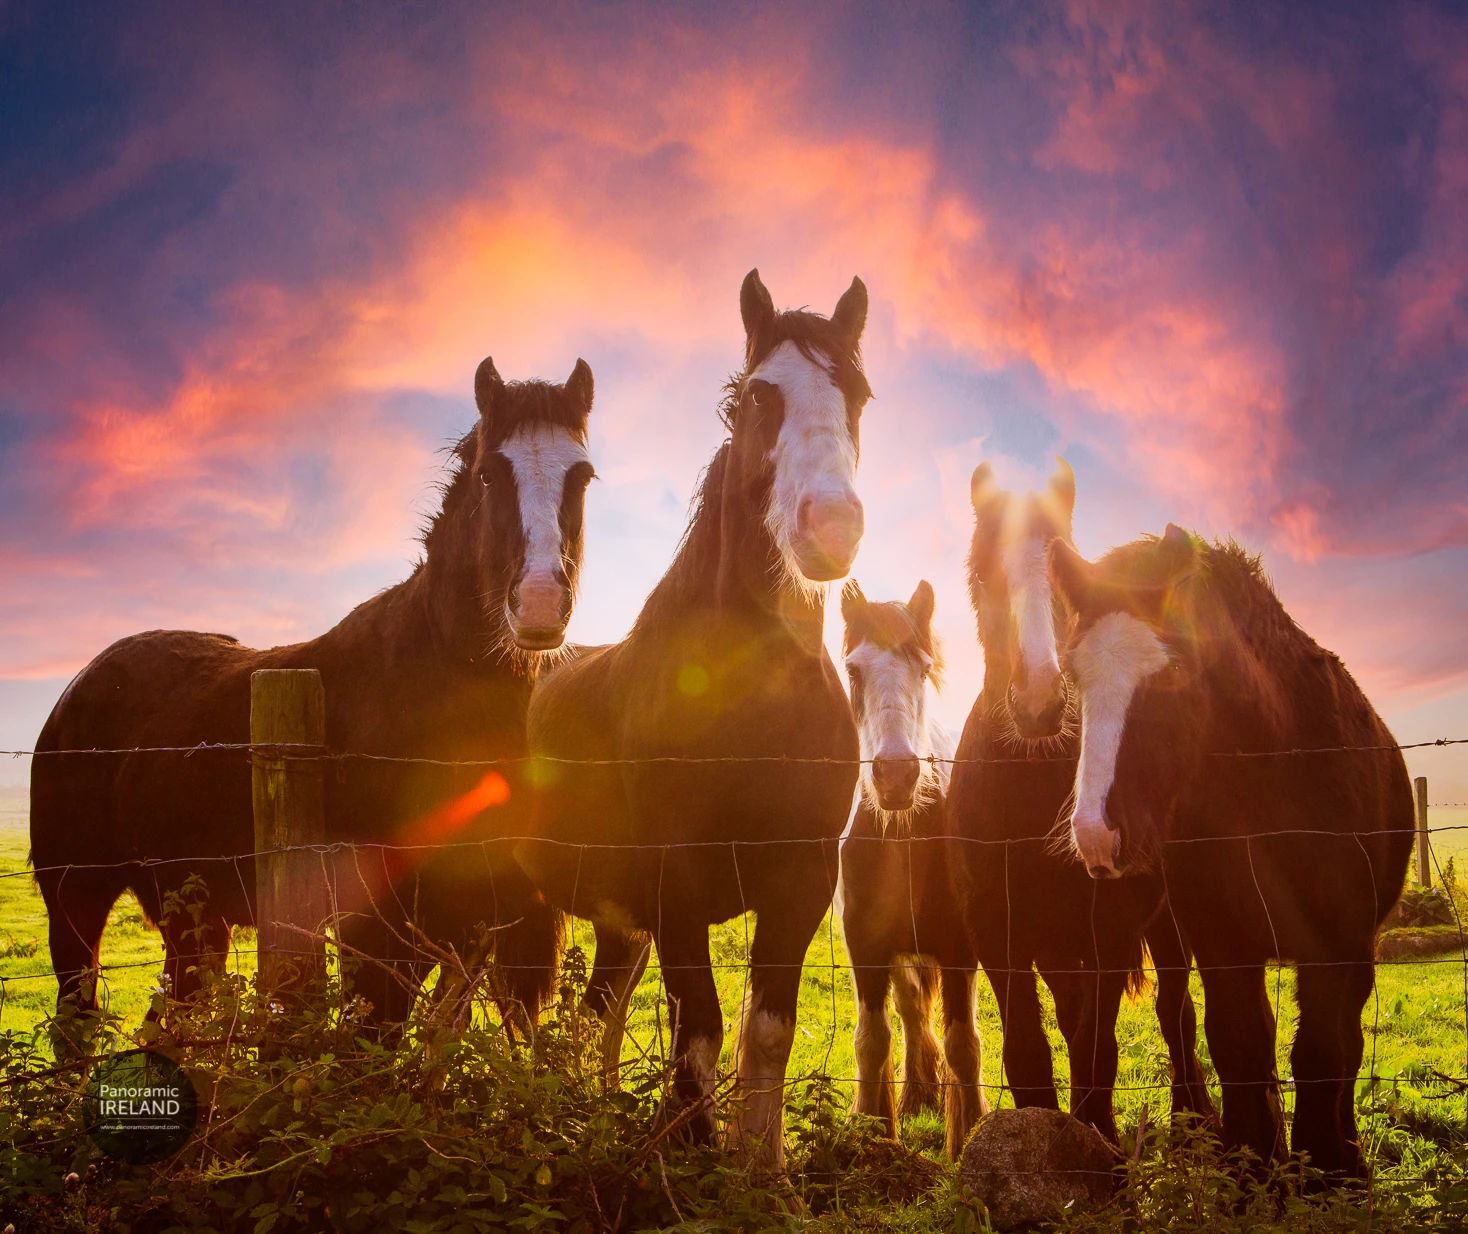
Here is the final image with a little extra finishing in Lightroom.


Related link:

Swap skies in seconds with Sky Replacement 


This topic has been closed for replies.

3 replies

Participant
January 15, 2021

I have place with Sky Replacement, bringing in photos from LR. After a few tries I discovered that for some reason my Sky Replacement panel is so large that the bottom part is off the screen - the part where you can click OK to save your edited photo. I have no idea what I did to make the panel get so large, but am hoping you can walk me through how to reduce it to its original size. I right-clicked on the heading 'sky replacement' at the top and tried the option 'size', but and have tried putting the double-arrow on an edge, but even though I can move the panel I cannot reduce it, which makes it essentially unusable for me.  HELP!


Participant
January 14, 2021

Hi I have a subscription, have just updated Photoshop and cannot find this tool at all.. Can anyone help please?


Darren McLoughlin
Participating Frequently
January 14, 2021

Hi,


Sorry to hear that you are having problems. The tool should be located under Edit > Sky Replacement...


Have a look at the enclosed screenshot.


Also just make sure you are using the latest version, 22.1, by going to Photoshop > About Photoshop... on Mac or Help > About Photoshop... on Windows.


If it is not there then I would recommend making a new post in the Photoshop Community: https://community.adobe.com/t5/photoshop/bd-p/photoshop?page=1&sort=latest_replies&filter=all so that more people can see your problem and help with a solution.


Hope that helps,


Darren

KShinabery212
Community Expert
Community Expert
December 8, 2020

I think it is a really cool feature... and I am looking forward to seeing how it evolves.  I demoed this to my Marketing students and they went nuts.  This was something we needed for a long time in regards to Photography.... so I am so happy it is now part of Photoshop.  As not every day can be the perfect day for shooting outside.... and when you have a model lined up you kind of have to go with what nature gives you (well, not any more thanks to Photoshop!).

Let's connect on LinkedIn. https://www.linkedin.com/in/kshinabery/
Darren McLoughlin
Participating Frequently
January 6, 2021

I agree, it can be a useful feature in cases where time is limited.