Inspiring
September 2, 2018
Answered

Please help me turn a color photo to a drawing in greyscale

  • September 2, 2018
  • 1 reply
  • 1462 views

Hi,

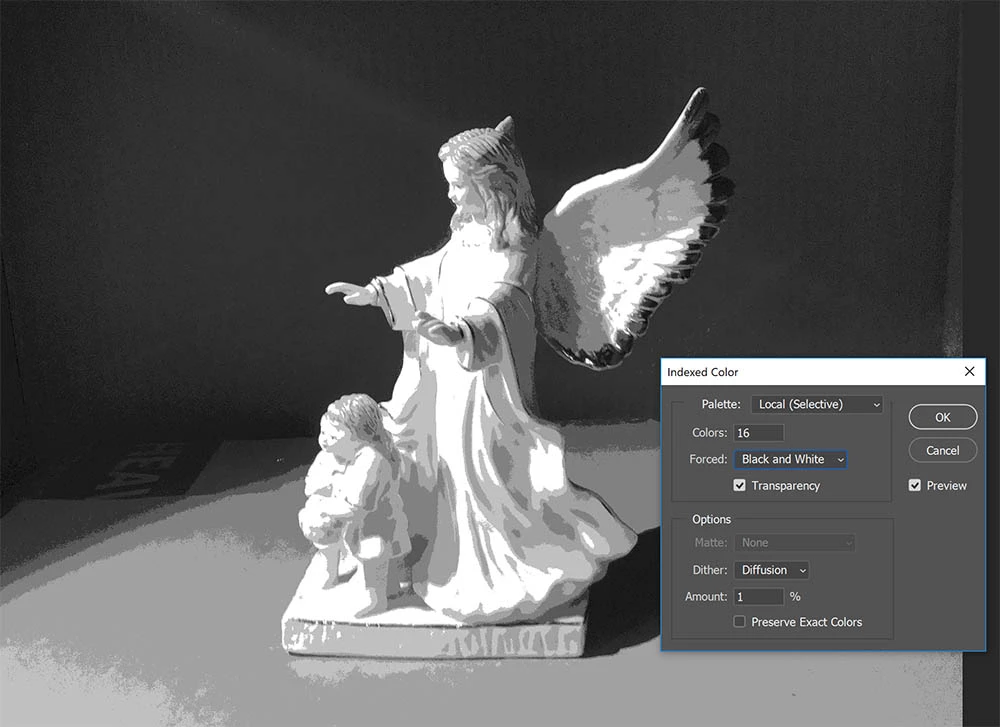
I am having a real problem in a course I signed paid for. Could someone please take either of the 2 color photos attached, turn them into a drawing and block in the greyscale values? I have to do this with actual paint on canvas, and am trying to use Photoshop to assist me. The second greyscale version of the angel statue is what I am going for. Thanks so much in advance.

    This topic has been closed for replies.
    Correct answer DeanUtian

    Not 100% clear about what you want but here are some steps that may be helpful. Starting with your colour image of the angel.

    1. Select Image > Mode > Grayscale. This makes the image 8 bit (256 colours) of grays - between black and white.

    2. Discard colour information.

    3. Select Image > Mode > RGB. This returns it to the full colour depth. It is needed for the next step.

    4. Select Image > Mode > Indexed Color.. This brings up window with settings to control the colours.

    5. You can change the amount of colours to 16, Dither to Diffusion and Amount to 1% (as below)
      Result is a you get shades of grey rather than a dithered effect.

    6. You can then adjust the brightness and contrast to get the blacks blacker - Image > Adjustments > Brightness/Contrast...

    1 reply

    Community Expert
    September 2, 2018

    Hi sheana,

    Is your question about how to make your first colour image into the second one?

    DeanUtianCommunity ExpertCorrect answer
    Community Expert
    September 2, 2018

    Not 100% clear about what you want but here are some steps that may be helpful. Starting with your colour image of the angel.

    1. Select Image > Mode > Grayscale. This makes the image 8 bit (256 colours) of grays - between black and white.

    2. Discard colour information.

    3. Select Image > Mode > RGB. This returns it to the full colour depth. It is needed for the next step.

    4. Select Image > Mode > Indexed Color.. This brings up window with settings to control the colours.

    5. You can change the amount of colours to 16, Dither to Diffusion and Amount to 1% (as below)
      Result is a you get shades of grey rather than a dithered effect.

    6. You can then adjust the brightness and contrast to get the blacks blacker - Image > Adjustments > Brightness/Contrast...

    Inspiring
    September 2, 2018

    Yes, this is exactly what I was looking for. What does "dithering" mean? Is it the lack of detail in my greyscale attachement?