rbanks88
Inspiring
April 19, 2024
Question

Please save a work of art with advice on removing an object from a complex background.

  • April 19, 2024
  • 2 replies
  • 407 views

This is a small portion of a huge crowd watching the recent solar eclipse from the deck of a cruise ship off of Mazatlan. Unfortunately, this man disrupts the flow of a beautiful negative space flowing through the image.


What procedure would you recommend for removing the man in this photo, which I'll call "Photo A"?


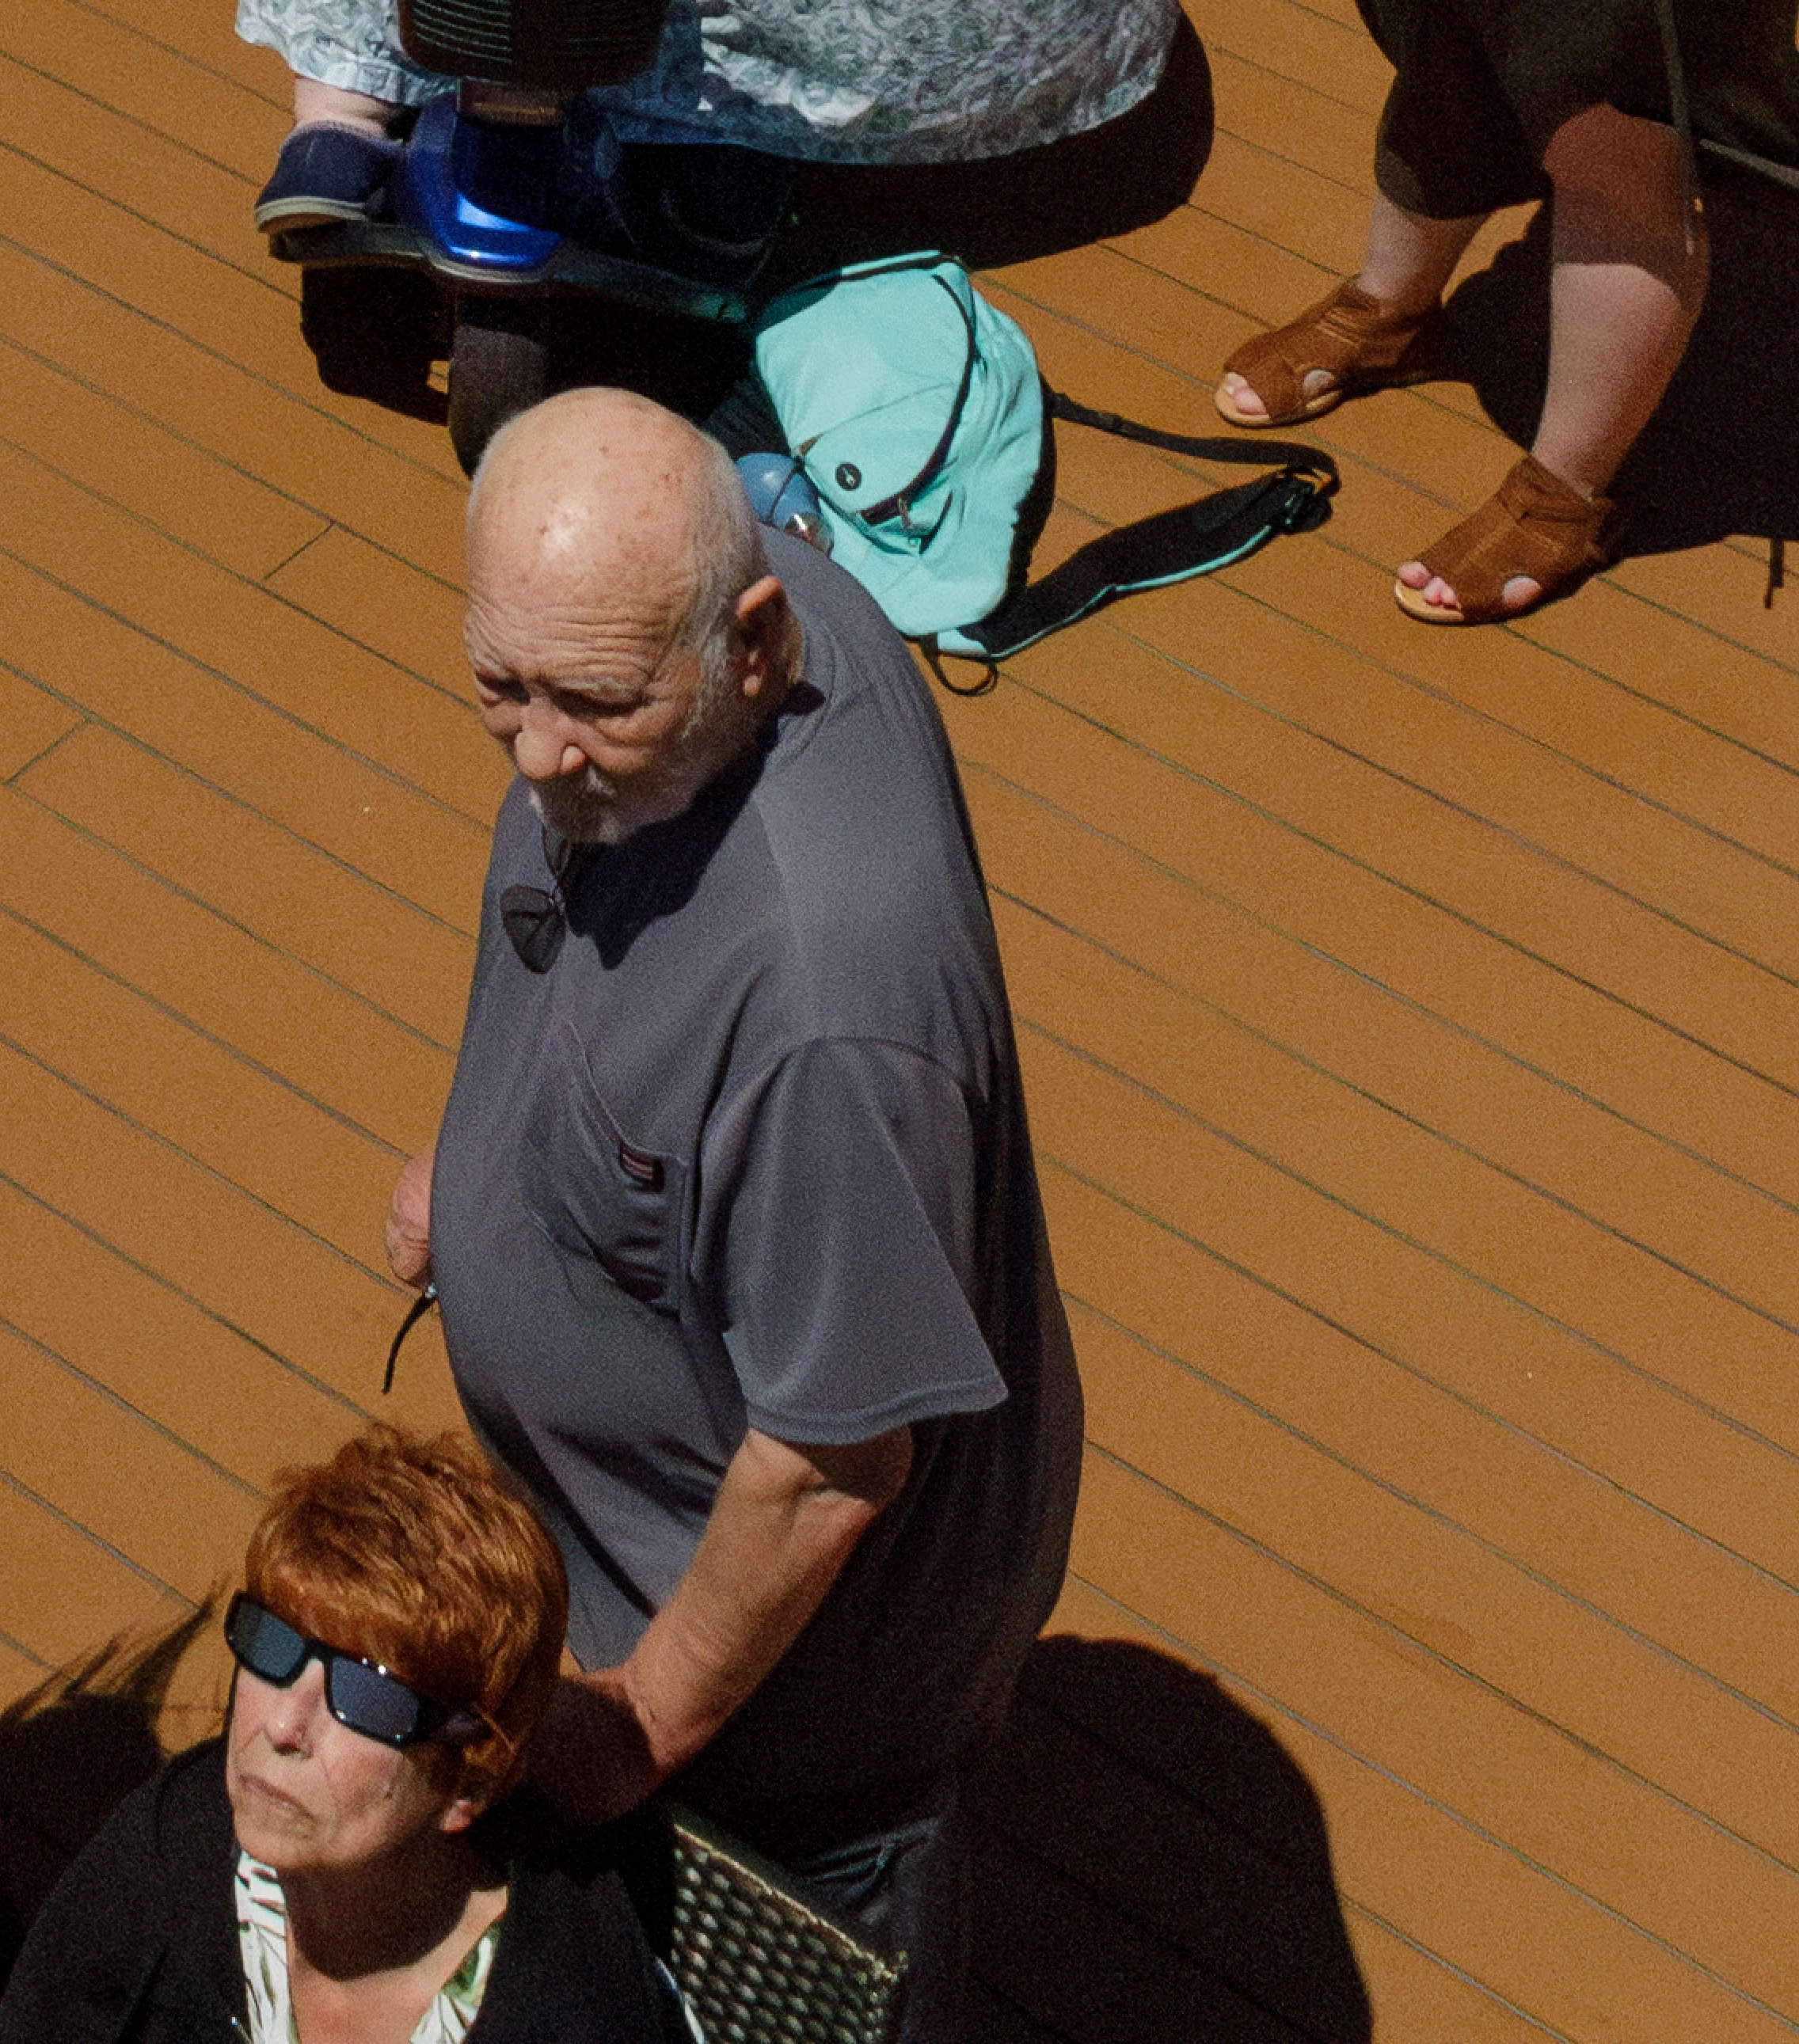
I have a similar image, "Photo B," without the man, that I think will be useful, though the camera wasn't pointed as far downward. Both images are at the bottom of their camera frames:


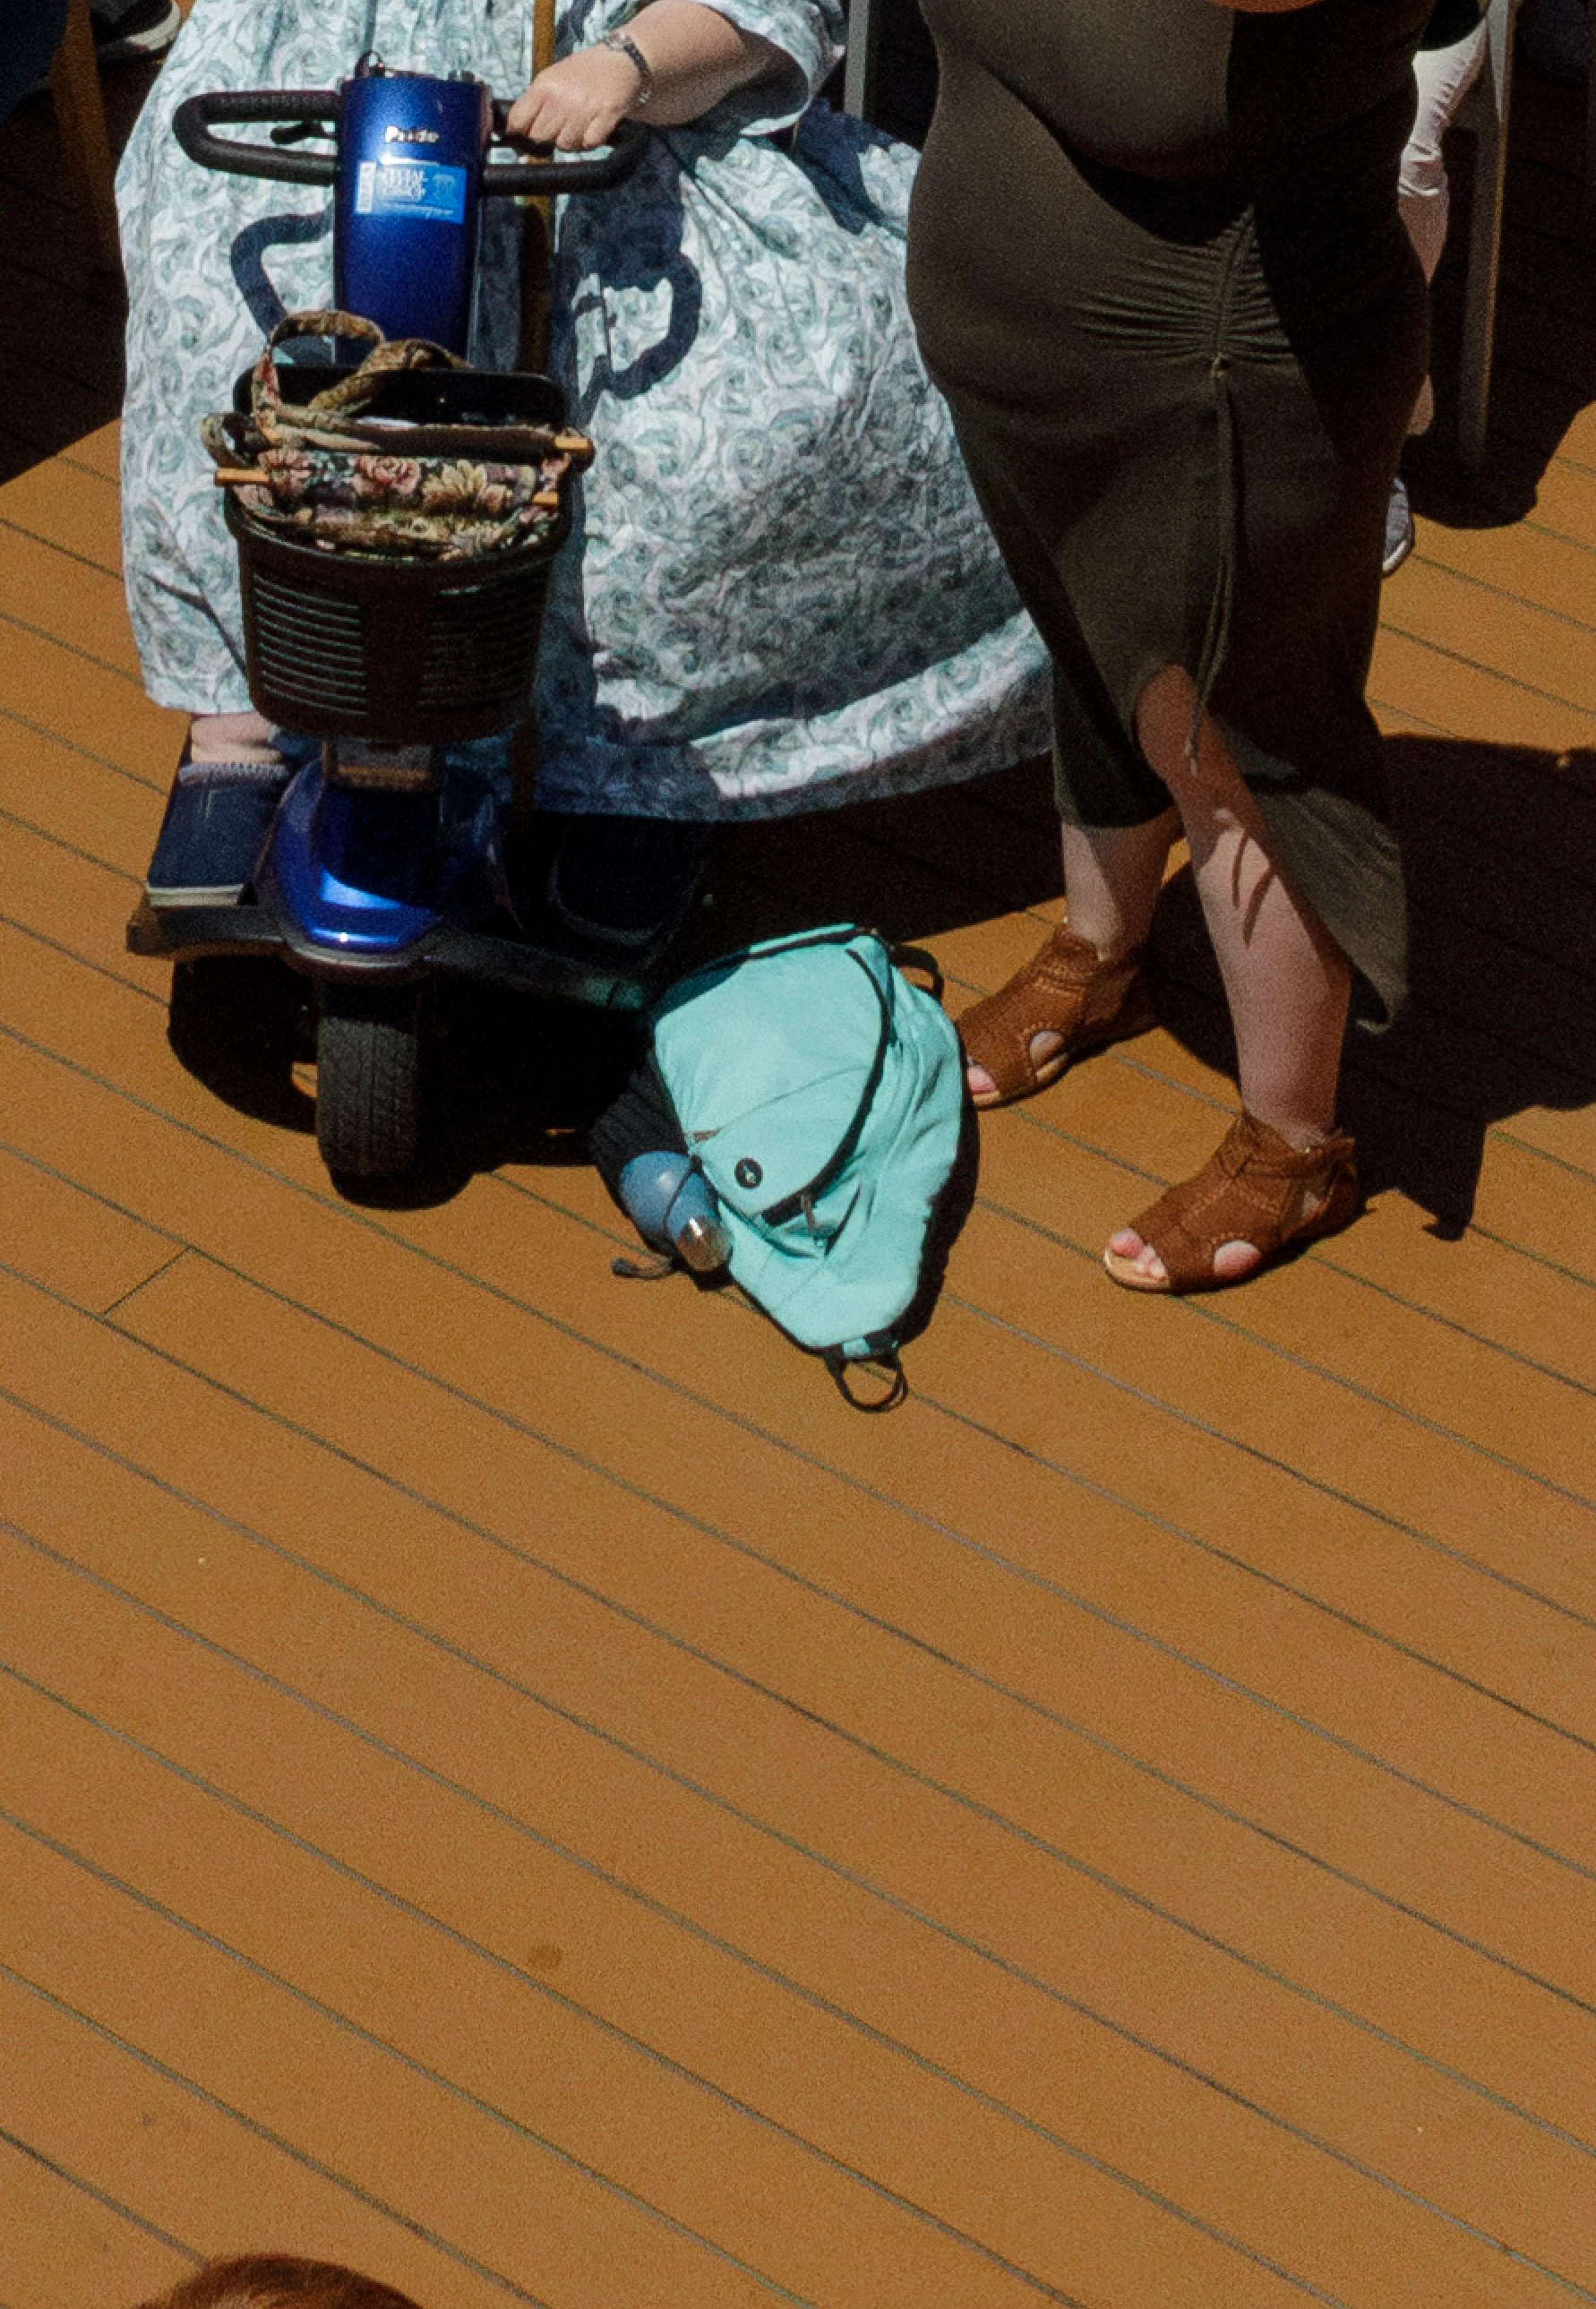
I've tried duplicating the floor from Photo B to a layer in Photo A, but the lines don't align precisely. I suspect this is because it was shot with a 24 mm lens and there was a little distortion at the edges. 


Should I use Transform on this layer from Photo B? I think it would need a little rotation, plus some skew or distort adjustments.


I would also have to be very careful to match the illuminance, color and grain, since the images were shot at different exposures and or different enough that a hard edge might show on the smooth areas. Perhaps I could feather the layer from Photo B.


Or would it be better to just use this layer from Photo B to get the blue backback and scooter wheel, and use tools like Patch and Clone Stamp on several layers with masks for the floor? (That sounds very tedious and error prone!)


There's also content-aware fill and the removal tool. Or some combination of these approaches?


Thanks,
Russell


P.S. Do you know of a comprehensive, up-to-date, book or online course zeroing in on all aspects object removal in Photoshop? 

This topic has been closed for replies.

2 replies

Conrad_C
Community Expert
Community Expert
April 19, 2024

Here’s another approach. In the demo below, these were the steps used:


1. Load both images into the same Photoshop document. I used File > Scripts > Load Files into Stack. 

2. Select both layers and choose Edit > Auto-Align Layers. I used the Perspective option. 

3. Hover the Object Selection tool over the man until the tool outlines him, then click.

4. The selection is not perfect, so have the Object Selection tool add or subtract regions as necessary. I put the tool into Lasso mode so I could drag around specific areas to add (Shift-drag) or subtract (Option/Alt-drag). 

5. When the selection is complete, at the bottom of the Layers panel click the Add Layer Mask button. 

6. The area outside the selection is masked, so in the Properties panel click Invert to reverse the mask. (This step can be avoided if in step 5, you hold down the Option/Alt key to invert the mask as it’s created when clicking the Add Layer Mask button.) 

7. At this point it may become clear that the Auto-Align Layers might not have done a perfect job, so select one of the layers, choose Edit > Transform > Distort, and drag handles until the perspectives of the two layers are matched as best you can. Unfortunately the software for this forum degrades animated GIF quality, so it’s hard to see how I’m making the deck planks line up.


8. Fill in holes and clean up using any combination of tools that works, such as Generative Fill, Content-Aware Fill, Healing Brush tool, Clone Stamp tool, etc.


When I tried Generative Fill, it did a great job filling the hole in seconds!


rbanks88
rbanks88Author
Inspiring
April 19, 2024

Thank you all so much for your responses!  This is such a kind and generous community.


I'll try all of your suggestions to see what works best.

didiermazier
Community Expert
Community Expert
April 19, 2024

You could first get rid of the guy with the eraser tool…

Or select a subject and then enlarge a little the selection and content aware filling. It  would be more editable since you cluld choose the areas to insert.

in both cases the floor will not align well but it would be a good start then to place the floor from the other picture


Inspiring
April 19, 2024

Try "Generative Fill":


P.S. Also try www.youtube.com and search option there for online courses on objects removal - there is tones!