john jrs8781846
Participating Frequently
September 29, 2018
Answered

Putting gif on still image

  • September 29, 2018
  • 5 replies
  • 57500 views

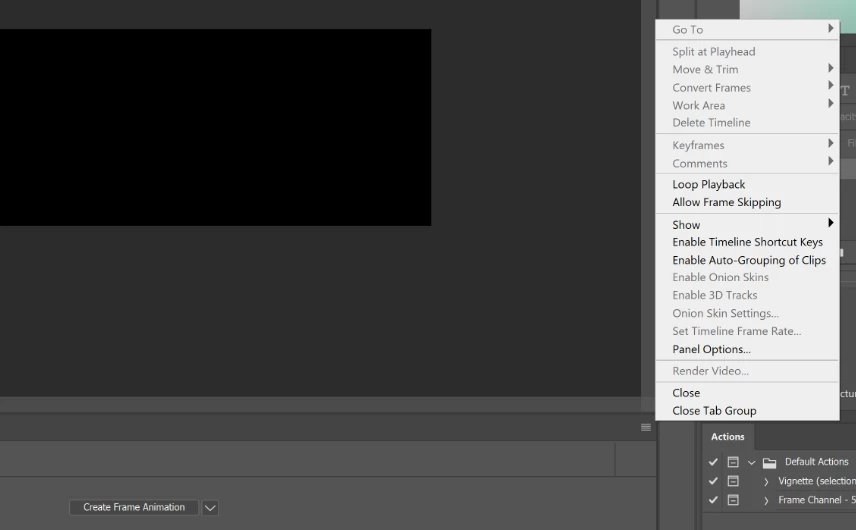
I'm trying to put a gif on a new document. I've got the gif open and the new document open. On the gif I can copy all the layers but when I go over to the new document and select the box in the upper right hand corner, it doesn't give me the option to paste the gif to the new document. I've watched YouTube video's and it all seems so easy but for some reason I'm not getting the same options they do. I'm using Adobe Creative Cloud. Thanks for any help you can provide.

    This topic has been closed for replies.
    Correct answer JJMack

    You did not create a frame animation yet there is no animation to paste into.  Click the button to create the frame animation in the panel...

    5 replies

    john jrs8781846
    Participating Frequently
    September 30, 2018

    Still won't work. I have no option to paste frames. This is what comes up when i click on the box in the upper right.

    JJMack
    Community Expert
    JJMackCommunity ExpertCorrect answer
    Community Expert
    September 30, 2018

    You did not create a frame animation yet there is no animation to paste into.  Click the button to create the frame animation in the panel...

    JJMack
    john jrs8781846
    Participating Frequently
    October 1, 2018

    Ok, that was the problem but now have another problem. How do I get the background image to show on all frames. When the gif I added to the image starts to play, the background image goes blank. Thanks for all your help, I'm a newb and just learning Photoshop.

    JJMack
    Community Expert
    Community Expert
    September 30, 2018

    Actually you can do it both ways.  You make a frame Animation with you Large still.   In the animated gif document you select all frames  using  the frame animation Panel Fly-out menu and in the same menu Copy Frames.  The in the single frame animation you Paste in All the frames linked. Photoshop duplicated the required layers from animated gif document and also paste all the frames into the frame animation time line.  You dupe the background with  new layer appears in all frames..    Because you had Photoshop link all pasted frames you can easily  drag around the pasted animation and position it within you large still  The animated gif may have two layers and  a hundred or more frames. If the Animation was made using tween to begin with.

    JJMack
    Trevor.Dennis
    Community Expert
    Community Expert
    September 30, 2018

    Assuming that you are talking about an animated GIF, then you need to add the still image to the frame animation document, rather than the other way round.  

    So the first thing is to make the GIF canvas size  big enough to fit the new background image.

    Note that I have placed the animation frames into a Group.  This will make it easier to move them into position.

    Now drag or copy the background image to the frame animation, and move it to the bottom of the layer stack.

    It should automatically be on for every frame, but if not, select all the frames and turn the background layer on.

    That's it. Export > Save for legacy as usual, and you are done

    Participating Frequently
    November 10, 2020

    Thank you!!!! I had the same question and you answered it beautifully.

    JJMack
    Community Expert
    Community Expert
    September 30, 2018

    In your new document flatten it and in the timeline create a frame animation using the create frame animation button

    In the Animated Gif Document use the frame animation fly-out menu  click select all frames and in the same menu the click copy frames.

    In your new Document use the frame animation fly-out menu  click Paste Frames. A dialog will pop click the bottom radio button and check link the frames. Use the frame animation fly-out menu make sure new layer appears in all frame is checked.  Target the first frame in the frame animation  and use shortcut Ctrl+J to dupe the background layer. Drag Frame 1 to the trash can in the frame animation panel.  Drag the animation to where you want in over the background.

    JJMack
    Shellie92270
    Participant
    May 30, 2022

    JJMack,

    You are a genius!  Thank you very much. You should be teaching a class. 🙂

    Muqqarib Hassan
    Inspiring
    September 29, 2018

    Hi, Check this video. It will explains to you how to insert a gif.

    Add a GIF to a Still Image (Photoshop CS6 Tutorial) - YouTube

    Or perform these steps here step by step.

    1. Upload your images to Photoshop.
    2. Open up the Timeline window.
    3. In the Timeline window, click "Create Frame Animation."
    4. Create a new layer for each new frame.
    5. Open the same menu icon on the right, and choose "Make Frames From Layers."
    6. Under each frame, select how long it should appear for before switching to the next frame.
    7. At the bottom of the toolbar, select how many times you'd like it to loop.
    8. Preview your GIF by pressing the play icon.
    9. Save and Export Your GIF.

    How to Create an Animated GIF in Photoshop

    Here's an example of an animated GIF you might make using this tutorial:

    marketing-trivia-GIF-example-1.gif

    Alright, let's get started.

    Step 1: Upload your images to Photoshop.

    If you already have images created ...

    Gather the images you want in a separate folder. To upload them into Photoshop, click File > Scripts > Load Files Into Stack.

    load-file-into-stack.png

    Then, select Browse, and choose which files you'd like to use in your GIF. Then, click OK.

    load-multiple-images.png

    Photoshop will then create a separate layer for each image you've selected. Once you've done that, skip to step two.

    If you don't already have the series of images created ...

    Create each frame of the animated GIF as a different Photoshop layer. To add a new layer, chose Layer > New > Layer.

    add-new-layer.png

    Be sure to name your layers so you can keep track of them easily when you make your GIF. To name a layer, go to the Layer panel on the bottom right of your screen, double-click on the default layer name, and type in the name you want to change it to. Press Enter when you're finished.

    name-layers.png

    Once you have your layers in there and you've named them all, you're ready for step two.

    Pro Tip: If you want to combine layers so they appear in a single frame in your GIF, turn visibility on for the layers you want to merge (by clicking on the "eye" to the left of each layer name so only the eyes for the layers you want to merge are open). Next, press Shift + Command + Option + E (Mac) or Shift + Ctrl + Alt + E (Windows). Photoshop will create a new layer containing the merged content, which you should also rename.

    Step 2: Open up the Timeline window.

    To open Timeline, go to the top navigation, choose Window > Timeline. The Timeline will let you turn different layers on and off for different periods of time, thereby turning your static image into a GIF.

    open-timeline.png

    The Timeline window will appear at the bottom of your screen. Here's what it looks like:

    timeline-in-photoshop.png

    Step 3: In the Timeline window, click "Create Frame Animation."

    If it's not automatically selected, choose it from the dropdown menu -- but then be sure to actually click it, otherwise the frame animation options won't show up.

    create-frame-animation.png

    Now, your Timeline should look something like this:

    timeline-with-frame-animation.png

    Step 4: Create a new layer for each new frame.

    To do this, first select all your layers by going to the top navigation menu and choosing Select > All Layers.

    Then, click the menu icon on the right of the Timeline screen.

    timeline-icon.png

    From the dropdown menu that appears, choose Create new layer for each new frame.

    new-layer-for-new-frame.png

    Step 5: Open the same menu icon on the right, and choose "Make Frames From Layers."

    This will make each layer a frame of your GIF.

    make-frames-from-layers.png

    Step 6: Under each frame, select how long it should appear for before switching to the next frame.

    To do this, click the time below each frame and choose how long you'd like it to appear. In our case, we chose 0.5 seconds per frame.

    choose-frame-time.png

    Step 7: At the bottom of the toolbar, select how many times you'd like it to loop.

    The default will say Once, but you can loop it as many times as you want, including Forever. Click Other if you'd like to specify a custom number of repetitions.


    choose-loop-number.png

    Step 8: Preview your GIF by pressing the play icon.

    play-icon.png

    Step 9: Save and Export Your GIF

    Satisfied with your GIF? Save it to use online by going to the top navigation bar and clicking File > Export > Save for Web (Legacy)...

    save-for-web.png

    Next, choose the type of GIF file you'd like to save it as under the Preset dropdown. If you have a GIF with gradients, choose Dithered GIFs to prevent color banding. If your image employs a lot of solid colors, you may opt for no dither.

    The number next to the GIF file determines how large (and how precise) the GIF colors will be compared to the original JPEGs or PNGs. According to Adobe, a higher dithering percentage translates to the appearance of more colors and detail -- but it increases the file size.

    save-for-web-preset-dropdown.png

    Click Save at the bottom to save the file to your computer. Now you're ready to upload this GIF to use in your marketing!

    Upload the GIF file into any place online that you'd put an image, and it should play seamlessly. Here's what the final product might look like: