Participant
July 5, 2017
Answered

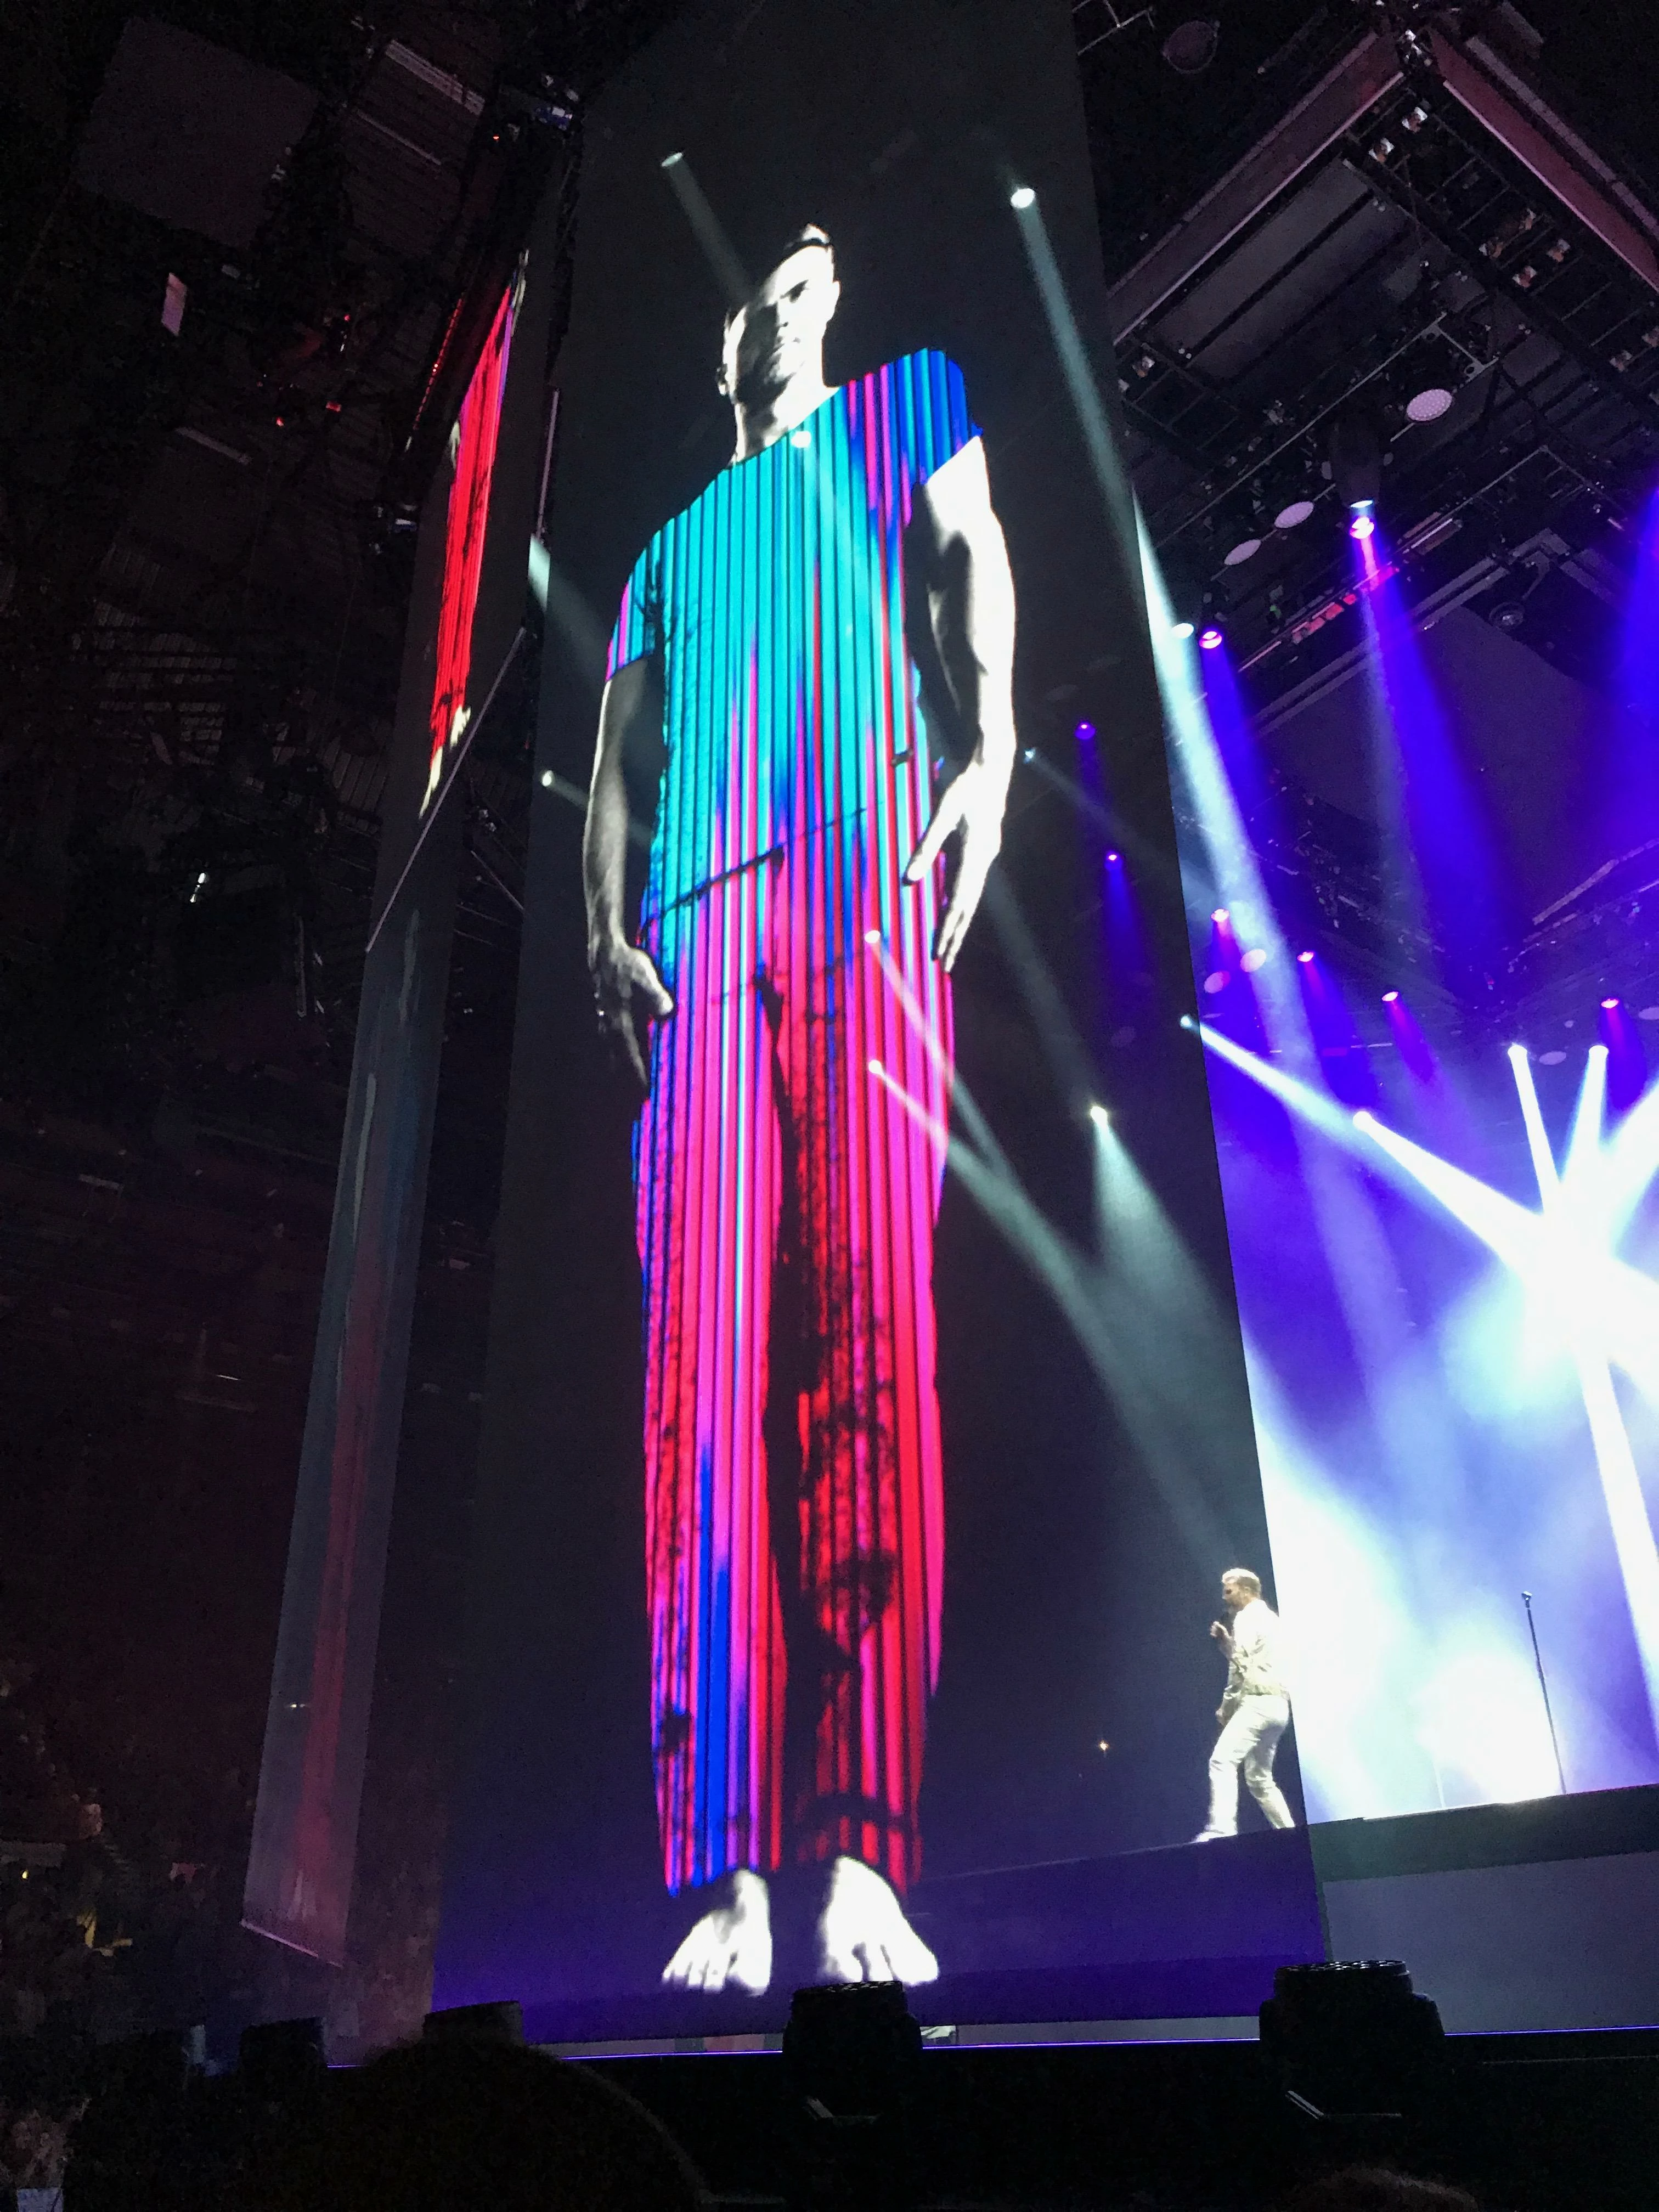
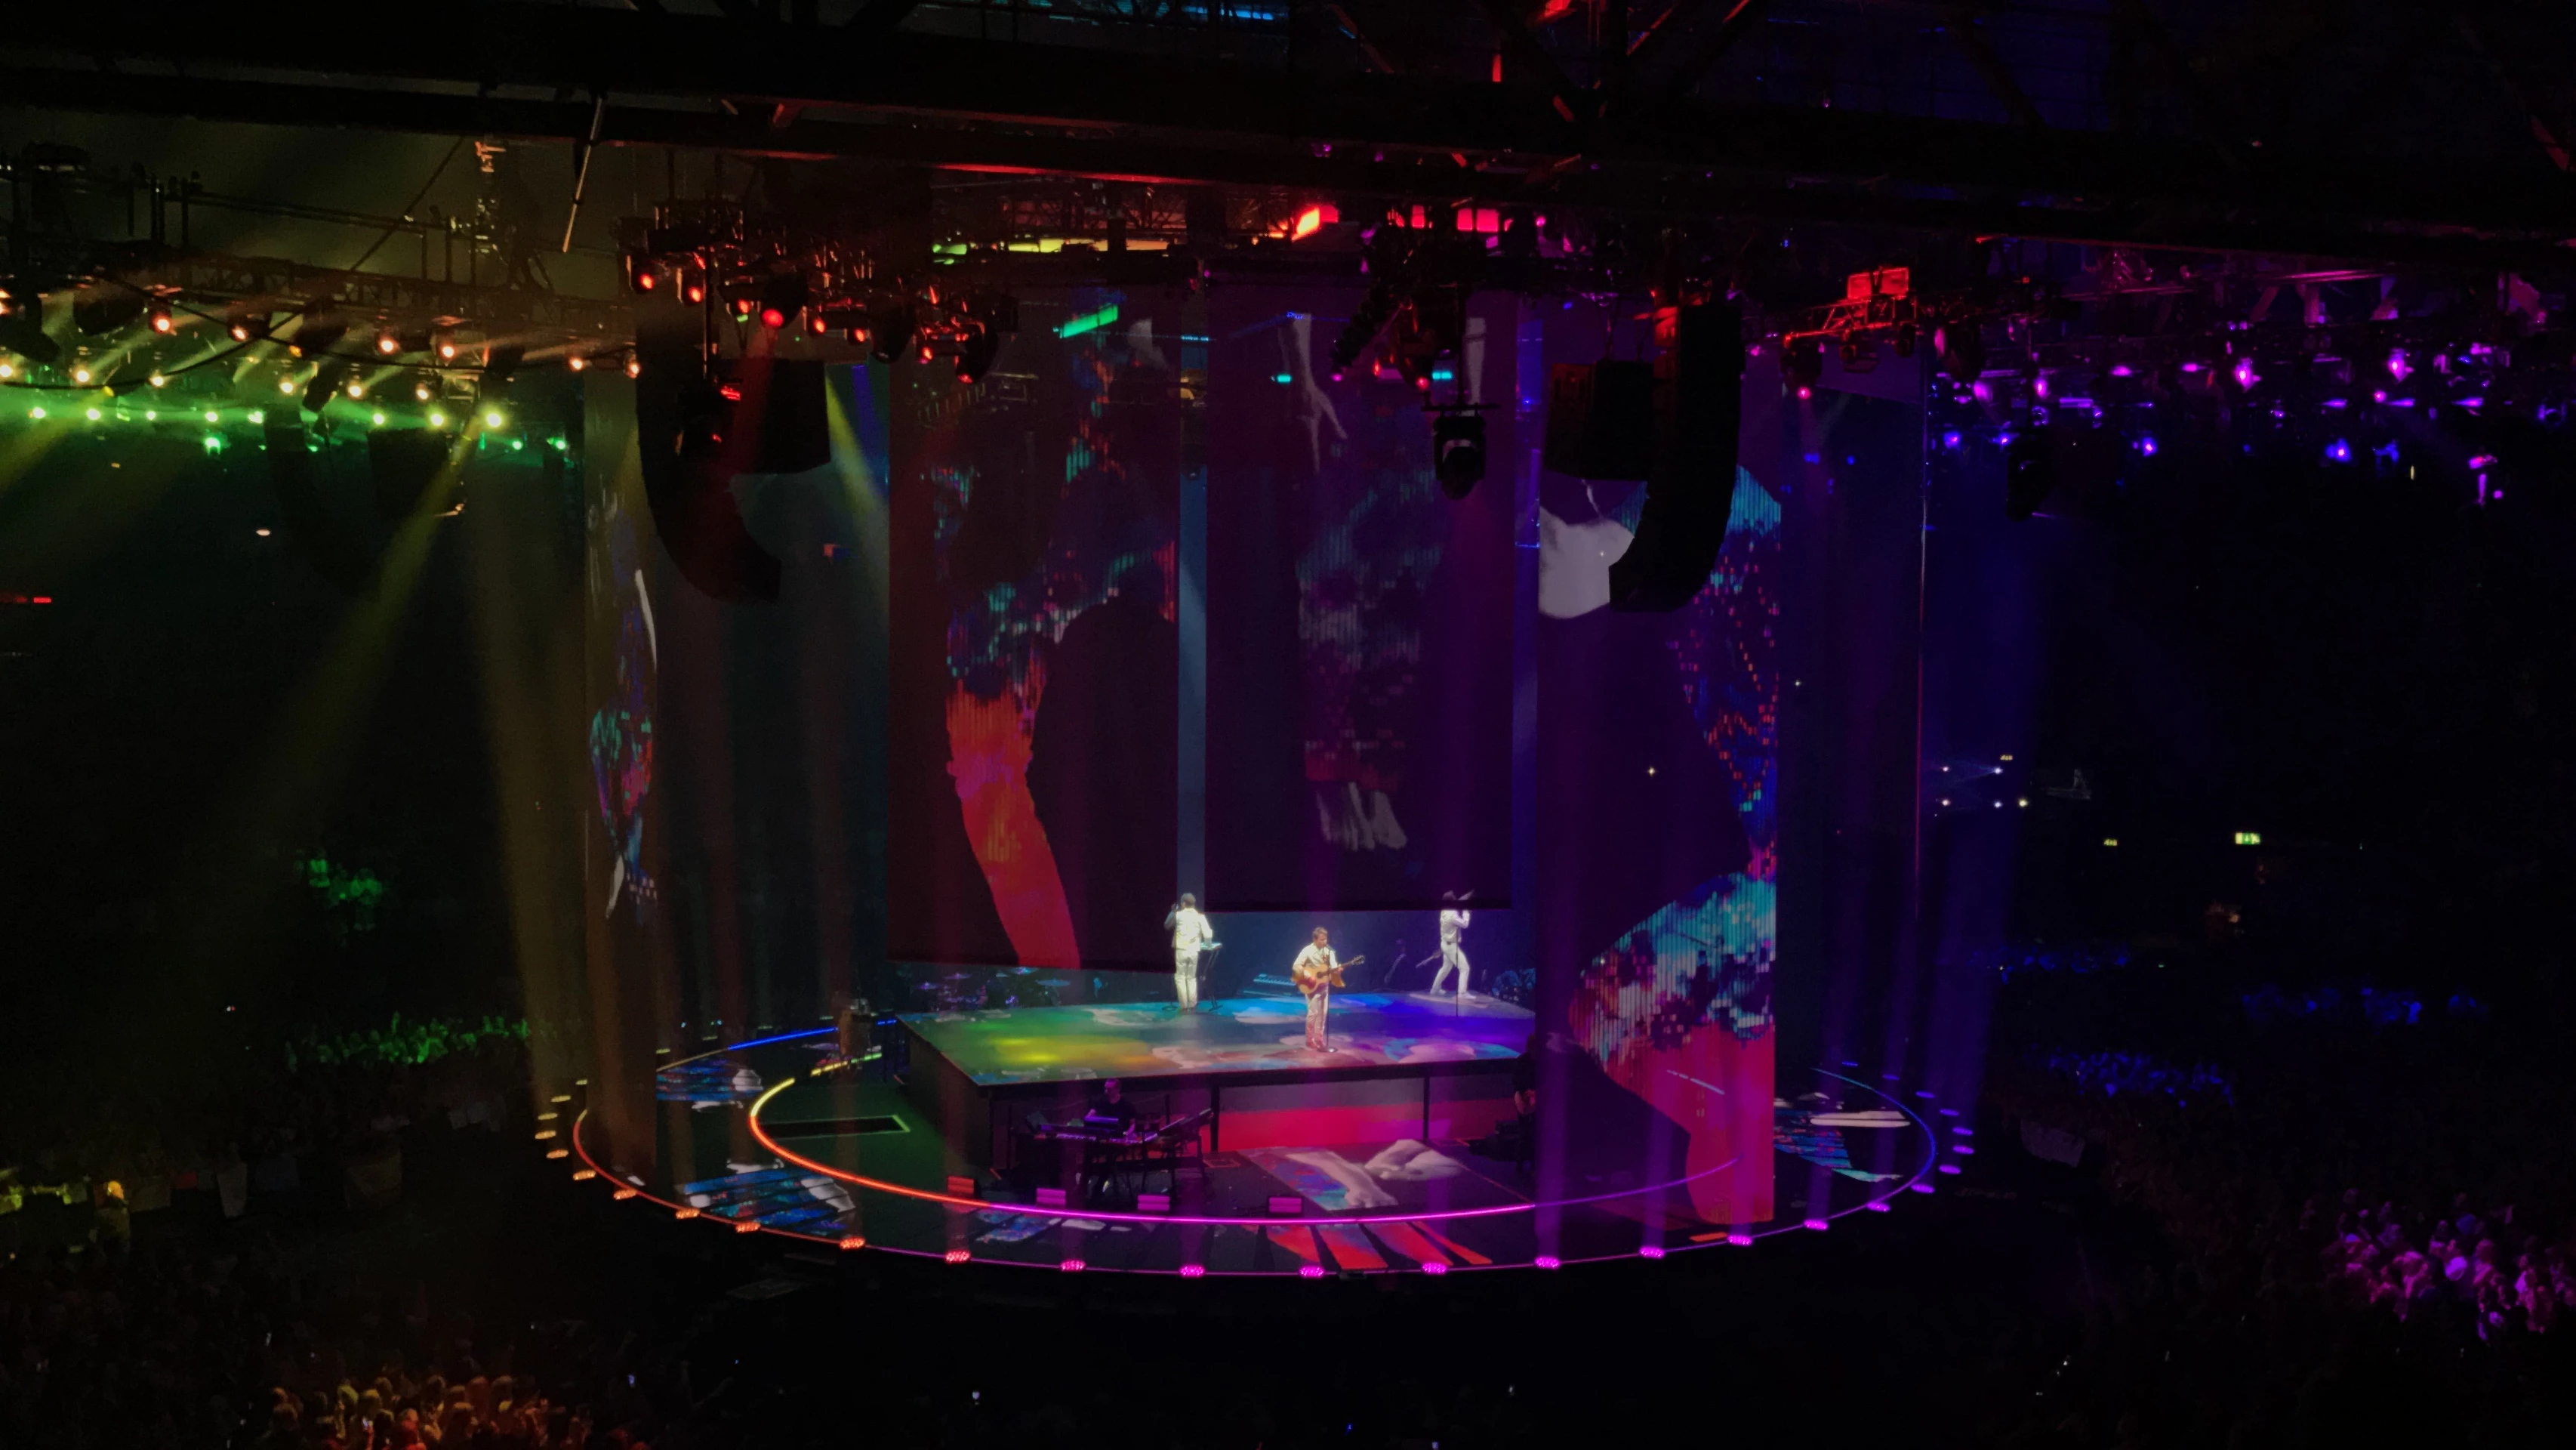
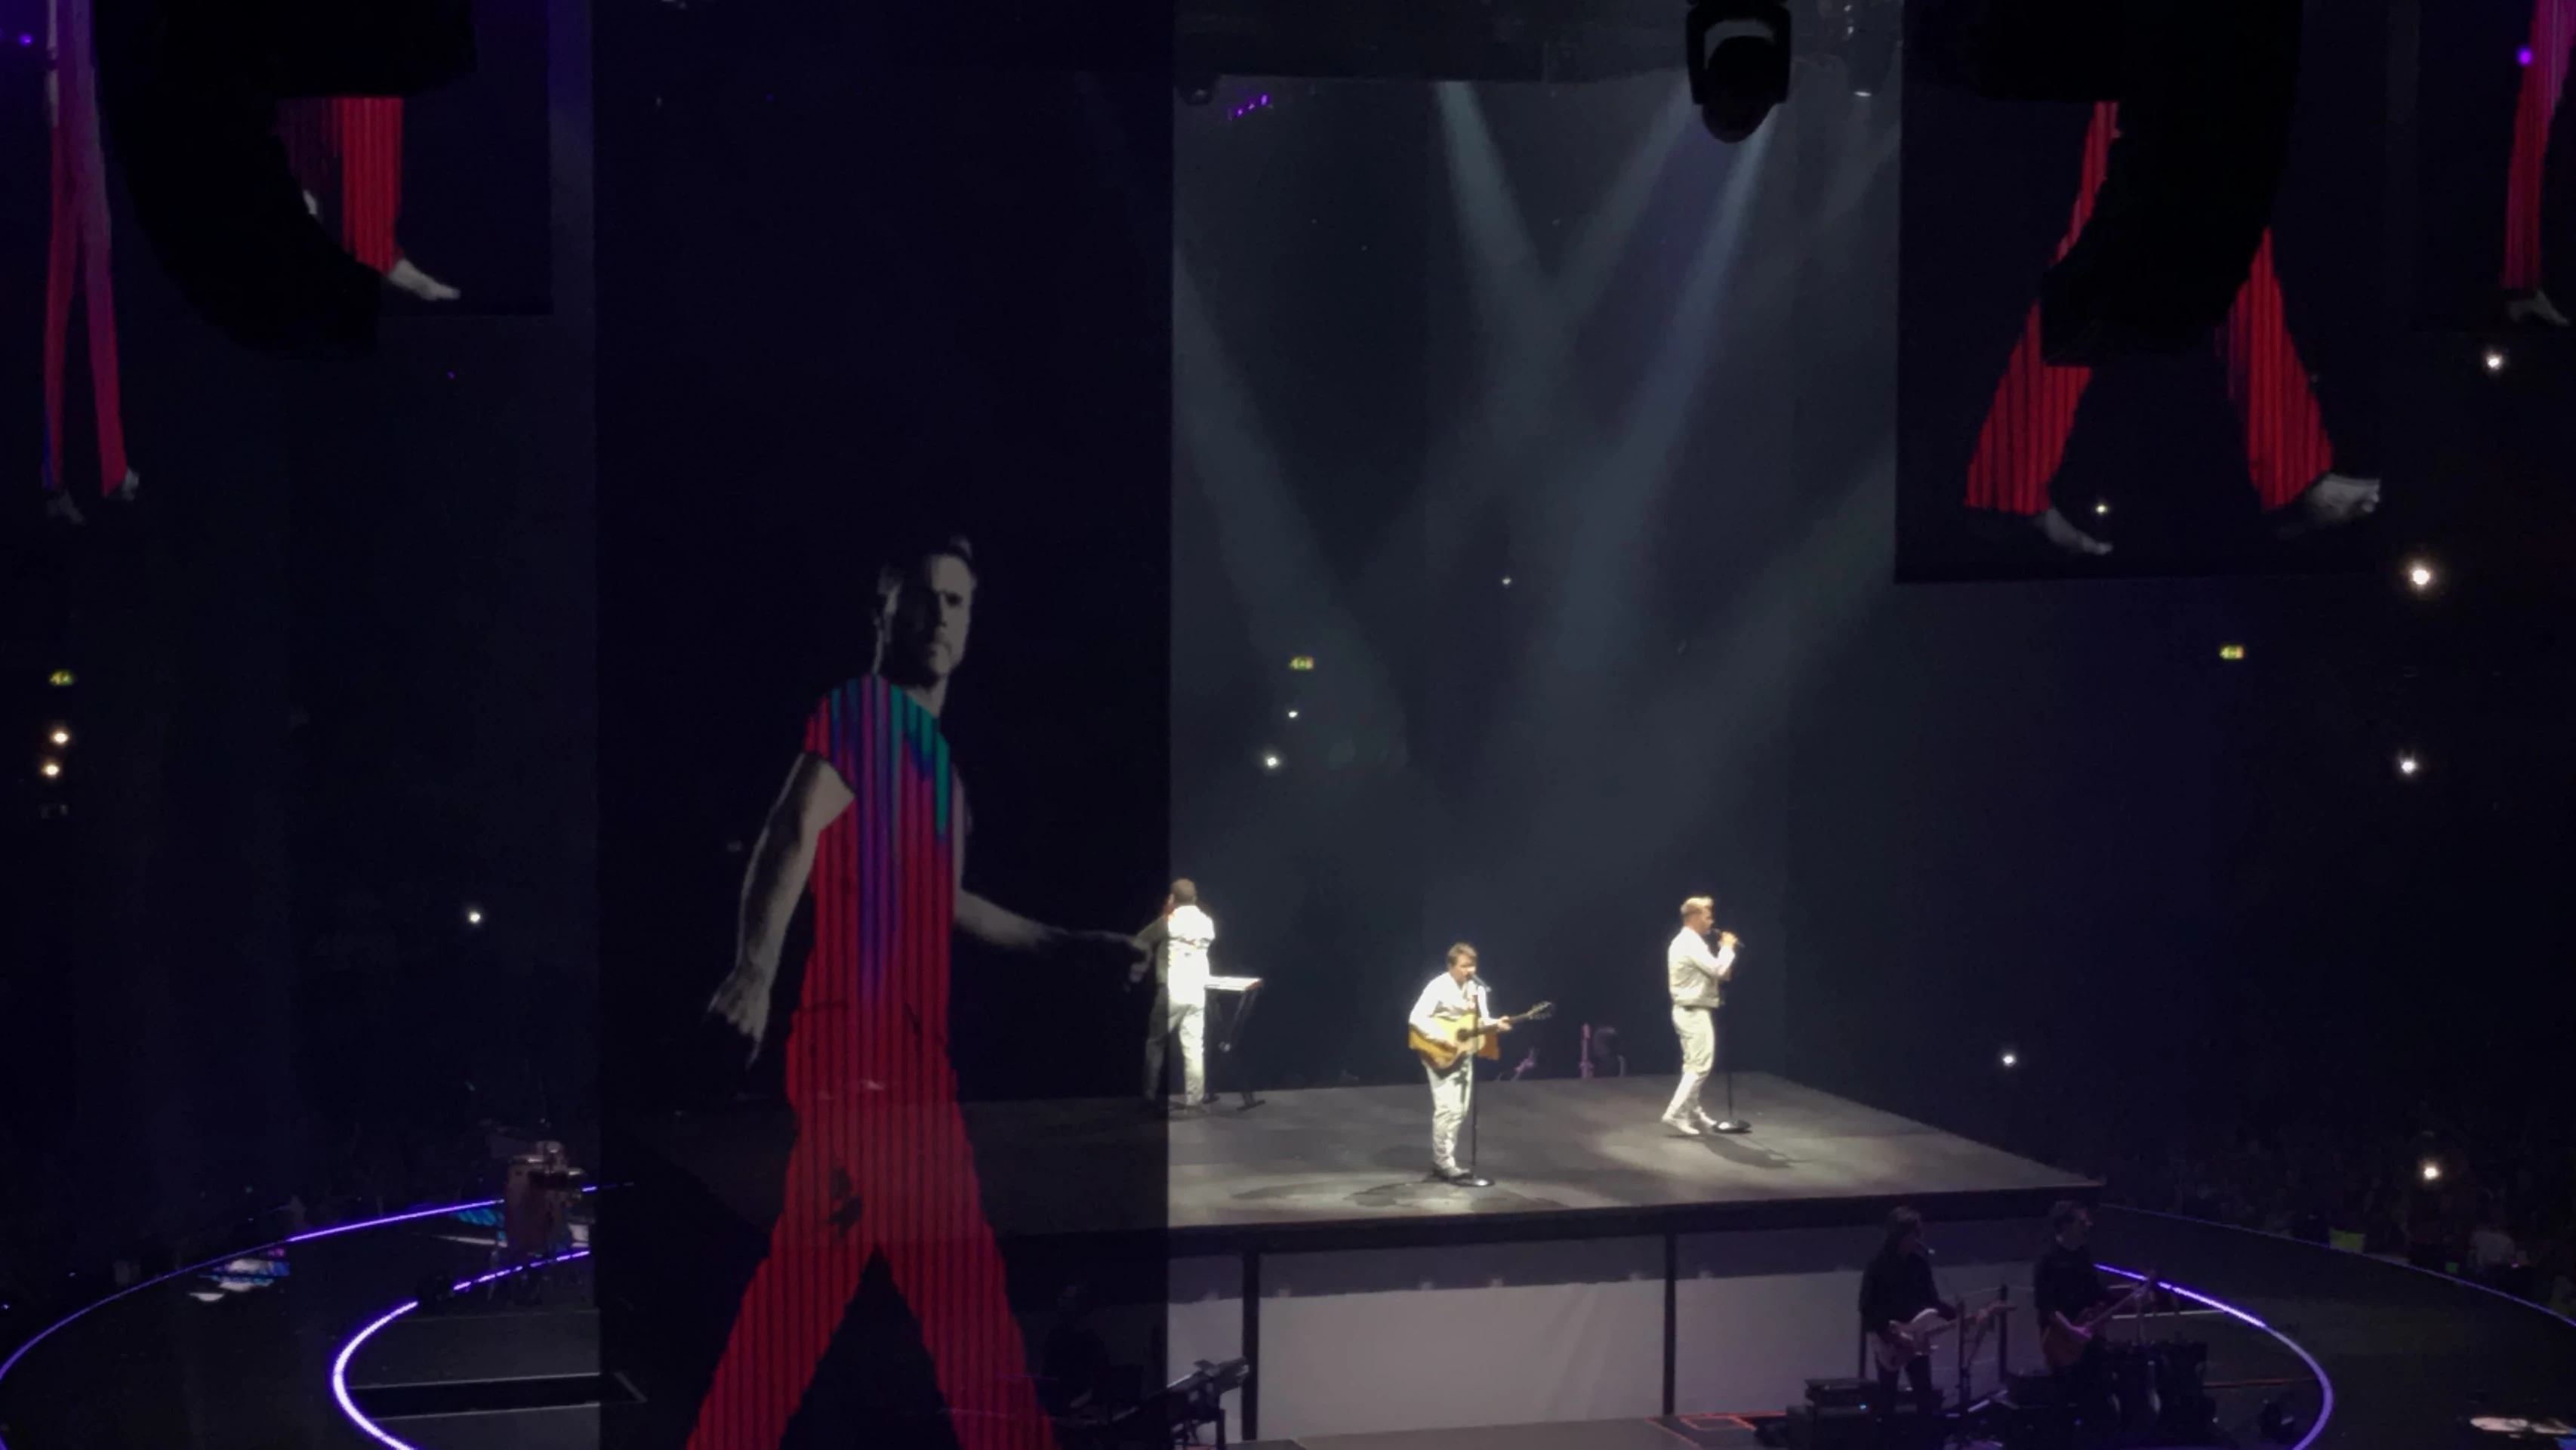
Recreating an effect from a Take That concert.

  • July 5, 2017
  • 4 replies
  • 510 views

Hello all,

This may be an absolute long shot, but I am wondering how I can recreate this 'effect' in the following pictures, to images of my own.

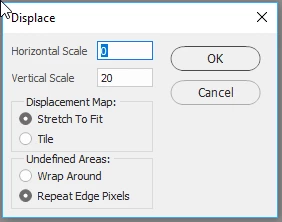
Im wanting to be able to do the gradient lines (which I imagine i'll apply a gradient, or brush and place lines on top afterwards to create the effect) but also separately on other images, create the 'pixelated' look on the gradient.

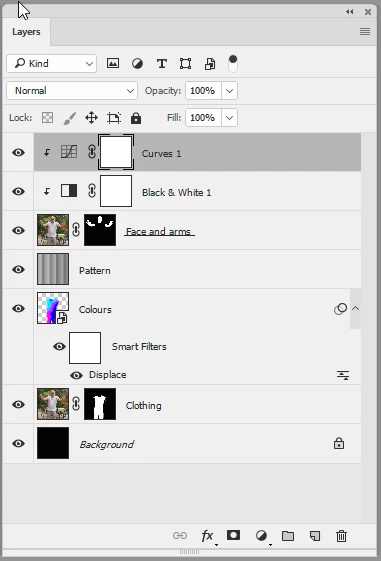
I know how i'll separate the skin areas and desaturate them, my main issue is how i'll get the clothed areas to look the same.

Any help or advice would be appreciated.

Carl.

This topic has been closed for replies.
Correct answer davescm

Hi

1. Make a small gradient and save it as a pattern (Edit Define Pattern)

2. Fill a layer with that repeating pattern and save it as an 8 bit image. This will be used as a displacement map

3. Mask the clothing layer

4. Add a layer and paint with colour - set this layer blending mode to color. Now add a displacement mask moving vertically only and using the previous pattern filled image as the map

5. Add that same gray pattern, used as the displacement map, above the image and set blending mode to multiply and opacity to around 70%

6. Add a layer with face and arms masked and clip a black and white adjustment layer and curve clipped to it

I hope that helps to get you started

Dave

4 replies

Participant
July 6, 2017

Hi Dave,

Thank you so much for the clear explanation,

i had no idea about snapped curves to layers etc,

im much more pleased with my second attempt!

If only i could make myself happy with my colour placement lol.

thanks again!!

As you can see i duplicated the colour layer for a more intense colour, as the 'clothing' layer was mostly white, having the 'colour' layer set to a 'colour' blend it was more subtle than i wanted. I know on darker bases this wont be necessary however.

davescm
Community Expert
Community Expert
July 6, 2017

Hi Carl

You're welcome.

Rather than duplicating the color layer due to the underlying layer being too light, you could have added another curve clipped to the clothing layer below and used it to darken that layer.

No rights and wrongs though - there are many ways to get results in Photoshop.

Dave

Participant
July 5, 2017

Thank you both for your help, I expected to be checking this post in three months time and for it to have no replies. I especially didn't expect two answers within hours of me posting.

Both answers are very detailed and easy to follow, what I do know on Photoshop is self taught, so some of the references go over my head but I imagine a simple Google search will help clarify.

Thank you both again, I really appreciate the help.

Best regards.

Carl.

davescm
Community Expert
Community Expert
July 5, 2017

Hi Carl

Try it step by step and come back and ask if you get stuck or don't understand any of the steps

Dave

Participant
July 5, 2017

Hi Dave,

i have had no interactions with Masks until now,

after applying them, my layers segment doesnt look like yours, im also convinced that my masks are not fulfilling the same roles as yours are,

do you have any tips on where i might be going wrong?

davescm
Community Expert
davescmCommunity ExpertCorrect answer
Community Expert
July 5, 2017

Hi

1. Make a small gradient and save it as a pattern (Edit Define Pattern)

2. Fill a layer with that repeating pattern and save it as an 8 bit image. This will be used as a displacement map

3. Mask the clothing layer

4. Add a layer and paint with colour - set this layer blending mode to color. Now add a displacement mask moving vertically only and using the previous pattern filled image as the map

5. Add that same gray pattern, used as the displacement map, above the image and set blending mode to multiply and opacity to around 70%

6. Add a layer with face and arms masked and clip a black and white adjustment layer and curve clipped to it

I hope that helps to get you started

Dave

c.pfaffenbichler
Community Expert
Community Expert
July 5, 2017

Ah, I guess I did not understand what the OP actually meant …

davescm
Community Expert
Community Expert
July 5, 2017

Between us we have hopefully given enough for Carl to get started and take it further .

Dave

c.pfaffenbichler
Community Expert
Community Expert
July 5, 2017

The Filter Clouds (with black and white) and a Gradient Map Adjustment Layer may help, though additional transformation may be necessary.

And naturally some masking.