PaintedStuff
Known Participant
February 5, 2023
Question

Smoothing out wavy imperfections from a panoramic image

  • February 5, 2023
  • 1 reply
  • 1170 views

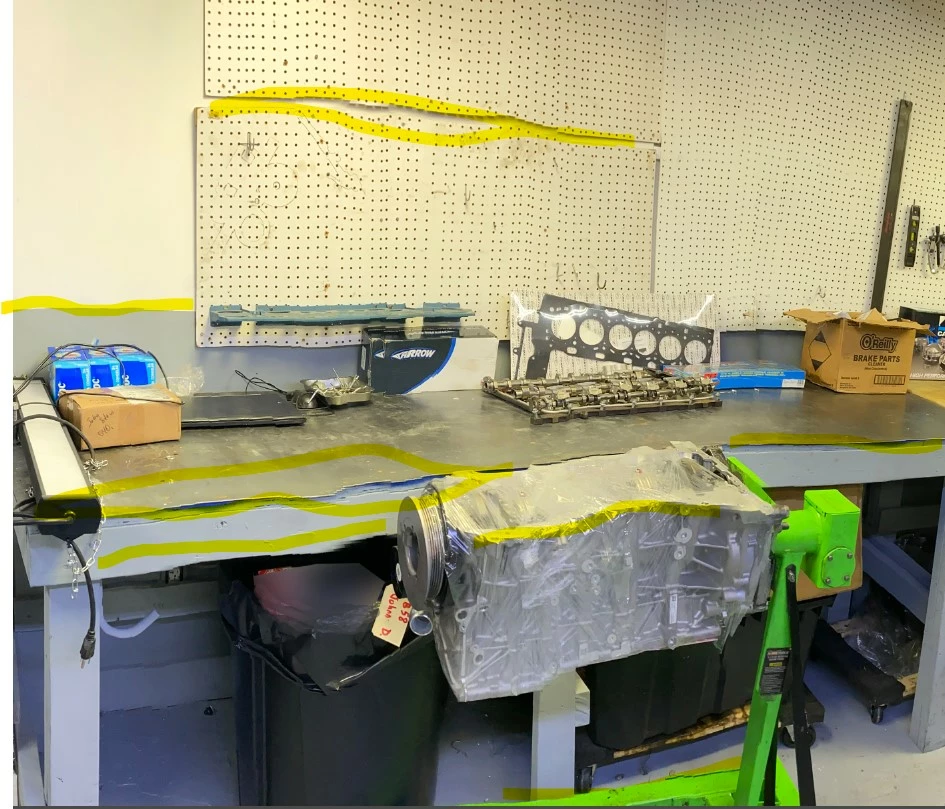
I took a panoramic photo of a mechanic's engine room with my iPhone to use on the website I'm building but many of the horizontal elements in the room are wavy!  Any good ways to fix these in Photoshop?

Many thanks!

Nancy

This topic has been closed for replies.

1 reply

Trevor.Dennis
Community Expert
Community Expert
February 5, 2023

It's interesting to see how Photoshop coped (or didn't cope) when merging a geometric pattern like that.  There's no fixing it I am afraid, but if you define a pattern of the peg-board, you could fake them back in


I made the pattern with layer styles using Inner Shadow and colour overlay (dark gray).

The advantage of doing ot this way is that if you turn Fill Opacity  down to zero, only the layer styles will show, so you have a transparent background.  

Turn on the grid (Ctrl ') and make three copies of the hole and arrange them like below.  They shouls snap into place, but if not, then turn snap on via the View menu)

Then make a selection, that will also snap to the grid so that the space around your four holes is half the distance between them.

Now go Image > Crop followed by Edit > Define pattern and you have your peg-board pattern


There's a handy tool under the View meun called Pattern Preview that shows how your pattern will look before you define it.


There are several ways to use a pattern, but if you use the Layer Style method you have a size option.


First select the existing pegboard outline, and fill a new layer with the background colour.  I gave a slight drop shadow to help it look real.  I called it Wall

Then place a new layer above the Wall layer, and use Layer style to apply the pattern scalling it as required.

I was a bit lazy here as I rasterised pattern layer so I could move it.  It would have been better to have made it a smart object.  The pattern layer is clipped to the wall layer.

I then added a layer mask to the Wall layer and masked out the tools.

This gives us an OK result, but with no perspective.


I have moved and freet transformed the pattern layer to aproximate the pespective, but there is very little information in the image to work out the true perspective.


I hope this helps.  Please ask if you need clarification.

Trevor.Dennis
Community Expert
Community Expert
February 5, 2023

Blimey, believe it or not, I have only just noticed the rest of the image has issues.  You can get it close by using Free Transform > Warp, and adding additional control points with the Ctrl (Cmd) key.  This is VERY rough as I am about to eat, so I'll add more later.  Basically, after using Warp or Liquify to get things close, you will need to fake it with masks and the clone tool.   


Good luck.  You are going to need it with this one!

PaintedStuff
Known Participant
February 13, 2023

These are both very thoughtful and interesting answers and I greatly appreciate your efforts.  I will give them a try. 

Thank you very, very much!!

"Creative minds have always been known to survive any kind of bad training."-Anna Freud