I like to fix issues in the order of worst problems first, but you usually need to go back and fine tune. If you adjust the black and white points so they are just off clipping, and then adjust contrast or clarity, as a for instance, the black and white points will usually need to be readjusted.
Our Dag would say that you'd need an uber expensive monitor to do it by eye, but I always think that the numbers never lie, so histograms and RGB values will tell what is clipping. There is also the trick of holding down the Alt (Cmd) when adjusting the end sliders in a Levels Adjustment layer, which puts the image preview into threshold mode. So in the example below, moving the highlight slider shows the blown pixels in the red channel.
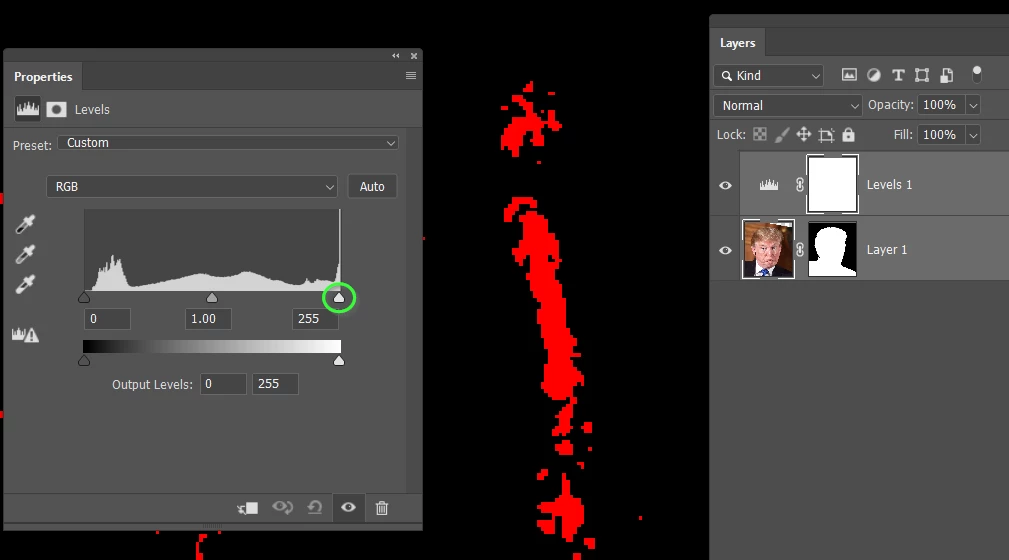
The threshold colours change to show which channel, or combination of channels are clipping as you continue to move the sliders towards the middle. I've zoomed out to show the blue tie below and included the channels panel.
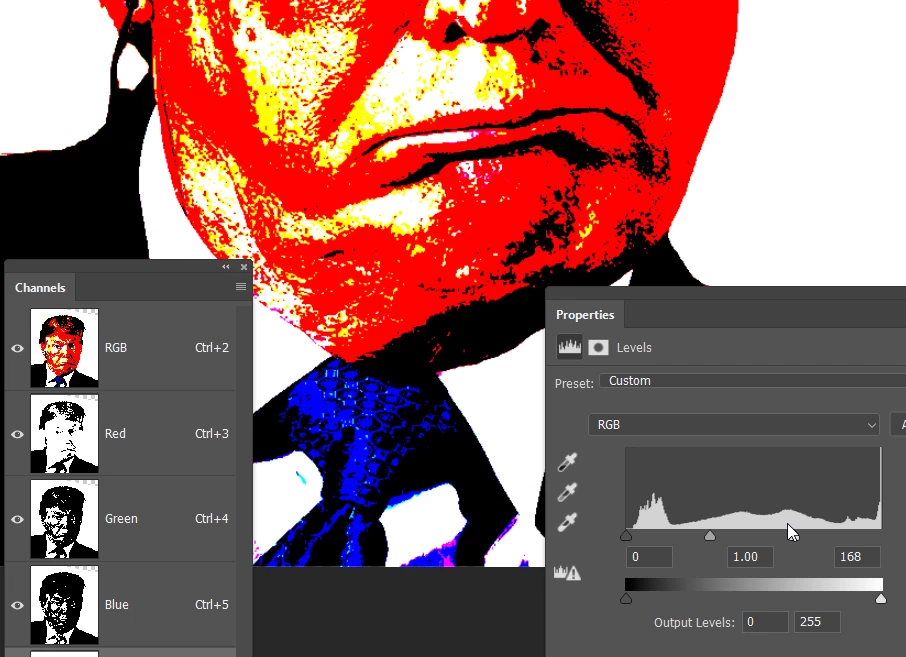
Interestingly, no mater how I adjusted the sliders, Mr Trump's heart remained the blackest of blacks. Go figure.
Hi
I tend to work in this order in ACR/Lightroom. Not that it matters in terms of the end result, for the reasons stated previously, I just find it convenient.
1. Colour temperature
2. Black point (holding down the Alt key)
3. White point (holding down the Alt key to check clipping)
4. Exposure
5. Highlights
7. Shadows
8. Contrast
Repeat 2-8 as a recheck and fine tune.
Only then do I go into any other adjustments. Note this is for ACR/Lightroom only.
If building up adjustment layers in Photoshop then the order does matter as you can't unclip a clipped layer from an adjustment layer below on the layer stack.
Dave
